1

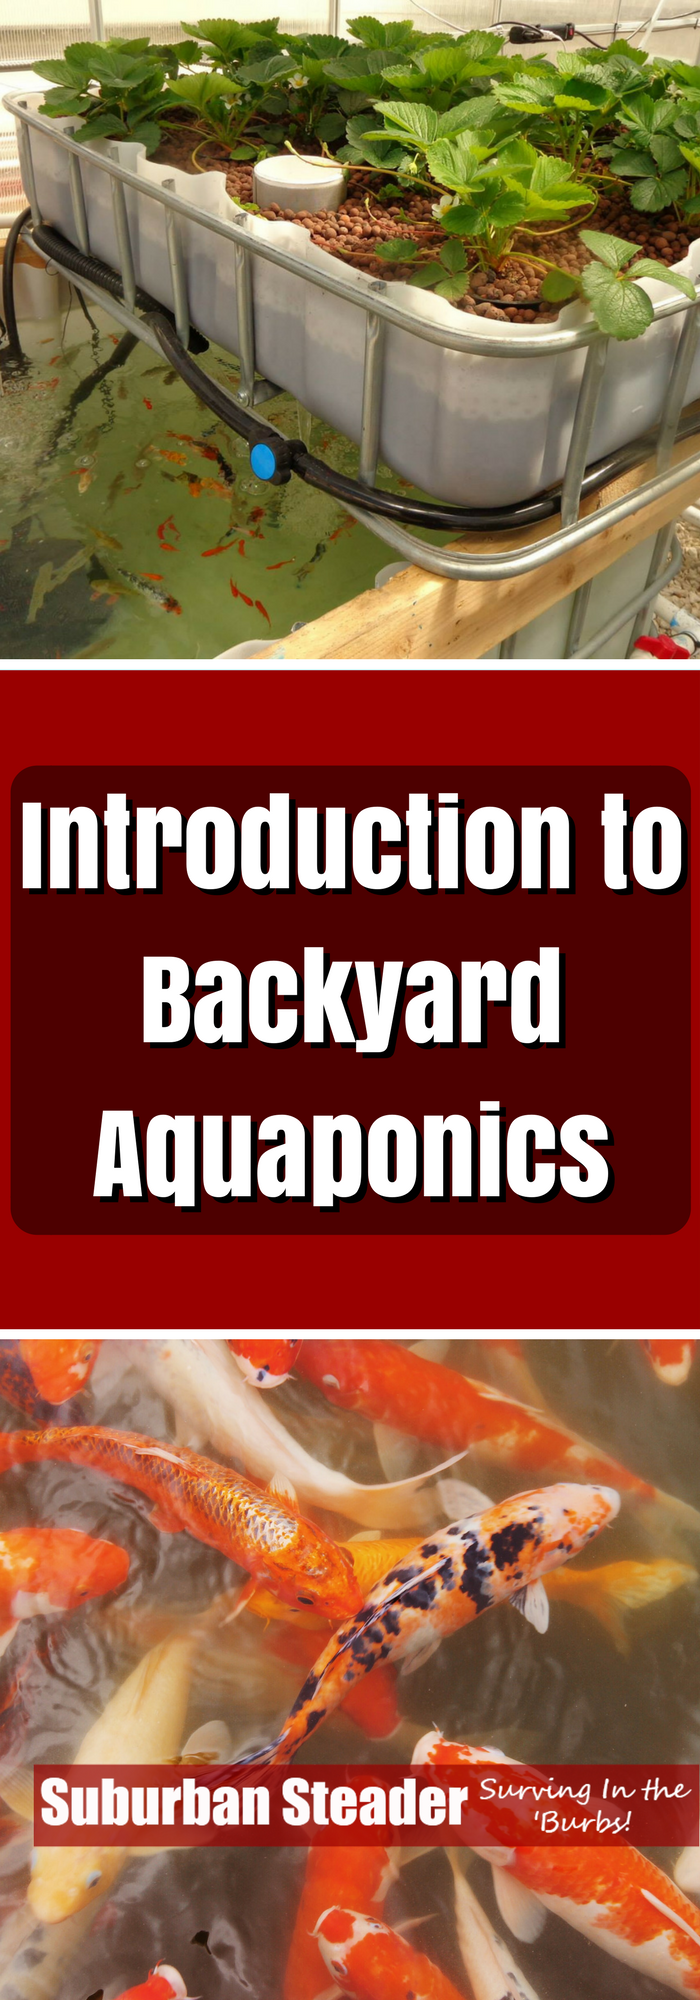
Introduction To Backyard Aquaponics

The ability to grow plants and raise fish organically without the use of pesticides or fertilizers is accomplished through a method called aquaponics. This system of growing plants and raising fish without the use of soil was discovered by researchers from the University of Virgin Islands while looking for ways through which you can grow plants organically.  And, with just a little sweat equity and a few dollars, you too can have a backyard aquaponics system working for you!

How Does It Work?

Basically, aquaponics works in a win-win situation. What happens is that it combines the traditional aquaculture with hydroponics. In aquaponics, plants feed on the effluents released by aquatic animals.  Those plants, in turn, purify water to keep the fish more comfortable.

Backyard Aquaponics

Between 2006 and 2007, this technique was widely adopted and is now commercially used on many farms to grow plants organically. According to some farmers, aquaponics grows plants 50%-100% faster as compared to inorganic farming. With just a small amount of space, you’re able to deliver ten times more as compared to older methods.

What Is Aquaponics?

Aquaponics is essentially the combination of aquaculture (raising fish) and hydroponics (growing plants). This process takes advantage of the aquatic affluent (fish waste) deposited in water to provide essential nutrients to your plants. When the water is affluent rich, it becomes toxic to the aquatic animals. During this stage, plants absorb and use the nutrients eliminating the high water toxicity for your fish to survive.

Backyard AquaponicsThere are so many benefits you’ll enjoy when you make a backyard aquaponic system. Unlike a fish pond where you’ll have to exchange water every now and then, an aquaponic system relies on the relationship between plants and aquatic animals. Freshwater fish release ammonia which is converted to nitrite by a nitrifying bacterium called Nitrosomonas. Another nitrifying bacterium called Nitrobacter converts the nitrite to nitrate which is used by the plants to freshen the water for the fish. This process of converting ammonia to nitrite then to nitrate is referred to as “the nitrogen cycle.”

Types of Aquaponic Systems

There are three major types of Aquaponic systems:

Media Filled Beds

This method is the simplest and is commonly used in most backyard aquaponics systems. It involves filling containers with medium and small clay pebbles then planting seedlings directly into the media.

Fish tank water is then pumped over the media to allow the plants to feed on the excess nutrients. The medium clay pebbles act as biological filters where they help to eliminate toxins giving your fish fresh and clean water in the long run.

There are two major ways which this Aquaponics system can be operated:  continuous water flow method and the flood and drain (also known as ebb and flow) method.

Nutrient Film Technique

This method involves pumping nutrient-rich fish water through PVC pipes. Plants are grown inside cups with small holes at the bottom to allow the roots to reach the water in the PVC gutters.

It’s important to understand that this method is only suitable for leafy green plants with small root systems and not larger plants with bigger, invasive roots.

Deep Water Culture

This method is commonly used in both commercial and backyard aquaponics systems because it’s relatively cheaper to setup and operate. This method uses a foam “raft” which floats on top of the water. Plants are held in holes made in the raft in a way that the roots dangle into the water. For perfect results, fish water can either be pumped on the floating racks or the racks can be placed directly on the fish water.

Benefits of a Backyard Aquaponics System

Setting up a backyard aquaponics system in your garden comes with lots of benefits such as environmental improvement, better health, and higher quality nutrition. This section will review some of the essential benefits which farmers can expect to enjoy.

Saves Space

Unlike other gardening methods, aquaponics system allows you to plant your seedlings close together thus saving on space. Since this method involves submerging plant roots in nutrient-rich water, there is less overcrowding which helps you save on space as compared to other gardening techniques.

No Weeding

Another benefit of backyard aquaponics system is that you don’t have to weed anymore. This method doesn’t encourage the growth of weeds since there is no soil involved. Farmers are able to enjoy the freedom of growing plants at home without weeding.

No Soil Pests

Since Aquaponics doesn’t rely on soil, farmers are relieved the burden of using pesticides to eliminate soil pests. Pesticides destroy the plant slowly over time due to toxins absorbed by the plant.

Plants Grow Faster

Backyard aquaponics system allows plants to access nutrients for 24 hours each day making them grow faster. According to research, vegetables such as lettuce have been proven to grow twice as fast as compared to when planted normally on the soil.

Making Your Own Backyard Aquaponics System

Backyard Aquaponics

There are many ways through which you can make your own backyard aquaponics system. Regardless of the method you choose, always ensure that your system is able to grow plants in a way that confers most of the environmental benefits such as low environmental impacts and water efficiency.

Without wasting time, we will go through a step by step program on how to make a Flood and Drain system.

Flood and drain system

Necessary Equipment and Material

Build Process

  1. Place your fish tank on a flat surface away from direct sun to reduce algae growth.
  2. Place the pump and feed pipe in the fish tank.
  3. Place the grow bed near the fish tank. Fill it with gravel and make sure it’s close to the fill pipe.  Also, make sure the drain pipe from the grow bed feeds directly into the fish tank.
  4. Install the timer on the pump and set it to cycle for 15min on, 45 min off.
  5. Join the pipes and the pump together to connect the fish tank with the grow bed. Also, remember to connect the overflow drain in the grow bed to remove water.
  6. Plant your seedlings into the grow bed and place your fish inside the fish tank.
  7. Test your fish water to determine the level of Ammonium, nitrite, and nitrate. If you notice that the pH level is high or low, you can adjust it accordingly to keep the water neutral.
  8. Turn on the pump to start the cycling process. This involves circulating nutrient-rich water from the fish tank to the grow bed then back to the tank again. After a few days, you’ll notice that your seedlings are growing; a milestone which reveals that your aquaponics system was successfully established.

Conclusion

In summary, there are tons of benefits which farmers enjoy once they set up a backyard aquaponics system. The system is cost efficient and makes backyard gardening more productive and economical. According to research, aquaponic systems use about 1/10th the amount of water used when farming on the ground. This technique helps you produce a tremendous amount of fish and vegetables within a short time in a small area.

backyard aquaponics


Small Yard Garden Organization Ideas

Just because you have a small yard does not mean you have to give up on gardening. With a little work, some money, and a few imaginative ideas (we take care of that), you can make a great small yard garden out of nothing. It does not matter whether you want to plant veggies, herbs, or flowers  – these ideas will work.

Repurposed Furniture Yard Garden

This idea is a great one if you have any old furniture that is sitting around your home that you are thinking about throwing away.  You can repurpose it into a multi-tiered yard garden that saves space. Old dressers are the best for this purpose. They are also easy to find at yard sales or flea markets.  You can either plant your flowers directly into the drawers or put the plants in separate pots and then put the pots in the drawers.  This approach allows you to bring the plants in and out of the house easily.

Vertical Garden

These gardens are perfect for those who only have a balcony or a small patio but still want a lot of greenery. According to the growing demand for landscaping design in Sydney, a rise in vertical gardening is to be expected. One way to build a vertical garden is to use a shoe organizer. Fill each shoe space with some high-quality soil or compost and plant your herbs in them. Make sure you hang your new garden somewhere where it will get enough sunlight, but be protected from rain at the same time. Old pallets can also serve as vertical planters. Attach plastic or terracotta pots to a pallet, plant whatever you choose in them, and lean the pallet garden against a wall. Living walls are more of an artwork than simply a garden and are an inevitable part of modern garden designs. They can be as small or as large as you want. Once the greenery starts to grow thick, they even make a perfect fence.

Hanging Gutter Garden

Old gutters easily turn into beautiful hanging gardens. It is a perfect way to get rid of bulk trash after roof replacement. The length of the gutter depends on the size of your garden, and the guttering that you have. It can be a single or multi-level garden. Gutters can also be laid down on the ground and be used as yard garden dividers.

Kiddie Pool Garden

Do you have an old kiddie pool that your kids have grown out of? Instead of throwing it away, make a raised garden from it. This is a great idea even if you have a somewhat bigger yard with little or no soil and planting areas. Fill the pool with planting soil and start building your green haven. You can stack stones around the pool to make it look more natural.

Herb Spiral

Regardless of its name, this small yard garden is not intended solely for herbs. It is, however, most suitable for this purpose. Why spiral? For one thing, it provides more space than a simple round raised yard garden. Secondly, it provides planting areas that are more or less raised, and more or less shaded. Just make sure you take into account which herbs prefer which conditions while planting them. Those that require more sunlight should naturally go on top. You can make the spiral by piling up bricks, stones, or by placing wooden planks vertically into a spiral. Then just fill the space in between with soil and your garden is ready for planting.

Conclusions

There are numerous more ways to make your yard garden at least seemingly bigger that would make a world of difference to you. Are you ready for some planting?

Small Yard Garden Organization Ideas


Urban Farming: No Farm Farming

Many people graduate from college and just sit year after year wondering what their calling is. If you are looking to make a difference in the world and find that the typical 9-to-5 isn’t making the cut, then perhaps it’s time to take a look at farming, specifically urban farming.

“What if I don’t have land?” you might ask. This article will help you bring farming techniques into fruition in areas where space is limited. Permaculture is a large concept at work here and it can run the gamut of everything from composting to water retention systems. Although you may think that your backyard is too small to enact some of the main principles, think again. All of these things can bring you one step closer to farming in your backyard.

Water Harvesting

You may not be building the water terraces of ancient China or the aqueducts of old Peru, but you can still change the dynamic landscape of your own backyard to save water. Consider where you need to water and where rain gathers. If you can divert this natural force and slow it’s descent to the sewer you’ll be better off.

First, let’s tackle the backyard. Taking excess dirt and creating a slope that funnels water to the center of the garden is the best way to take advantage of soil architecture and save rainwater, as well as water from your sprinkler. 

Roof runoff is also worth saving no matter how rare rainfall is in your area. There are a few things to keep in mind when setting up a water cache system like this.

  • Water Quality: Water must be filtered and should be pollutant free. Keep in mind that zinc-aluminum roofing can be dangerous to your health.
  • Do not let your gutters become blocked with leaves. Leaf guard can be expensive, while homemade alternatives are still effective.
  • Regular maintenance is a must. You’ll want to make sure that water is sealed at appropriate times, to protect from development of mosquitoes in warmer months.

Companion Planting

Growing plants that are native to the same continent and cultures together will improve crops survivability. Because these plants have evolved in the same place for many generations, they require the same protection, and in some instances provide shade, nutrients, and ground cover.

You might find your crops being under siege from spider mites or other pests. This guide will illustrate just how to face those problems in an organic way, by using companion plants.

Composting

Composting is central to the farming experience. While we won’t delve completely into the wide world of composting here, there are a few things to remember while at home in the urban setting.

  • Make sure to seal compost bins to avoid confrontation with pets, pests, and neighborly noses.
  • Red Worms are your best friend
  • Save coffee grounds or ask for some from a local business
  • Find a local composting co-op if you don’t have room at home.

Keep in mind that your goal is to return nutrients to the soil as food for crops. You don’t want your backyard turning into a miniature dust bowl after several seasons.

Graywater

This is a topic that can take some getting used to, but with the proper installation you can use the forms of water in your household that are not exposed to human waste to better hydrate the garden. I’ve seen setups where the sink was disconnected and water was free to run into a bucket for later distribution. This comes with its problems of course and is not recommended. But there are designs aplenty for whatever age your home may be. Here are some of the most prominent benefits:

  • More water for use, and less strain on wells or drought stricken areas
  • Less strain on failing septic tank
  • Less energy and chemical use
  • Plants benefit foremost and after water is returned to it’s origin (groundwater) faster
  • Increased awareness of and sensitivity to natural cycles

Poultry & Eggs

Yard pending, you can find a way to install a small to a medium chicken coop or convert a pre-existing shed. The chicken housing must meet several requirements, not only to meet city ordinance but also for the chickens themselves to be happy and fruitful:

  • Chicken feeding is a regular job and requires a solid schedule. An automatic feeder may lessen the burden.
  • Fencing around the coop can be important if you have nosy pets or live in an area rife with predators.
  • Don’t forget the light! Chickens only lay eggs based on daylight cycles. Some lights will also affect the temperature of the coop, which is another important part of keeping chickens healthy and alive.
  • Make sure you have access to the inside so you may clean regularly.

Whether the goal you have in mind is for eggs (quite sustainable) or for poultry, you should find that the coop is an excellent addition to the home, and is one step closer to making you an actual farmer. Treat your chickens well and a healthy product will come along with it.

Position of the Sun         

If you aren’t paying attention this could spell disaster for your first year, mostly because you won’t have a second year. Without proper daylight, your crop will never properly flourish, and for some locations, the urbanite may have to do some proper planning. Before making any cuts on the tree linings of the property, make a chart that shows where the sun line falls on your property. In some cases, you’ll have full coverage, but more than likely you’ll have a tree or two in the way. Note the time of year as well, as the sun will shift depending on the season.

After trimming, consider burying the remnants of your tree trimmings to create a Hugelkultur bed. This is a form of composting that uses trees and tree parts to save moisture, contribute nutrients, and reinvigorate the soil. Gather the tree parts and bury them with a layer of nutrient dense material and cover with topsoil and my personal preference of straw.

Urban Farming For All…

This article is only the tip of the iceberg.  Use the following resources to transform your backyard into a farmer’s market contributor, and turn that day job into that of an urban farmer. If all goes well, maybe you’ll make that return back to college for an agricultural education. For now, supplement your income with fresh fruit, vegetables, and stock!

References and Resources for Further Education

Urban Farming


How To Build A Worm Bin

How would you describe the typical suburban homesteader family?  More than likely you’re looking at two parents, a few kids, maybe a dog or a cat, two full-time jobs, soccer practice, ballet recitals…the works!  With that kind of schedule, how are you going to fit in managing livestock on your suburban homestead?  I’ve got the answer for you – worms!  And to raise worms, you’re gonna need a worm bed!

In today’s post, we’re going to explain why you’d want to raise worms and how to build a worm bin.  This information is very similar to what you’d find in Anna Hess’ great book entitled The Weekend Homesteader.  If you don’t already have a copy, I highly recommend you pick one up.  Every suburban homesteader should have one!

Why Worms?

Raising worms is all about the quality of the finished product, not necessarily the quantity.  Anna Hess explains it best:

…your worm bin isn’t going to produce gobs of compost…an under-the-sink worm bin will churn out enough nutrients for a potted lemon tree

But, remember that, despite how much (or little) you get in terms of worm output, the quality is super high.  Worm casting a very high in micronutrients and will help your food grow better than just about any other compost available.

Remember that commercial that used to say “A little dab’ll do ya”?  Well, that’s worm castings and tea in a nutshell.  Adding a small amount will show tremendous results to your garden.  That fact alone makes growing worms a worthwhile endeavor for the suburban homesteader.

Gathering Your Supplies

There’s nothing particular outrageous required to make a worm bin.  You’ll need the following:

Plastic Storage Bins

The Plastic Storage bins should be somewhere in the 8-10 gallon range and can usually be found for around $5 a piece.  Make sure both of the ones you are using are the same size.

Sheet of Cardboard

The sheet of cardboard needs to be big enough to cover the top of one of the bins.

Bedding

Worms love shredded newspaper for bedding.  If you have a shredder that creates strips, you’re all set.  The cross-shredders cut the paper into pieces that are too small.  In the absence of shredded newspaper, you can use hand-shredded paper, torn-up cardboard or egg cartons, fallen leaves, straw, coconut coir and peat moss.  Each of these have their downfalls, mostly that they’ll mat down in the bin too much when they get wet.

Worms

Let me say this very simple – we’re not raising earthworms.  Compost worms are known as red wrigglers, redworms or Eisenia fetida.  You might be able to find these guys living in horse manure, but you’re more than likely going to have to purchase them.  You can find some on Amazon.com or at Vermicomposters.com.  You’ll want about 2 lbs of worms for your bin, but could start with 1 lbs and let them grow to fill the space.

Soil

Nothing special here – a few scoops from your garden thrown into the bin to help the worms grind up their food.

Making The Worm Bin

This process is incredibly easy and even those of you who are mechanically challenged can do this project.  Here we go:

  1. Soak your bedding in water for a few hours.  It needs to be soaked, but not dripping.
  2. While the bedding is soaking, use the drill and drill bit to put about 10 holes in the cover and about 8-10 holes in each wall of one of the containers.  The bottom of the container should have about 20 holes.  You can use the ruler and marker, like I would, to put the holes in a nice, equally space pattern or simply do it by eye.  Either way, you want a fairly even distribution of holes across each face.
  3. Place the bin with the holes inside the bin without any holes.
  4. Place the saturated bedding in the bin with the holes and add your soil.  Mix well.
  5. Use the scissors to cut the cardboard so it sits flush with the top of the bedding.  This addition will keep the worms dark and moist.
  6. Pour the worms in (including any bedding they came with) and replace the cardboard.
  7. Place the plastic lid on top and your done!

Caring For Your Worms

Much like any livestock, worms do take a little bit of work to care for.  But, unlike most livestock, they’re not going to require daily attention.

Feeding

You’ll want to let the worms settle for a few days after you finish building the worm bin.  At that point, you can add food scraps on a schedule that works for you – daily, weekly, whatever.  Just make sure you are placing the scraps in different areas of the bin to promote the worms moving around.  You can feed them just about anything you eat, although you’ll want to avoid citrus peels, bread, meat and oil.  Citrus can be toxic in larger quantities.  Likewise, bread, meat and oil will increase your chances of a pungent smell.  Make sure you add a handful of fresh bedding eat time you feed them to cover up the scraps and keep the chance of smell and fruit flies down.

Overfeeding

Overfeeding is the biggest cause of worm bin failure.  On a daily basis, a pound of worms can process roughly one-half pound of food scraps.  That means your two-pound of worms can handle about seven pounds of food scraps per week.  Anything above that should make its way to your compost pile.  You do have a compost pile, right?

Bedding

The only care you need to give your worms besides feeding them is keeping their bedding moist, but not sopping wet.  Likewise, you might find your bin is too dry.  Either way, the way to tell something is wrong in your worm bin is to see how many worms are escaping to the lower bin.  A few worms showing up there every week is normal.  Anything more than that and you’ll need to investigate your worm bin’s conditions and see if you need to add moisture or dry bedding to reduce moisture.

As mentioned previously, stink and fruit flies can also be a problem.  But, in the end, almost every worm bin problem can be treated by adding new layers of bedding (moist or dry, depending on your problem) and never having food scraps above the bedding.  Reducing or stopping feeding for a few weeks during this process also helps.

Harvesting Tea and Castings

Harvesting worm bin tea is super easy.  Simply remove the inner container and pour the worm bin tea from the outer container into a third container.  Replace the inner container and you’re done.  Now you can apply the worm bin tea to your favorite plants for a quick boost of fertilizer.

It’s time to harvest the castings when the contents of the inner container begin to look more like compost and less like bedding and food scraps.  Get a third container, drill holes in it like described above, place some fresh bedding and food scraps in it and then place this new container on top of the original inner container.  Place the cardboard and lid on top of this new, third container.  The worms will work their way into the new bin over a week or two.

When applying the casting to your garden, remember the following:

  • Your soil should be made of no more than 20% castings
  • Casting are best used in your vegetable garden
  • Castings should be used when fresh and damp

Conclusion

Building a worm bin is an easy task that will result in big returns on your suburban homestead.  You’ll have a recycling center right in your house, as well as a compost creator and a fertilization machine.  Your return on investment is terrific with this project so get after it!

Let us know in the comments how this worked out for you!


How To Build A Worm Bin

photo credit: AxsDeny via photopin cc

How To Build A Worm Bin


Mulch and Your Suburban Homestead

If you’ve been following Project TWH and implementing the suggestions on your own homestead, you most likely have a nice summer garden planted. And, if you have your summer garden planted, you’ve probably experienced weeding which is one of the downsides of a garden. Fortunately, we have the solution to your weed problems – mulch! Not only will mulch reduce or eliminate the weeding that you have to do, but it will also improve your soil over time. Double bonus! Let’s get into it:

Pros and Cons of Mulch

Mulch provides many benefits to your garden including:

  1. Blocks light to soil; greatly reducing weed germination
  2. Holds moisture that would otherwise evaporate
  3. Filters water from heavy rains; reduces soil run off
  4. Slowly breaks down into compost – increases organic matter and lightly fertilize soil
  5. Moisture holding keeps worms, salamanders and the like in the moisture during hot, sunny summer months

Despite these benefits, there are some detractors from adding mulch to your garden:

  1. Moisture holding increases the presence of pests such as snails, slugs and burrowing critters like moles and voles.
  2. Cost – sourcing good organic mulch can be difficult

I’ve never had major problems with pests but you might want to think twice about using mulch if you are already fighting these critters without the presence of mulch. In terms of cost, you might be able to skirt that issue if you grow your own mulch.

Grow Your Own Mulch

The key to this approach is cover crops. Cover crops can be defined as a crop grown for the protection and enrichment of the soil. The general approach is that a crop such as buckwheat, autumn seed oats, oil seed radishes and the like is planted. They grow quickly and either are ‘chopped and dropped’ or winter kill in place, providing mulch for the area. Sometimes legumes are used as they pull nitrogen from the air and it can be added to the earth. There is a free publication Manager Cover Crops Profitably that I would recommend for further reading on this topic.

Mulch C:N Ratio

C:N is a ratio of carbon to nitrogen. This ratio is expressed as a function of weight, so when talking about the C:N ratio of mulch, we’re talking about the pounds of carbon in the mulch material divided by the pounds of nitrogen in the material. A C:N above 1 means that the mulch has more carbon; a C:N below 1 means that the mulch is heavier in nitrogen. In The Weekend Homesteader, Anna Hess explains that “nitrogen provides quick meals for plants and bacteria, while the energy in carbon can only be accessed slowly, often by fungi. Knowing the C:N ratio of a material helps you decide whether to use that organic matter as compost, mulch, or neither.”

Common C:N Ratios

  • Humus: Humus is a stable form of organic matter and has a C:N ratio of 10:1.
  • Compost: Well built compost will weigh in around 30:1 which allows micro-organisms to thrive and quickly turn organic matter into humus. A C:N ratio of 30:1 is too low for mulching due to the fact that it will cause the organic material to ‘melt’ into the soil and will need to be replaced sooner than later.
  • Mulch: Mulch will typically have a C:N ratio greater than 30:1. This ratio makes it difficult for micro-organisms to survive and, as such, don’t pull the nitrogen out of the soil.

Types of Mulch

With the basic chemistry and biology of mulch explained, we can step into the different kinds of mulch available to you:

Straw Mulch for your Suburban Homestead

photo credit: stellar678 via photopin cc

Straw

The preferred choice of garden mulch on the Suburban Steader Homestead. The C:N ratio of straw comes in at a healthy 50:1 and, moreover, it sticks around for about 6-8 months. Cost is usually a sticking point for us but we use such little of it (1 bale takes care of both gardens) that it doesn’t pose that big of a problem. On Long Island, I can get straw for about $7-$8/bale. It’s important to understand the difference between straw and hay. Straw is sterile and is nothing but stalks from which the grain (seed) has been harvested. Hay consists of the entire harvested grass plant and is full of grass and weed seed. It is NOT a suitable mulch because, in effect, you are seeding your garden with a grass crop.

Rotten Wood Chips

Fresh wood chips range in the 200:1 (softwoods) to 600:1 (hardwoods) range and are too high in carbon for a mulch. If you let these chips sit for two years or so, they’ll decompose about halfway and be ready for use. Most people use this type of mulch around fruit trees with great success. Be careful with this kind of mulch as you can’t be sure of what’s in it if you don’t do the chipping yourself.

Municipal Waste Mulch

Many municipalities (including mine) collect grass clippings, leaves, branches and other organic material. They then grind it down and compost it into a mulch. It is often very reasonably priced – in my area, it is free to home owners assuming you can carry it from the processing area (they even bag it for you). The problem with this kind of mulch is the contents. You have no idea what is in there. Have people treated their grass with chemicals? Is there pesticides on the tree branches? Are there a bunch of ground up weeds with Round-Up in there? Think long and hard about whether you want to put that kind of thing on the soil that is growing food you want to eat.

Grass Clippings

The C:N ratio of this kind of mulch is about 20:1. Not ideal, but it will work for a short duration. The main positive of grass clippings is its availability. If you cut your own grass, you have almost a limitless supply for this kind of mulch. Likewise, if you live in the suburbs, it’s likely that your neighbors also cut their grass giving you a large supply of mulch. But not so fast. Do you or your neighbors use herbicides or pesticides on your grass? If so, skip this step. Also, you don’t want to use grass that is going to seed. It essentially defeats the purpose of mulch. If you don’t use anything on your grass and it’s not going to seed, then by all means use it as mulch. Just be prepared to replace it more often. The low C:N ratio means that the grass will ‘melt’ into the soil and need to be replaced sooner than later.

Comfrey Leaves

Much like grass, they work great assuming there is nothing added to them from the herbicide or pesticide family. You can grow a few plants in an out-of-the-way area and cut the leaves back every few weeks for mulch. I have no personal experience with this approach to mulching.

Autumn Tree Leaves

Everyone who has trees has wondered what to do with all those leaves. Well, there’s hope my friends! With a 50:1 C:N ratio, leaves tend to match straw in their level of use for mulch. And, for the most part, leaves are free. The downside to leaves is that they tend to blow away if not shredded. I have had good luck enriching my soil by adding a layer of leaves (roughly 1-3″ thick) under a layer of straw when I put my garden beds to sleep for the winter.

Compost

It can do the trick, but I don’t recommend it. Compost will, for a time, stock the propagation of weed growth. However, it will allow the weeds to grow eventually. Add that to the fact that you’re probably putting in some decent effort to make a quality mulch to better your soil and this approach is one I would steer clear of.

Cardboard and Paper

We’ve used cardboard in our kill mulch to much success. And, in a typically mulching situation, it works well too. The problem with cardboard and paper is their propensity to fly away if not held down. I typically recommend a layer or cardboard or paper under a layer of straw. Be aware that both items will likely decompose in a few months. Also, make sure to stay away from glossy and colored paper.

How To Mulch

OK, we’ve armed ourselves with all this information and procured just the right mulch for our application. How do we apply it? The first step is to weed your garden. Pull anything out that you don’t want to grow. Be sure to pull out the entire weed, root and all. Next, lay down enough mulch so that no weeds will germinate through it. I’ve found that the sweet spot in my gardens is anywhere between 2 and 4 inches, but you’ll have to experiment for yourself. Obviously, you’ll have thinner mulch around seedlings versus established plants. That’s about it. Maintenance is almost nonexistant. If you see a weed, pull it out and thicken up that area of mulch a bit. If you notice your vegetables are turning yellow, you probably have too high of a C:N ratio meaning you have a nitrogen deficiency. There are a few things you can do to fix this: add diluted urine (yes, you read that right), compost tea or a layer of compost to get things back in order. I’ll cover diluted urine and compost tea in June.

Wrap-Up

You’ve just done a little bit of work to make your life that much easier. Sit back, sip on a cold beverage and enjoy watching your neighbors scurry around weeding their gardens. Got a tip or question regarding mulching? Please let us know in the comments or on our Facebook Page. Mulch and Your Suburban Homestead

photo credit: hardworkinghippy via photopin cc

Mulch and Your Suburban Homestead


Nutrition For The Suburban Homesteader

I know what you’re thinking. Nutrition? This is a blog about suburban homesteading! What does nutrition have to do with that?

The short answer is: a lot!

Think about it this way: you are the engine that gets work done around your suburban homestead and the food you eat is your fuel. Remember how the gas station has different grades of fuel for your vehicle? Well, that’s essentially what nutrition is for you – it is a quality scale of your fuel and it helps determine well you will perform.

What Does The Suburban Steader Know About Nutrition?

I have something to admit to you – I was a bit of a meathead in my past life. I spent a lot of time lifting weights and building my strength up in an attempt to get into powerlifting. I learned a lot about nutrition as a part of this endeavor. Admittedly, I was concentrating on how to build muscle mass but the knowledge base I acquired serves me well to talk about nutrition as it pertains to any goal.

What Should You Eat?

I could spend hours and hours writing on this topic given my experience. Heck, I could write an entire blog on this topic alone – but I’m going to concentrate on the basics for this post. And the first thing I’ll do is let you in on the secret of nutrition:

Keep It Simple!

Yep, that old KISS rule works perfectly when it comes to good nutrition.

Nutrition, from the athletic point of view, is very specific. Athletes who participate in sports which require large muscle mass – bodybuilders, wrestlers, powerlifters, football players, et – require a large protein intake. They concentrate on lean meats which provide the nutrients needed to build muscle. Conversely, endurance athletes such as marathoners, bicyclists, triathletes and the like concentrate more on diets that provide more extended energy levels. These diets typically involve larger amounts of slow burning carbohydrates.

I’m not an athlete, what do I eat?

OK, I know I’ve been dodging the question about how to eat well for good nutrition. The answer is this – eat natural.

Huh? What does that mean?

It means that the closer your food is to natural, the better the nutritional value. If you look at the ingredients on the box of whatever you are thinking about eating and it sounds more like a science experiment than dinner, I’d suggest putting it down and moving on. Fresh fruits and vegetables are great. Meat that hasn’t been pumped full of hormones, antibiotics and other crap is preferred.

Two things I want to point out:

  1. Yes, this approach is very similar to a Paleo diet. While I’m not a complete follower of the Paleo approach (I have no problem with dairy and non-GMO grains in moderation), I believe that the general concept is a solid way to approach good nutrition.
  2. Yes, this approach can be more expensive. Eating fresh (non-GMO) vegetables and fruit as well as grass-fed, free range meat is more expensive than the basics you find at the supermarket. I’ve heard this added cost referred to as a ‘six pack tax’ and, while your goal might not be to get into swimsuit model shape, I think it’s a good way to think about this added expense.

4 Quick Steps To Better Nutrition

Still not sure how to get started with improving your nutrition? Here’s four basic steps to get you started:

  1. Journal Your Food: I recommend you track everything you eat for at least a week. Keep track of what you eat/drink, how much of it you ate/drank and how it made you feel. Don’t try to game the system by eating healthier – the temptation will be there – because it won’t help you improve.
  2. Change One Item: While you keep logging your food, make one change and see how it affects you. For instance, if you have a beer or glass of wine every night, maybe you could cut that out and only have one on the weekend nights. Or, if you find that you’re eating only red meat and poultry, try throwing fish in one or two nights a week. Continue logging your intake and documenting how the foods make you feel. Pay special attention to how the new changes make you feel versus the old habits.
  3. Find A New Place To Shop: You don’t have to completely change your shopping habits. Simply tweak it a little. Is there a farmers market you’ve been meaning to hit up? Give it a shot! Maybe you can get some of your veggies or eggs there. Increasing the value of some of your purchased goods will help increase your nutrition.
  4. Repeat Step 2 As Necessary: Once your first change becomes habit, go back and make another change. As you work through this change, keep track of how you feel. If you feel better, it’s something you should work into habit. Keep using this approach and you’ll find that your entire nutrition routine is changed for the better in short order. The best part of this approach is that it’s much easier to stick to than changing everything all at once.

Additional Nutrition Resources

Here’s a few places you may want to explore for more information on nutrition:

  • RobbWolf.com: Robb Wolf is a former research biochemist and one of the world’s leading experts in Paleolithic nutrition. His website is considered the go-to site when researching Paleolithic eating and nutrition.
  • FitDay.com: FitDay.com provides a free online food tracking journal that I have successfully used to track and modify my daily nutrtional intake.
  • Harvard School of Public Health – Healthy Plate: The Harvard School of Public Health has published an alternative food plate (compared to the USDA) which they argue “is based exclusively on the best available science and was not subjected to political and commercial pressures from food industry lobbyists.”
  • Weston A. Price Foundation: Dr. Weston A. Price was a dentist who went on a search for the cause of dental decay and physical degeneration. During that search, he found a nutritious way of living that is very similar to a Paleo approach. While they differ in approaches, they are very much alike and a lot of information can be ‘co-mingled’ to create a very basic, but very nutritious lifestyle.

Wrap Up

This topic can leave you with your head spinning or it can inspire you to learn more. I hope it’s the latter.  I know you are not a nutrition expert by any means, but I hope that this post has helped you move along in your search for better nutrition.

Remember that, as a suburban homesteader, food is your fuel and nutrition is a way of describing the quality of that fuel. Also, remember that nutrition is an ongoing education – I’ve been involved in this world for the last fifteen years and am still learning every day!

Please let us know any nutrition tips or question you have in the comments or on our Facebook Page.

photo credit: BobPetUK via photopin cc

Nutrition For The Suburban Homesteader


Plant Your Summer Garden

If you’ve been following Project TWH, you’ve learned how to find room to homestead, performed a suburban homestead site survey, planned your summer garden and maybe even used the kill mulch technique to get your garden area ready. Now it’s time to really get your suburban homestead moving in the right direction – we’re going to plant your summer garden!

If you refer back to The Weekend Homesteader, you’ll see that planting your summer garden has four main components to it:

  • Knowing When To Plant
  • Succession Planting
  • Knowing How To Plant
  • Garden Maintenance

When To Plan Your Summer Garden

Determining when to plant your summer garden is probably one of the most frustrating parts of starting a suburban homestead garden. Plant too early and your crop is prone to late freezes that could kill it off early. Plant too late and your crop might bolt right to seed and have a horribly small yield.

What’s a gardener to do?

If you remember the 5 Tips To Start Your Garden that I provided a while back, you’ll remember that the first tip was to know your zone.

Your hardiness zone is a good indication of when last freeze and first freeze occur in your area and it also will have information about when to plant different species relative to these dates.

You can find more information on your hardiness zone by clicking here: USDA Hardiness Zone Map.

Hardiness Zone - Plant Your Summer Garden

Back in the article on Planning Your Summer Garden, I gave you five or six different vegetables that I considered ‘easy’ to grow. In general, the swiss chard can be started about a month before last frost and the rest can be planted after the frost-free date. Mint can be planted just about any time of the year.  You should consult with your seed providers and local nurseries for tips specific to your area.

Succession Planting

What’s worse than having a small harvest? How about a HUGE harvest that all happens at the same time? What are you ever going to do with ALL of these vegetables when they show up at the same time?

By staggering your planting, you will pretty much guarantee that not all your crops show up at the same time. How you use this method is up to you. Personally, I try to stagger plantings every week or so. That means that when the crop in one area is harvested, I’ll have some more coming up in another area a week later and a week after that in another area.

You can also use this approach to work with your schedule. Are you a teacher with the summer off? Plant so that there’s no harvest until mid-June. Or, if you plan to be on vacation mid-August, plan out your plantings so that nothing will be ready for harvest then.

How To Plant Your Summer Garden

You just dig a hole and throw the seeds or seedlings in. Right? Well, it’s not quite that simple, but it’s not terribly difficult either.

Here’s the really simple approach I recommend:

  1. Rake back the mulch
  2. Depress the soil as required
  3. Place seeds in ground
  4. Fill hole, tamp in place

It’s really not that hard. All you really need to remember is that the seeds you’re using need access to soil and water so making sure they are planted deep enough (but not too deep) is important.

If you’re using the Square Foot Gardening approach, I recommend building the garden stamp shown in the following video. Super easy to make and VERY useful:

[youtube_sc url=”yOZNRvlECic”]


If you’re using seedlings (or sets as others call them), I recommend planting them so that the first set of leaves is right above the soil. This approach gives the best chance for roots to grow and will also give your stems the most stability as they grow.  You might want to consider some fertilizer when you plant your seedling as well.  The application of fertilizer during planting will typically destress the situation for the young plants and give them the nutrients they need to begin growing in their new surroundings.

Summer Garden Maintenance

Again, this step isn’t rocket science. If you take the time to mulch, it will definitely help. You’ll spend much less time weeding and the water you apply to your summer garden will be retained much better.

Basically, you need to do three things to keep a garden in good order:

  1. Weed
  2. Water
  3. Harvest

You don’t have to worry about harvesting (with the exception of beans lettuce) for a while and the other two steps are relatively straight forward. It’s really hard to screw up a garden once it’s set, so take it easy and have fun.

Wrap Up

There you have it, how to plant your summer garden. It’s not terribly difficult and really is one of those things that you learn to do by doing it. So, please, go out and get your hands dirty this weekend! You’ll enjoy it!

Please let us know any tips you have for planting your summer garden in the comments or on our Facebook Page.

photo credit: Distant Hill Gardens via photopin cc

Plant Your Summer Garden


5 Tips To Start Your Garden

Suburban homesteading usually involves some kind of food production.  While a homestead on multiple acres may allow for row farming and grazing for large animals, suburbanites need to scale back a bit.  Rabbits and chickens may be reasonable sources for protein, but your fruit and vegetable production is usually scaled down to the gardening level.  While not as abundant as a multi-acre setup, a high quality suburban garden can produce more than enough food to adequately supplement your weekly fruit and vegetable intake.  Our 5 Tips To Start Your Garden will help you get there more quickly!

1. Know Your Zone

First, let’s define what we’re talking about when we say ‘zone.’  The United States Department of Agriculture (USDA) has split North America into roughly 11 separate hardiness zones; each about 10oF warmer or colder than its adjacent zones.  The higher the zone number, the warmer the area.

5 Tips To Start Your Garden - USDA Hardiness Zone Map

Knowing your zone gives you a good idea what crops are available to you.  Some crops that grow well in a hearty zone in Michigan (say 5 or 6) will have no chance growing in the heat of mid- to south-Texas (zones 8 or 9).  Likewise, plants like citrus that need the super warmth in areas like southern Florida (Zone 10) won’t do well in more temperate climates like Boston (Zone 6).  Selecting your crops accordingly can help remove some disappointment in the future.

Finding your zone is rather simple – just click the link below to see what your USDA Hardiness Zone is:

USDA Hardiness Zone Map

2. Determine Your Space

This step is relatively simple: determine how much space you are going to set aside for growing crops.  While you may want to jump over this step with a quick answer, spend a few minutes thinking about it from two perspectives:

  1. Location – the closer you put your garden to your house, the more you’ll be likely to go into it on a regular basis to maintain it (weeding, harvesting, watering, etc.).  With that in mind, make sure you aren’t sacrificing sun exposure for proximity to your house.
  2. Size – While a huge garden may seem desirable, you also have to maintain it.  A larger garden is going to have more work associated with it.  Make sure you decided on a size that is both promising to your end production goal and manageable given your other responsibilities.

3. Identify What You Eat

Put very simply: only grow what you’ll eat.  What sense is there in growing tomatoes if you can’t stand them?  Likewise, you’re less likely to care for the garden if you realize you’re not going to partake in its bounty.  Growing what you eat is a simple way of helping to ensure you stay engaged in the gardening experience.

Don’t take this tip to mean you can’t experiment.  If you want to throw in a few plants of a fruit or vegetable you have never tried, by all means, do it.  Just make sure the majority of your garden is items you intend to eat.

4. Make A Plan

5 Tips To Start Your Garden - VeggieHarvest.com Zone 7 Planting CalendarYou don’t need to be a certified Project Manager to plan out a garden, but a little forethought is useful.  The last thing you want to do is plant your vegetables so they all come in at once or, worse, plant them at the wrong time.  To help you plan out your planting schedule, I suggest you visit the following links:

VeggieHarvest.com Planning Guide

VeggieHarvest.com Planting Zone Calendars

 The first link has a great guide which talks more in-depth about a lot of the issues addressed in this post.

Possibly more importantly, the second link allows you to print a copy of the planting calendar that is relevant to your Hardiness Zone.

For instance, here on Long Island, I’m in Zone 7.  This graph quickly shows me that I should have started peas, broccoli and cauliflower at the beginning of March (which I did) and should getting them in the ground around April 1st.

I can also use this calendar to plan out the rest of my garden.  It’s also a great too when you start to think about doing a spring/summer/fall approach to your garden for extended production.

5. Be Flexible, Adapt and Document

Gardening is not an exact science and is very dependent on a variety of inputs including sun, rain, freeze, heat, seed quality, animals, bugs, soil…. The list goes on and on.  What you have to do is be willing to change and let you garden take you through the process.  If you pay attention, your plants will tell you what they need.

The other trick is to document yourself.  Keep track of what you plant, when you plant it and where it was planted.  After a few cycles, you’ll start to see patterns emerge.  For instance, I know that if I plant broccoli after the last freeze, I tend to get a worse crop than I do if it’s planted before that time.  I also know that certain seeds work better for me.

Keeping an open mind and quality records allow you to build a better garden year after year.

5 Tips To Start Your Garden – Wrap-Up

So there you have it – 5 Tips To Start Your Garden!  All these simple tips are easy to accomplish and can be done within a day.  That means you should be able to get a garden planned and ready to roll this weekend.

Above all, remember that running a garden should be a rewarding and relaxing experience.  It should not be taxing or considered ‘work.’  Yes, you’re going to have to put some effort in to make it work, but you’ll get much more out of it than you put into it if you follow these five steps up front.

Did we miss anything? Do you disagree with anything we wrote?  Let us know in the comments below or on our Facebook page!5 Tips To Start Your Own Garden