Kill Mulch – Finally Getting Your Hands Dirty!
Finally! A part of Project TWH that actually involves something other than planning!
Let’s get your hands dirty!
Kill mulch, at its simplest, is a way to use the existing organic matter on the ground as nutrients for your new crops. The process basically kills (hence the name) all the living plants, grass, weeds, etc and spreads their nutrients into the soil through decomposition.
In this quick article, I’ll explain what kill mulch is, how it works and how to get it going on your suburban homestead. As always, I’ll take direction from Anna Hess in her book The Weekend Homesteader as well as throw in my two cents where appropriate.
What Is Kill Mulch?
I know I said kill mulch is a way of using existing organic matter as nutrients for your new crops. And that statement is a 100% true…it’s also quite vague.
You’re probably thinking “OK, so I’m using something that is/was growing on my land to provide nutrients for something new that’s going to grow on my land. Cool. But how?”
Great question – the premise behind kill mulch is that it blocks the light from reaching grass and weeds, therefore killing them. The plants then die and rot in place producing a nutrient dense soil for future plantings.
How to Build Kill Mulch
Kill mulch – sometimes referred to as sheet mulch or lasagna mulch – is achieved by layering various substances.
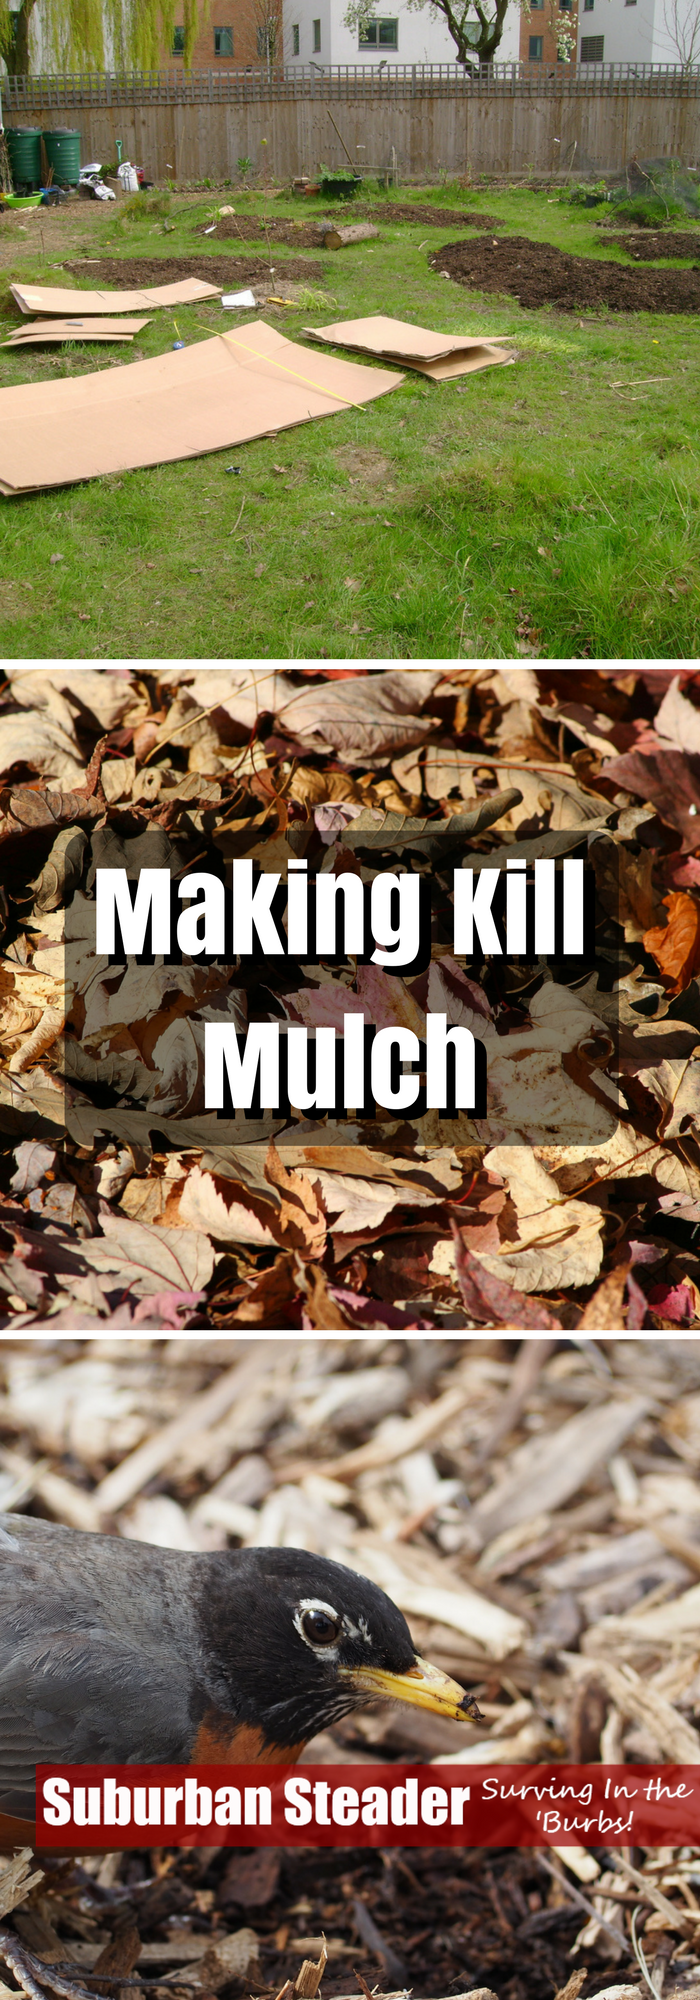
You want to start with a compost. One that may contain weed seeds is permitted here. Next is a thick layer of light blocker – one layer of corrugated cardboard or a layer of twelve (minimum) newspaper sheets will do the trick.
Next, add a thick layer of weed-free compost. It is important that this layer is both thick and weed free. Remember that your plants’ will keep their roots in this layer for the first month or two until the cardboard or newspaper is broken down.
Finally, finish off the kill mulch with a layer of mulch – grass clippings or straw are perfect.
Why You Should Use Kill Mulch
Kill mulch’s biggest benefit is that it is a no-till approach. Aside from the labor involved in tilling a garden, tilling also has many drawbacks:
- Erosion – Tilled soil can blow or wash away easily causing you to lose soil and reducing your garden’s fertility.
- Loss of Soil Microorganisms – Bacteria and fungi are your friends! These wonderful items are important for plant growth and typically reside in the top three inches of soil. Tilling will destroy fungi-networks and move bacteria and fungi into different depths of the soil.
- Increased Weeds – While a freshly tilled garden looks great at first, what you’re not seeing is the weed seeds that have moved to the top and are ready to sprout!
- Soil Compaction – After that fluffy soil sees rain, it’ll compact down tight. Roots, seedlings and water will all have a tough time penetrating it at this point.
Wrap-Up On Kill Mulch
There’s the down and dirty on kill mulch. It’s a very effective process and, if done correctly, will result in some of the most fertile soil you can produce.
I used this approach, along with a woody bed/hugelkultur approach, on my new garden bed.
I laid down a little bit of compost and then dropped in layers and layers of newspaper to block the light getting to the grass underneath. The paper was then soaked endlessly – I left a hose on it for a couple of hours and allowed it to stay outside during rainstorms for a few weeks.
After that, I placed a thick (probably 6-10 inches) layer of wood down before filling the rest of the box with topsoil (I didn’t have enough compost). It will be interesting to see how the soil does in this area.
Please let us know any tips you have for building kill mulch in the comments or on our Facebook Page.
photo credit: London Permaculture via photopin cc