1

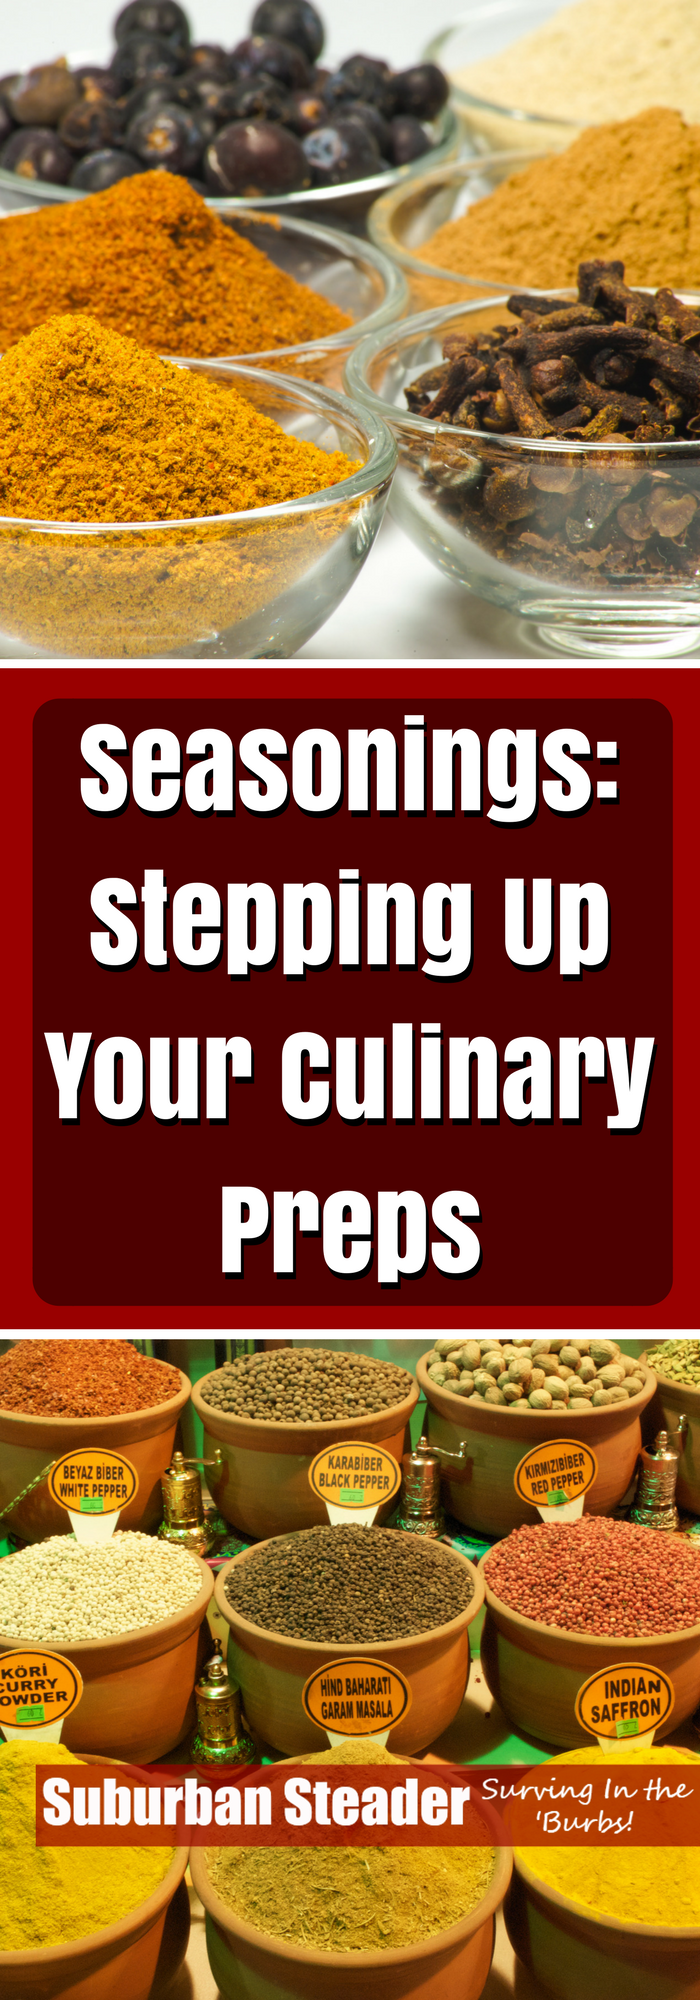
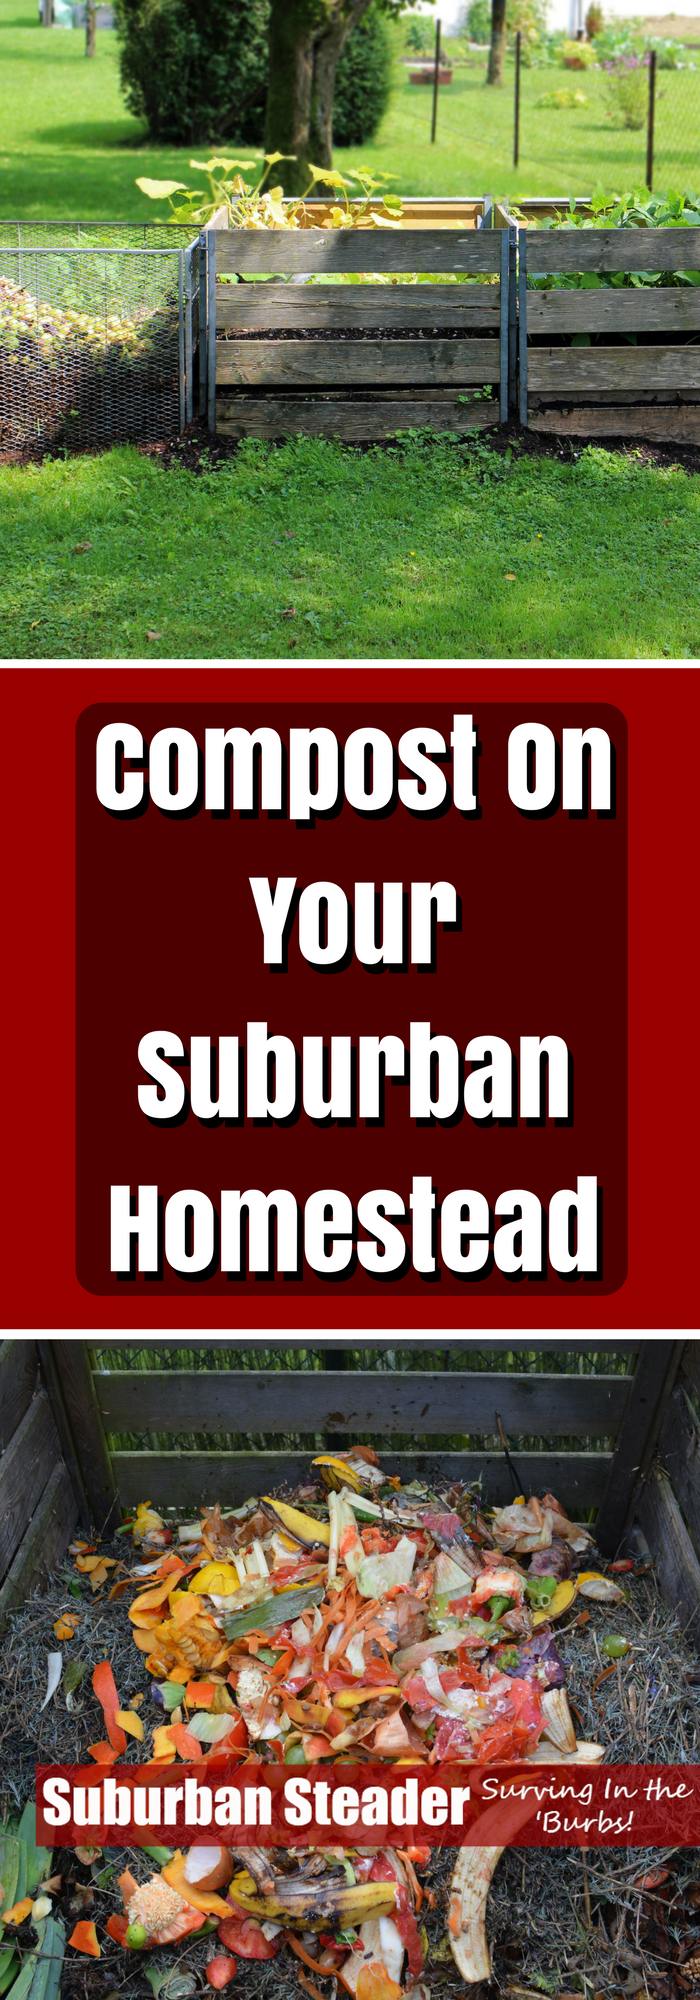
Seasonings: Stepping Up Your Culinary Preps

We’re going to talk about seasonings today in our second cooking-related Project TWH post.  In case you missed it earlier, our first cooking-related post in Project TWH was about Nutrition For The Suburban Homesteader.

Why Seasoning Is Essential To Homesteaders

Let’s get this fact out-of-the-way right off the bat – bland food sucks!  Monotony does too.  Picture this very realistic scenario:

Your suburban homestead garden is successfully producing this year and you’ve got more tomatoes, carrots, cucumbers and broccoli than you know what to do with.

At first, this problem is anything but a free problem.  The vegetables are fresh and taste great.  But in the not too distant future, you’re getting sick of all these vegetables in your diet.  It’s just annoying to eat the same thing over and over and over and over again despite how fresh these vegetables are.

But, add some seasoning – garlic to the broccoli, sage to the carrots, salt and balsamic vinegar to the tomatoes, dill (with some yogurt) to the cucumbers – and, all of a sudden, these mundane flavors are once again exciting!

Seasonings make food more interesting and also allow you to be creative with your cooking!

Types of Seasonings

We can spend a long, long time talking about seasonings, but let’s start talking about the basics.

  • Herbs: The flavor in herbs comes from the leaves of the plant.  A lot of these seasonings can easily be grown in your garden.
  • Spices: Anything used to season food that is not made from the leaves of a plant are considered a spice.  A lot of these items are difficult to grow in a typical garden in the U.S., however some like chili peppers and fennel seeds are able to be grown in the U.S.
  • Black Pepper: A typical staple in every pantry, this seasoning can only be grown in tropical climates.  It is, however, almost a required, essential seasoning for any setting.  The ability for only a light sprinkle to make an astounding difference is incredible!
  • Salt: Due to the fact that it is not a part of a plant, salt is neither a herb or a spice.  It is, however, much like black pepper in that it is essentially a required staple due to its ability to greatly change (most will say improve) flavor in small amounts.
  • Onions and Garlic: Both are vegetables and, at the same time, both are used primarily to alter the taste of other food rather than as a major.  Onions have a sweet, but not sugary, flavor to meals.  Garlic has a unique flavor and is able to turn a simple dish (think steamed broccoli) from a mundane dish to a tasty dish.  It has amazing health benefits as well.
  • Vinegars: A liquid seasoning that can help you spice up salads and other vegetable dishes.  There are multiple different flavors that range from sweet (balsamic vinegar) to subtle (apple cider vinegar).

Grow Your Own Seasoning

There’s two ways to effectively start using seasoning in your cooking.  The first approach is determining which seasonings you like and thane making dishes that use them.  The second is finding dishes that you like and figuring out what seasonings work well with them.  In the end, it’s probably best to use a combination of these approaches.  That being said, the average suburban homesteader can grow most of the seasonings listed below and could easily try incorporating them in their cooking.

  • Basil: This plant is very simple to grow, although it is frost sensitive.  It also has some propensity to experience fusarium wilt in the Deep South.  Basil grows great from seeds that are planted after the frost-free date.  We use basil extensively with tomatoes here on the Suburban Steader homestead – tomato and mozzarella slices with chiffonade basil and balsamic vinaigrette is a terrific appetizer for summer meals.
  • Chili Peppers: These peppers are grown just like bell or sweet peppers.  And, much like sweet peppers, the fruits can be eaten.  They can also be dried and used for seasoning foods in the winter.  Chili peppers have a spicy taste to them and are used extensively in Mexican and Asian-style cooking.
  • Coriander / Cilantro: A definite “two-for-one” in the seasoning world.  Cilantro leaves are typically used in Mexican-style cooking.  Coriander, on the other hand, is associated with many different styles of cooking.  Both have very unique flavors.  Unfortunately, the Mrs doesn’t like cilantro very much, so it is not used very much on the Suburban Steader homestead.
  • Egyptian Onions and Chives: Both of these perennials are grown mostly for their green leaves.  Their taste profile is similar to onions or garlic but neither have as sharp a flavor as the latter.  The Suburban Steader homestead always has some chives on hand for numerous things but one of our favorites is adding these great seasonings to tuna, egg or chicken salads.
  • Garlic: Probably my favorite seasoning, garlic has many uses.  Almost every dish, regardless of cuisine, can benefit from some minced up garlic.  Garlic typically goes hand in hand with onion.  We use the age-old ratio of three garlic cloves to one onion in most meals and it works great.  The taste of garlic is wonderful and the health benefits (as mentioned above) are incredible which makes it no surprise that garlic is the most used and appreciated seasoning in the Suburban Steader homestead.  Garlic is planted in the fall and harvested in the summer.
  • Mint: Probably the easiest seasoning to grow, mint can also be a problem in your garden.  It is known as a runner meaning that the roots will spread and consume a large area.  It is recommended that you use either a separate pot or root barriers when growing mint.  All that being said, mint is quite a useful seasoning.  It is matched well with some meats – lamb especially – and is also great for making teas.  In addition, mint is a great addition to some adult beverages.  In addition to normal mint, you might want to experiment with different variations like spearmint or peppermint.
  • Onions: Just like garlic, onions have almost limitless use.  They can be eaten raw on sandwiches – they are terrific on hamburgers – or diced and sautéed as the base for numerous dishes.  Onions are planted from seed or set early in the spring and the bulbs are harvested mid-summer.  Onions have a unique ability to add a sweetness to a dish that is nothing like the sweetness sugar adds.  The aroma and taste onions add as seasoning to a dish is unique and it is added to many dishes here on the Suburban Steader homestead.
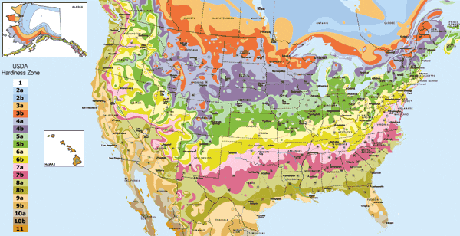
  • Oregano: This fast growing perennial is hardy down to Zone 5 (learn about USDA Hardiness Zones here).  Much like mint, oregano can be a runner so make sure you use some kind of root barrier or a separate pot when growing oregano. Oregano is used a lot in both Italian and Mexican cuisines and is a mild, but tasty seasoning.
  • Parsley: Much like onions and garlic, parsley is best known for its extensive use in Italian cuisine.  It is a biennial meaning that it is harvested in the first year and bolts to seed in the second spring.  Much like cilantro and basil, parsley is grown for its leaves.  A fine-chopping of parsley is a great addition to any Italian-style dish as well as many soups and pasta dishes.
  • Rosemary: This terrific seasoning has many uses but is best known as a great seasoning for most starches.  Our favorite use of rosemary is as an addition to roasted red potatoes.  Rosemary is a perennial that will grow hardly in the South and may die back some in the cold of winter in anything less than Zone 7.
  • Thyme: Another perennial that is hardy down to Zone 5, thyme is a great seasoning for both vegetables and different kinds of meat.  Here at the Suburban Steader homestead, we use thyme a lot with chicken.  We’ll take a few chicken breasts, rub them in a little olive oil, salt, pepper and paprika, toss a sprig or two of thyme on the chicken and bake them.  This process makes the chicken tasty and a great addition to salads.

Testing New Seasonings

So you’ve taken the plunge and are growing a bunch of the seasonings from above but don’t know where to start when it comes to trying them.  Do you find the seasonings you like and then find meals that use them?  Or, do you figure out what seasonings you can use to spice up the meals you already like?  Ideally, you’ll do both.

Here on the Suburban Steader homestead, we definitely take the two-prong approach to trying new spices.  For instance, there are quite a few meals that we’ve become very good at making such as different grilled meats, chicken meals and pasta with red sauce.  We’ve begun to play with different seasoning profiles on these dishes to spice them up and change the typically taste of the dishes so we don’t get bored.

On the other side, we’ll occasionally buy a seasoning from the store (sage was one of the latest we tried) and found recipes that highlight it.  Not everything works out well, but it’s opened up our palettes and has allowed us to expand both our taste profiles and our culinary skills.

Exploring new seasonings is definitely a win-win experience in both the taste and culinary skill worlds!

Seasoning: Stepping Up Your Culinary Preps

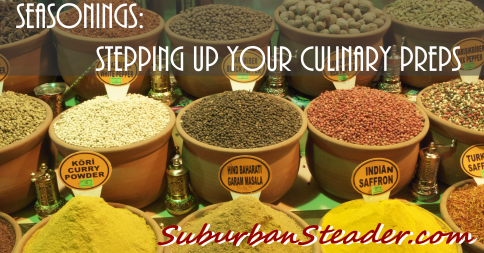
photo credit: Tord Sollie via photopin cc

Seasoning: Stepping Up Your Culinary Preps


How To Build A Worm Bin

How would you describe the typical suburban homesteader family?  More than likely you’re looking at two parents, a few kids, maybe a dog or a cat, two full-time jobs, soccer practice, ballet recitals…the works!  With that kind of schedule, how are you going to fit in managing livestock on your suburban homestead?  I’ve got the answer for you – worms!  And to raise worms, you’re gonna need a worm bed!

In today’s post, we’re going to explain why you’d want to raise worms and how to build a worm bin.  This information is very similar to what you’d find in Anna Hess’ great book entitled The Weekend Homesteader.  If you don’t already have a copy, I highly recommend you pick one up.  Every suburban homesteader should have one!

Why Worms?

Raising worms is all about the quality of the finished product, not necessarily the quantity.  Anna Hess explains it best:

…your worm bin isn’t going to produce gobs of compost…an under-the-sink worm bin will churn out enough nutrients for a potted lemon tree

But, remember that, despite how much (or little) you get in terms of worm output, the quality is super high.  Worm casting a very high in micronutrients and will help your food grow better than just about any other compost available.

Remember that commercial that used to say “A little dab’ll do ya”?  Well, that’s worm castings and tea in a nutshell.  Adding a small amount will show tremendous results to your garden.  That fact alone makes growing worms a worthwhile endeavor for the suburban homesteader.

Gathering Your Supplies

There’s nothing particular outrageous required to make a worm bin.  You’ll need the following:

Plastic Storage Bins

The Plastic Storage bins should be somewhere in the 8-10 gallon range and can usually be found for around $5 a piece.  Make sure both of the ones you are using are the same size.

Sheet of Cardboard

The sheet of cardboard needs to be big enough to cover the top of one of the bins.

Bedding

Worms love shredded newspaper for bedding.  If you have a shredder that creates strips, you’re all set.  The cross-shredders cut the paper into pieces that are too small.  In the absence of shredded newspaper, you can use hand-shredded paper, torn-up cardboard or egg cartons, fallen leaves, straw, coconut coir and peat moss.  Each of these have their downfalls, mostly that they’ll mat down in the bin too much when they get wet.

Worms

Let me say this very simple – we’re not raising earthworms.  Compost worms are known as red wrigglers, redworms or Eisenia fetida.  You might be able to find these guys living in horse manure, but you’re more than likely going to have to purchase them.  You can find some on Amazon.com or at Vermicomposters.com.  You’ll want about 2 lbs of worms for your bin, but could start with 1 lbs and let them grow to fill the space.

Soil

Nothing special here – a few scoops from your garden thrown into the bin to help the worms grind up their food.

Making The Worm Bin

This process is incredibly easy and even those of you who are mechanically challenged can do this project.  Here we go:

  1. Soak your bedding in water for a few hours.  It needs to be soaked, but not dripping.
  2. While the bedding is soaking, use the drill and drill bit to put about 10 holes in the cover and about 8-10 holes in each wall of one of the containers.  The bottom of the container should have about 20 holes.  You can use the ruler and marker, like I would, to put the holes in a nice, equally space pattern or simply do it by eye.  Either way, you want a fairly even distribution of holes across each face.
  3. Place the bin with the holes inside the bin without any holes.
  4. Place the saturated bedding in the bin with the holes and add your soil.  Mix well.
  5. Use the scissors to cut the cardboard so it sits flush with the top of the bedding.  This addition will keep the worms dark and moist.
  6. Pour the worms in (including any bedding they came with) and replace the cardboard.
  7. Place the plastic lid on top and your done!

Caring For Your Worms

Much like any livestock, worms do take a little bit of work to care for.  But, unlike most livestock, they’re not going to require daily attention.

Feeding

You’ll want to let the worms settle for a few days after you finish building the worm bin.  At that point, you can add food scraps on a schedule that works for you – daily, weekly, whatever.  Just make sure you are placing the scraps in different areas of the bin to promote the worms moving around.  You can feed them just about anything you eat, although you’ll want to avoid citrus peels, bread, meat and oil.  Citrus can be toxic in larger quantities.  Likewise, bread, meat and oil will increase your chances of a pungent smell.  Make sure you add a handful of fresh bedding eat time you feed them to cover up the scraps and keep the chance of smell and fruit flies down.

Overfeeding

Overfeeding is the biggest cause of worm bin failure.  On a daily basis, a pound of worms can process roughly one-half pound of food scraps.  That means your two-pound of worms can handle about seven pounds of food scraps per week.  Anything above that should make its way to your compost pile.  You do have a compost pile, right?

Bedding

The only care you need to give your worms besides feeding them is keeping their bedding moist, but not sopping wet.  Likewise, you might find your bin is too dry.  Either way, the way to tell something is wrong in your worm bin is to see how many worms are escaping to the lower bin.  A few worms showing up there every week is normal.  Anything more than that and you’ll need to investigate your worm bin’s conditions and see if you need to add moisture or dry bedding to reduce moisture.

As mentioned previously, stink and fruit flies can also be a problem.  But, in the end, almost every worm bin problem can be treated by adding new layers of bedding (moist or dry, depending on your problem) and never having food scraps above the bedding.  Reducing or stopping feeding for a few weeks during this process also helps.

Harvesting Tea and Castings

Harvesting worm bin tea is super easy.  Simply remove the inner container and pour the worm bin tea from the outer container into a third container.  Replace the inner container and you’re done.  Now you can apply the worm bin tea to your favorite plants for a quick boost of fertilizer.

It’s time to harvest the castings when the contents of the inner container begin to look more like compost and less like bedding and food scraps.  Get a third container, drill holes in it like described above, place some fresh bedding and food scraps in it and then place this new container on top of the original inner container.  Place the cardboard and lid on top of this new, third container.  The worms will work their way into the new bin over a week or two.

When applying the casting to your garden, remember the following:

  • Your soil should be made of no more than 20% castings
  • Casting are best used in your vegetable garden
  • Castings should be used when fresh and damp

Conclusion

Building a worm bin is an easy task that will result in big returns on your suburban homestead.  You’ll have a recycling center right in your house, as well as a compost creator and a fertilization machine.  Your return on investment is terrific with this project so get after it!

Let us know in the comments how this worked out for you!


How To Build A Worm Bin

photo credit: AxsDeny via photopin cc

How To Build A Worm Bin


Compost On Your Suburban Homestead

What comes to mind when you hear the word compost? Do you think of some stinky pile where food scraps get thrown and flies live? If that’s what comes to mind then you need to know something – you’re doing it wrong! Compost is a decidedly simple yet effective process that anyone on a small suburban lot can partake in.  You’ll see incredible benefits in your garden once you take the plunge into making good compost.

Compost Science

The ‘art’ of making compost is actually quite easy – it’s less art and science and more…well, just doing. You need to make sure you have the right ingredients and keep them moist (not wet). You also need to make sure you’re turning it often to keep the heat up inside the pile. And, while it’s a very forgiving process, it’s also good to have an understanding of what goes into compost.

Temperature

Temperature can be a fickle creature in the world of compost. On one hand, an elevated temperature can help you. Keeping the compost at a minimum of 104°F for five days (hitting 131°F for five hours during that time) will make sure that all the weed seeds and pathogens in your compost are killed. Likewise, if you get too hot it’s not good either. For example, if you hit 160°F, all the microorganisms – basically bacteria and fungi – that make the compost action happen will die.

Heat is caused in the compost pile when the microorganisms begin to decompose the plant material you’ve included. You are most likely not going to have to cool down your compost pile (it’s pretty hard to get it that hot). But, if you do see smoke on your compost pile, all you have to do is add water to cool it down. Adding a mixture of high carbon ingredients (dead leaves are great) after the water is a good idea.

Browns and Greens

If you remember the post about Mulch and Your Suburban Homestead, you’ll remember how we talked about the C:N ratio. This ratio is commonly thought of as the ratio of browns to greens. The table below gives you a few examples of browns and greens:

Browns Greens
Autumn Leaves Grass Clippings
Wood Chips Fruit/Veggie Scraps
Sawdust Coffee Grounds
Shredded Paper Manure


The easy way to remember which is which is to remember that greens are typically moist and colorful (with the exception of coffee grounds and manure – both of which are moist).  Everything else is browns.

You want to start your pile at a rough C:N ratio of 30:1 meaning your browns are 30x more prevalent than your greens.  This scenario will whittle down to roughly 10:1 or 15:1 as the decomposition occurs.

An ammonia type smell coming from your compost pile means you have too many greens.  Likewise, if you don’t see a lot of decomposition action going on, you’re probably too high on the browns.

If you’re the analytical type, check out this compost calculator to see how well you are doing.

Compost On Your Suburban HomesteadParticle Size and Shape

Believe it or not, size and shape greatly influence your compost.  As a rule of thumb, the smaller the better.  The microorganism can more easily digest small pieces.  A good example of this phenomenon is an apple.  We put a whole apple in our compost pile and then chopped one into small pieces and placed it in there as well.  After a certain amount of time, the small pieces were barely recognizable and the whole apple was more or less intact.

Remember that shape is equally important.  If you have material that is so small that it can mat together when wet – whole sheets of paper, full lettuce leaves, or very finely ground up food – the air and water will not be able to get in and help the microorganisms work their magic.

Aeration

As I eluded to above, air is critical to the decomposition process in a compost pile.  Much like humans, microorganisms take in oxygen and expel carbon dioxide.  If these little guys can get oxygen, they’ll eventually be smothered and replaced with anaerobic microorganisms (anaerobic = no oxygen).  These guys stink (literally) and don’t decompose your compost nearly as well as their aerobic counterparts.

So how do you aerate your compost pile?  Easy – keep it open to the air and turn it often.

Moisture

Again, the microorganisms are like you and I in that they also need moisture to live.  But, much like temperature, moisture can be a fickle situation.  Too little moisture and your microorganisms will perish.  Too much and they’ll drowned; being replaced by their anaerobic counterparts.

You can tell if your compost pile is sufficiently moist by grabbing a handful of the compost.  If it feels like a wrung-out sponge when you squeeze it, it’s good.  For the most part, you won’t have to worry about this problem as your greens and rainfall will give the pile enough moisture.

Turning

Turning is one of those things that people have differing opinions on.  Some folks say that nature does this kind of process without turning a forest floor.  And they’re completely correct.  But those people are usually more patient and willing to wait a year or more for a compost pile to be ready.

Those of us who are a bit more impatient will turn the pile on occasion.  Turning the pile provides a few benefits to the compost pile.  First, the temperature at the middle of the pile is always going to be greatest so turning it allows for a more thorough compost.  Second, turning the compost pile helps aerate it and break up clumps that may shed water.

We here at the Suburban Steader Homestead turn our pile because we believe it provides a better quality compost in a shorter time.

Compost On Your Suburban HomesteadCompost Bins

Good news – science class is over!  Now we’re getting into the hands-on part of this post.

The question also becomes: What should I make my compost in?

My answer is usually a simple Nothing.

To be perfectly frank, the compost pile on the Suburban Steader Homestead is just a pile on the ground.  We add our table scraps, scrapped paper, straw, etc to it and turn it on occasion.  We’ll water it during especially dry spells but those are far and few between considering where we live.

But, you may not want to have a compost pile just laying on your property somewhere so let’s talk about what you can do:

Pallet Compost Bin

This concept is very simple.  Make a four-sided area out of wooden pallets and put some hinges on it so you can open up one pallet.  Now make another one next to it in the same manner.  Once one bin is full, use a pitchfork to move it to the second bin.  This movement will aerate the compost pile for ‘finishing’ in the second bin.  You can now start a new pile in the first bin.  By the time you’ve filled the first bin again, the second bin material should be ready to use.

Compost Tumblers

You can either buy these at your local big box store or make one out of a plastic 55-gallon drum (with a cover) and a pipe.  Put the pipe through the barrel length-wise so the barrel can spin around it and support the pipe with a wooden frame.  Now all you have to do is cut and opening in the barrel – make sure you can close it again – that you can both add material and retrieve your compost from.  Now all you have to do is add material and give it a spin.  These aerate your compost quite well and generally produce quality compost at a faster rate.  The problem is that the amount you produce is significantly smaller than what you can with a pallet bin or pile situation.

Using Compost In Your Garden

Using compost in your garden is soooo simple.  Follow these three rules:

  1. Pull back mulch
  2. Apply compost
  3. Reapply mulch

That’s it.  Following these simple will help build up the health of your soil.  The sponge-like capability of the compost will retain moisture in the garden, the nutrients will attract earthworms which will work the compost deeper into your garden.  Pretty soon your soil will be darker and richer with a higher level of microorganisms.

Wrap Up

Compost is a wonderfully easy and inexpensive tool that every suburban homesteader should have in their toolbox.  While there’s a plethora of science behind, the premise is pretty simple.  Throw some browns and greens together, add moisture and oxygen, turn it occasionally and get out of the way.  Nature will do the rest of the work.

You’ll see incredible benefits in your garden and you’ll enjoy knowing that your soil is getting more and more fertile which means you can grow better and better produce.  Everyone wins!

Additional Resources

Please let us know any tips you have for making compost in the comments or on our Facebook Page.

Compost On Your Suburban Homestead

Compost On Your Suburban Homestead


June Preview – Project TWH

First, let me apologize. The end of May and June were a crazy time around the Suburban Steader Homestead. I don’t really feel like going into detail, but a lot of family issues came up. Long story short, everyone is happy and healthy(er) now, so we’re moving on. And, while it’s early June, we’re going to continue with the Project TWH and discuss the June Preview.

As an aside, my goal is to write about both the June and July topics this month in hopes of getting caught up. If it spills a little into August, so be it, but please know that I am committed to this discussion and believe it’s beneficial for both my readers and myself.

In what seems to be a theme lately, the June Preview of Project TWH is a mismatch of topics. Some of the topics are straight-up homesteading related. Others are more suburban homestead related and can be related to a general approach for bettering your life.

As usual, we’ll be referencing The Weekend Homesteader throughout this month. In fact, our four main articles for the month will be centered around the four topics Anna Hess outlines for June:

  • Compost
  • Worm Bins
  • Seasoning
  • Your Real Hourly Wage

Compost

  • Goal: Build a compost pile
  • Cost: $0-50
  • Time: 1-3hrs
  • Difficulty: Medium
  • Kid-Friendly: Yes

Compost – the lifeblood of a garden. Well, maybe that’s water, but you get the point. We’ll spend a good amount of time talking about the science behind compost and how to create it. Not sure what browns and green are? Should you turn or aerate your compost? Do you need to water it? Don’t worry about it because we will talk about all these topics and more. We’ll also get a little into how to store or contain your compost with bins and store-bought systems.

Worm Bins

  • Goal: Build an under-the-sink worm bin
  • Cost: $35-100
  • Time: 1-2hrs
  • Difficulty: Medium
  • Kid-Friendly: Yes

Yup, you hear that right. Worms! And we’re going to teach you how to build a worm bin to grow them! Well, the purpose of the worm bin isn’t really to grow worms, it’s to produce worm casting and worm tea for composting and fertilization needs. This post will be a kind of “How-To” in that we’ll walk you through building a worm bin and getting started with growing a worm colony. We’ll talk about what to do with the by-products of your bin and wrap up with a list of resources to get started on this most interesting adventure in suburban homesteading

Seasoning

  • Goal: Expand your culinary horizons by trying out new spices and herbs
  • Cost: $0-10
  • Time: 1-2hrs
  • Difficulty: Easy
  • Kid-Friendly: Yes

The first two posts for this month will concentrate on helping your garden grow and this post will give you some advice on what to do with its product. When you think about it, we garden and raise animals on our suburban homestead for one reason – to feed ourselves! Seasoning, however, makes this goal that much more interesting. Herbs and spices add whole new level of taste, texture and nutritional input to your diet. We’ll talk about the basic herbs and spices, how to use them in your cooking and where you might want to try experimenting with ‘off the beaten path’ herbs and spices.

Your Real Hourly Wage

  • Goal: Discover the true value of your time
  • Cost: $0
  • Time: 1-2hrs
  • Difficulty: Easy
  • Kid-Friendly: No

It’s probably not a stretch to assume that, as a suburban homesteader, you probably live in the (gasp!) suburbs. That being said, it’s probably safe to assume that you don’t own enough land to be completely self-sufficient. That means that one of you (at least) must have a full-time job. And I bet you can either tell me how much you get paid annually or per hour. But is that really what you make? In this post, we’ll spend some time talking about how to calculate your real hourly wage and what to do with those numbers. This article and it’s tasks will be an interesting introspective activity for you; I expect it will really get you thinking about what’s important to you and what isn’t.

Conclusion

So there you have it, the June Preview of Project TWH. As usual, it’s going to be an eclectic and busy month. There are some hands on activities as well as some non-gardening activities – this blog is about suburban homesteading after all and gardening is just one subset of that. I’m definitely interested in a few of the article this month – worm bins and real hourly wage especially. So sit back, enjoy a cup of coffee and join us on our suburban homesteading journey in June.

Like what we’re doing here? How about letting us know in the comments or on Facebook?

June Preview - Project TWH


Teamwork On The Suburban Homestead

When you hear the word homesteading, even suburban homesteading, I’m sure one of the your first thoughts is of complete self-sufficiency. You dream of being able to completely provide for your family in all aspects of life, right? Unfortunately, that’s just not realistic. You can’t do everything yourself, whether you’re on 40-acres or a little quarter acre suburban homestead.

You’ll need to rely on teamwork to get it all done.

Teamwork On Different Levels

Anna Hess tells a great story in her book The Weekend Homesteader about how a lack of teamwork nearly wrecked her farm. She tried to do it all herself and found out the hard way that she couldn’t. In the end, she found that teamwork not only helped her get farm up and running, but it also introduced her to her husband.

I’m not going to guarantee that teamwork around your suburban homestead is going to find you a spouse, but it will allow you to grow your network and skill set, as well as take some of the burden off your hands.

After Anna tells her little story about how teamwork, she goes on to describe the different kind of skills and traits that teamwork can help build within your community. Some of the more important ones to suburban homesteading are described below:

Strength and Stamina

I have no intention of starting a battle of the sexes here, but we can all admit that men and women have far different levels (and types) of strength. Personal experience has shown that men tend to be stronger in the upper body and women have more stamina for tasks like shovelling. Having a group of people with different levels of strength and stamina, regardless of gender, is always good to have when doing work around the suburban homestead.

Patience

I know this particular trait is something that I am short on. Having a wife who is patient and able to handle situations where either we’re having difficulty getting a task done or we have a repetitive task certainly helps.

Record-Keeping

We keep records of just about everything on our little suburban homestead – what plants were planted where, how much of each crop we harvested, where we bought certain supplies and how much they cost, etc. Having someone with meticulous attention to detail is a great addition to the teamwork aspect of suburban homesteading.

Building Skills

You’re invariably going to build something on your suburban homestead. There’s not way around it – whether it’s a new shed, raised bed, chicken tractor, or water collection system. Having someone on your team who can think in this manner is extremely helpful.

Teamwork On the Suburban Steader Homestead

As I’ve mentioned in the past, we have a little quarter acre lot on Long Island, NY. It’s nothing special and, from the outside, doesn’t look much different than your typical suburban plot. But, we do live a little differently and need to rely on teamwork to get it all done. Here’s how we do it:

Immediate Family

My wife and twin girls are the main support system on our homestead. I wouldn’t get half the work done without their teamwork. My wife is great at harvesting veggies and ‘master planning’ how we lay things out on our land so they are both functional and aesthetically pleasing. That’s not to mention her amazing skills in the kitchen!

My twin five-year-old daughters are an awesome help as well. They help me plant, harvest and compost. They love seeing the worms in the compost pile! As time goes on, they’ll acquire more skills and more responsibilities. For now, they’re learning more than they’re doing…and that’s part of the teamwork aspect as well.

My role is multifaceted. I’m kind of the manager of the homestead (don’t tell my wife I said that!). I manage when we’re going to plant and how to harvest. I’m also responsible for a lot of high-intensity physical labor aspects such as rotating the compost, building/fixing items around the homestead and most of the heavy duty yard work.

In addition to the immediate family, we harness the knowledge of extended family members when needed.  Two that come to mind are my father and brother.  My father is a plumber with a great mind for construction.  He has helped me do a ton of work on the house and in the yard.  My brother has a degree in plant and soil science and is my first call when I run into issue in both the garden and the yard.

It’s a wonderful blend between the four of us and our extended family.  The work is hard and, usually, we have fun doing it all.

Outside Resources

We have a lot of outside resources to help us with the homestead, some of whom don’t even know they’re part of our team. They include:

Security

I’ve hooked up with a great group of guys who I go to the range with on a fairly regular basis. While we always have a good time, we also spend a good amount of time working on our skills from a home defense perspective. The teamwork aspect of training – and making it fun – keeps me coming back for more.

Knowledge Base

I spend a good amount of time communicating with people online at places like The Survival Podcast Forums, When SHTF Forums, PermaEthos Forums and a private Facebook group for Preparedness & Homesteading bloggers. The people I meet in these places provide a great wealth of information for all aspects of suburban homesteading. Terrific teamwork mentality!

The Backyard PioneerLocal Support

I also have a good local support system in addition to all my ‘virtual friends.’ Most notable out of these folks is Mike over at The Backyard Pioneer. We regularly meet-up to discuss projects, bounce ideas off each other and discuss the challenges we are each facing. Sometimes just having an external sounding board and hearing that they’re facing similar challenges is enough to keep you going. In addition to our semi-regular meetings, Mike and I also lend a hand to each other whenever we can. And, being that we have families roughly the same age, we’re trying to get together more as a large group. I’m sure it’ll be good for our kids to hang out…and our wives can commiserate about their crazy husbands!

Wrap Up

Teamwork is a key part to the suburban homesteading lifestyle. As much as you’d like to think you can, you cannot do it all yourself. You need some help and the sooner you start working on building your team, the happier you’ll be. Remember that, as a suburban homesteader, you’re even more exposed to the community lifestyle. Why not try to build on that exposure and develop a group around you that can help you achieve your goals?

Please let us know any teamwork-related tips or question you have in the comments or on our Facebook Page.

Teamwork On The Suburban Homestead

photo credit: USDAgov via Compfight cc

Teamwork On The Suburban Homestead


Mulch and Your Suburban Homestead

If you’ve been following Project TWH and implementing the suggestions on your own homestead, you most likely have a nice summer garden planted. And, if you have your summer garden planted, you’ve probably experienced weeding which is one of the downsides of a garden. Fortunately, we have the solution to your weed problems – mulch! Not only will mulch reduce or eliminate the weeding that you have to do, but it will also improve your soil over time. Double bonus! Let’s get into it:

Pros and Cons of Mulch

Mulch provides many benefits to your garden including:

  1. Blocks light to soil; greatly reducing weed germination
  2. Holds moisture that would otherwise evaporate
  3. Filters water from heavy rains; reduces soil run off
  4. Slowly breaks down into compost – increases organic matter and lightly fertilize soil
  5. Moisture holding keeps worms, salamanders and the like in the moisture during hot, sunny summer months

Despite these benefits, there are some detractors from adding mulch to your garden:

  1. Moisture holding increases the presence of pests such as snails, slugs and burrowing critters like moles and voles.
  2. Cost – sourcing good organic mulch can be difficult

I’ve never had major problems with pests but you might want to think twice about using mulch if you are already fighting these critters without the presence of mulch. In terms of cost, you might be able to skirt that issue if you grow your own mulch.

Grow Your Own Mulch

The key to this approach is cover crops. Cover crops can be defined as a crop grown for the protection and enrichment of the soil. The general approach is that a crop such as buckwheat, autumn seed oats, oil seed radishes and the like is planted. They grow quickly and either are ‘chopped and dropped’ or winter kill in place, providing mulch for the area. Sometimes legumes are used as they pull nitrogen from the air and it can be added to the earth. There is a free publication Manager Cover Crops Profitably that I would recommend for further reading on this topic.

Mulch C:N Ratio

C:N is a ratio of carbon to nitrogen. This ratio is expressed as a function of weight, so when talking about the C:N ratio of mulch, we’re talking about the pounds of carbon in the mulch material divided by the pounds of nitrogen in the material. A C:N above 1 means that the mulch has more carbon; a C:N below 1 means that the mulch is heavier in nitrogen. In The Weekend Homesteader, Anna Hess explains that “nitrogen provides quick meals for plants and bacteria, while the energy in carbon can only be accessed slowly, often by fungi. Knowing the C:N ratio of a material helps you decide whether to use that organic matter as compost, mulch, or neither.”

Common C:N Ratios

  • Humus: Humus is a stable form of organic matter and has a C:N ratio of 10:1.
  • Compost: Well built compost will weigh in around 30:1 which allows micro-organisms to thrive and quickly turn organic matter into humus. A C:N ratio of 30:1 is too low for mulching due to the fact that it will cause the organic material to ‘melt’ into the soil and will need to be replaced sooner than later.
  • Mulch: Mulch will typically have a C:N ratio greater than 30:1. This ratio makes it difficult for micro-organisms to survive and, as such, don’t pull the nitrogen out of the soil.

Types of Mulch

With the basic chemistry and biology of mulch explained, we can step into the different kinds of mulch available to you:

Straw Mulch for your Suburban Homestead

photo credit: stellar678 via photopin cc

Straw

The preferred choice of garden mulch on the Suburban Steader Homestead. The C:N ratio of straw comes in at a healthy 50:1 and, moreover, it sticks around for about 6-8 months. Cost is usually a sticking point for us but we use such little of it (1 bale takes care of both gardens) that it doesn’t pose that big of a problem. On Long Island, I can get straw for about $7-$8/bale. It’s important to understand the difference between straw and hay. Straw is sterile and is nothing but stalks from which the grain (seed) has been harvested. Hay consists of the entire harvested grass plant and is full of grass and weed seed. It is NOT a suitable mulch because, in effect, you are seeding your garden with a grass crop.

Rotten Wood Chips

Fresh wood chips range in the 200:1 (softwoods) to 600:1 (hardwoods) range and are too high in carbon for a mulch. If you let these chips sit for two years or so, they’ll decompose about halfway and be ready for use. Most people use this type of mulch around fruit trees with great success. Be careful with this kind of mulch as you can’t be sure of what’s in it if you don’t do the chipping yourself.

Municipal Waste Mulch

Many municipalities (including mine) collect grass clippings, leaves, branches and other organic material. They then grind it down and compost it into a mulch. It is often very reasonably priced – in my area, it is free to home owners assuming you can carry it from the processing area (they even bag it for you). The problem with this kind of mulch is the contents. You have no idea what is in there. Have people treated their grass with chemicals? Is there pesticides on the tree branches? Are there a bunch of ground up weeds with Round-Up in there? Think long and hard about whether you want to put that kind of thing on the soil that is growing food you want to eat.

Grass Clippings

The C:N ratio of this kind of mulch is about 20:1. Not ideal, but it will work for a short duration. The main positive of grass clippings is its availability. If you cut your own grass, you have almost a limitless supply for this kind of mulch. Likewise, if you live in the suburbs, it’s likely that your neighbors also cut their grass giving you a large supply of mulch. But not so fast. Do you or your neighbors use herbicides or pesticides on your grass? If so, skip this step. Also, you don’t want to use grass that is going to seed. It essentially defeats the purpose of mulch. If you don’t use anything on your grass and it’s not going to seed, then by all means use it as mulch. Just be prepared to replace it more often. The low C:N ratio means that the grass will ‘melt’ into the soil and need to be replaced sooner than later.

Comfrey Leaves

Much like grass, they work great assuming there is nothing added to them from the herbicide or pesticide family. You can grow a few plants in an out-of-the-way area and cut the leaves back every few weeks for mulch. I have no personal experience with this approach to mulching.

Autumn Tree Leaves

Everyone who has trees has wondered what to do with all those leaves. Well, there’s hope my friends! With a 50:1 C:N ratio, leaves tend to match straw in their level of use for mulch. And, for the most part, leaves are free. The downside to leaves is that they tend to blow away if not shredded. I have had good luck enriching my soil by adding a layer of leaves (roughly 1-3″ thick) under a layer of straw when I put my garden beds to sleep for the winter.

Compost

It can do the trick, but I don’t recommend it. Compost will, for a time, stock the propagation of weed growth. However, it will allow the weeds to grow eventually. Add that to the fact that you’re probably putting in some decent effort to make a quality mulch to better your soil and this approach is one I would steer clear of.

Cardboard and Paper

We’ve used cardboard in our kill mulch to much success. And, in a typically mulching situation, it works well too. The problem with cardboard and paper is their propensity to fly away if not held down. I typically recommend a layer or cardboard or paper under a layer of straw. Be aware that both items will likely decompose in a few months. Also, make sure to stay away from glossy and colored paper.

How To Mulch

OK, we’ve armed ourselves with all this information and procured just the right mulch for our application. How do we apply it? The first step is to weed your garden. Pull anything out that you don’t want to grow. Be sure to pull out the entire weed, root and all. Next, lay down enough mulch so that no weeds will germinate through it. I’ve found that the sweet spot in my gardens is anywhere between 2 and 4 inches, but you’ll have to experiment for yourself. Obviously, you’ll have thinner mulch around seedlings versus established plants. That’s about it. Maintenance is almost nonexistant. If you see a weed, pull it out and thicken up that area of mulch a bit. If you notice your vegetables are turning yellow, you probably have too high of a C:N ratio meaning you have a nitrogen deficiency. There are a few things you can do to fix this: add diluted urine (yes, you read that right), compost tea or a layer of compost to get things back in order. I’ll cover diluted urine and compost tea in June.

Wrap-Up

You’ve just done a little bit of work to make your life that much easier. Sit back, sip on a cold beverage and enjoy watching your neighbors scurry around weeding their gardens. Got a tip or question regarding mulching? Please let us know in the comments or on our Facebook Page. Mulch and Your Suburban Homestead

photo credit: hardworkinghippy via photopin cc

Mulch and Your Suburban Homestead


Nutrition For The Suburban Homesteader

I know what you’re thinking. Nutrition? This is a blog about suburban homesteading! What does nutrition have to do with that?

The short answer is: a lot!

Think about it this way: you are the engine that gets work done around your suburban homestead and the food you eat is your fuel. Remember how the gas station has different grades of fuel for your vehicle? Well, that’s essentially what nutrition is for you – it is a quality scale of your fuel and it helps determine well you will perform.

What Does The Suburban Steader Know About Nutrition?

I have something to admit to you – I was a bit of a meathead in my past life. I spent a lot of time lifting weights and building my strength up in an attempt to get into powerlifting. I learned a lot about nutrition as a part of this endeavor. Admittedly, I was concentrating on how to build muscle mass but the knowledge base I acquired serves me well to talk about nutrition as it pertains to any goal.

What Should You Eat?

I could spend hours and hours writing on this topic given my experience. Heck, I could write an entire blog on this topic alone – but I’m going to concentrate on the basics for this post. And the first thing I’ll do is let you in on the secret of nutrition:

Keep It Simple!

Yep, that old KISS rule works perfectly when it comes to good nutrition.

Nutrition, from the athletic point of view, is very specific. Athletes who participate in sports which require large muscle mass – bodybuilders, wrestlers, powerlifters, football players, et – require a large protein intake. They concentrate on lean meats which provide the nutrients needed to build muscle. Conversely, endurance athletes such as marathoners, bicyclists, triathletes and the like concentrate more on diets that provide more extended energy levels. These diets typically involve larger amounts of slow burning carbohydrates.

I’m not an athlete, what do I eat?

OK, I know I’ve been dodging the question about how to eat well for good nutrition. The answer is this – eat natural.

Huh? What does that mean?

It means that the closer your food is to natural, the better the nutritional value. If you look at the ingredients on the box of whatever you are thinking about eating and it sounds more like a science experiment than dinner, I’d suggest putting it down and moving on. Fresh fruits and vegetables are great. Meat that hasn’t been pumped full of hormones, antibiotics and other crap is preferred.

Two things I want to point out:

  1. Yes, this approach is very similar to a Paleo diet. While I’m not a complete follower of the Paleo approach (I have no problem with dairy and non-GMO grains in moderation), I believe that the general concept is a solid way to approach good nutrition.
  2. Yes, this approach can be more expensive. Eating fresh (non-GMO) vegetables and fruit as well as grass-fed, free range meat is more expensive than the basics you find at the supermarket. I’ve heard this added cost referred to as a ‘six pack tax’ and, while your goal might not be to get into swimsuit model shape, I think it’s a good way to think about this added expense.

4 Quick Steps To Better Nutrition

Still not sure how to get started with improving your nutrition? Here’s four basic steps to get you started:

  1. Journal Your Food: I recommend you track everything you eat for at least a week. Keep track of what you eat/drink, how much of it you ate/drank and how it made you feel. Don’t try to game the system by eating healthier – the temptation will be there – because it won’t help you improve.
  2. Change One Item: While you keep logging your food, make one change and see how it affects you. For instance, if you have a beer or glass of wine every night, maybe you could cut that out and only have one on the weekend nights. Or, if you find that you’re eating only red meat and poultry, try throwing fish in one or two nights a week. Continue logging your intake and documenting how the foods make you feel. Pay special attention to how the new changes make you feel versus the old habits.
  3. Find A New Place To Shop: You don’t have to completely change your shopping habits. Simply tweak it a little. Is there a farmers market you’ve been meaning to hit up? Give it a shot! Maybe you can get some of your veggies or eggs there. Increasing the value of some of your purchased goods will help increase your nutrition.
  4. Repeat Step 2 As Necessary: Once your first change becomes habit, go back and make another change. As you work through this change, keep track of how you feel. If you feel better, it’s something you should work into habit. Keep using this approach and you’ll find that your entire nutrition routine is changed for the better in short order. The best part of this approach is that it’s much easier to stick to than changing everything all at once.

Additional Nutrition Resources

Here’s a few places you may want to explore for more information on nutrition:

  • RobbWolf.com: Robb Wolf is a former research biochemist and one of the world’s leading experts in Paleolithic nutrition. His website is considered the go-to site when researching Paleolithic eating and nutrition.
  • FitDay.com: FitDay.com provides a free online food tracking journal that I have successfully used to track and modify my daily nutrtional intake.
  • Harvard School of Public Health – Healthy Plate: The Harvard School of Public Health has published an alternative food plate (compared to the USDA) which they argue “is based exclusively on the best available science and was not subjected to political and commercial pressures from food industry lobbyists.”
  • Weston A. Price Foundation: Dr. Weston A. Price was a dentist who went on a search for the cause of dental decay and physical degeneration. During that search, he found a nutritious way of living that is very similar to a Paleo approach. While they differ in approaches, they are very much alike and a lot of information can be ‘co-mingled’ to create a very basic, but very nutritious lifestyle.

Wrap Up

This topic can leave you with your head spinning or it can inspire you to learn more. I hope it’s the latter.  I know you are not a nutrition expert by any means, but I hope that this post has helped you move along in your search for better nutrition.

Remember that, as a suburban homesteader, food is your fuel and nutrition is a way of describing the quality of that fuel. Also, remember that nutrition is an ongoing education – I’ve been involved in this world for the last fifteen years and am still learning every day!

Please let us know any nutrition tips or question you have in the comments or on our Facebook Page.

photo credit: BobPetUK via photopin cc

Nutrition For The Suburban Homesteader


Plant Your Summer Garden

If you’ve been following Project TWH, you’ve learned how to find room to homestead, performed a suburban homestead site survey, planned your summer garden and maybe even used the kill mulch technique to get your garden area ready. Now it’s time to really get your suburban homestead moving in the right direction – we’re going to plant your summer garden!

If you refer back to The Weekend Homesteader, you’ll see that planting your summer garden has four main components to it:

  • Knowing When To Plant
  • Succession Planting
  • Knowing How To Plant
  • Garden Maintenance

When To Plan Your Summer Garden

Determining when to plant your summer garden is probably one of the most frustrating parts of starting a suburban homestead garden. Plant too early and your crop is prone to late freezes that could kill it off early. Plant too late and your crop might bolt right to seed and have a horribly small yield.

What’s a gardener to do?

If you remember the 5 Tips To Start Your Garden that I provided a while back, you’ll remember that the first tip was to know your zone.

Your hardiness zone is a good indication of when last freeze and first freeze occur in your area and it also will have information about when to plant different species relative to these dates.

You can find more information on your hardiness zone by clicking here: USDA Hardiness Zone Map.

Hardiness Zone - Plant Your Summer Garden

Back in the article on Planning Your Summer Garden, I gave you five or six different vegetables that I considered ‘easy’ to grow. In general, the swiss chard can be started about a month before last frost and the rest can be planted after the frost-free date. Mint can be planted just about any time of the year.  You should consult with your seed providers and local nurseries for tips specific to your area.

Succession Planting

What’s worse than having a small harvest? How about a HUGE harvest that all happens at the same time? What are you ever going to do with ALL of these vegetables when they show up at the same time?

By staggering your planting, you will pretty much guarantee that not all your crops show up at the same time. How you use this method is up to you. Personally, I try to stagger plantings every week or so. That means that when the crop in one area is harvested, I’ll have some more coming up in another area a week later and a week after that in another area.

You can also use this approach to work with your schedule. Are you a teacher with the summer off? Plant so that there’s no harvest until mid-June. Or, if you plan to be on vacation mid-August, plan out your plantings so that nothing will be ready for harvest then.

How To Plant Your Summer Garden

You just dig a hole and throw the seeds or seedlings in. Right? Well, it’s not quite that simple, but it’s not terribly difficult either.

Here’s the really simple approach I recommend:

  1. Rake back the mulch
  2. Depress the soil as required
  3. Place seeds in ground
  4. Fill hole, tamp in place

It’s really not that hard. All you really need to remember is that the seeds you’re using need access to soil and water so making sure they are planted deep enough (but not too deep) is important.

If you’re using the Square Foot Gardening approach, I recommend building the garden stamp shown in the following video. Super easy to make and VERY useful:

[youtube_sc url=”yOZNRvlECic”]


If you’re using seedlings (or sets as others call them), I recommend planting them so that the first set of leaves is right above the soil. This approach gives the best chance for roots to grow and will also give your stems the most stability as they grow.  You might want to consider some fertilizer when you plant your seedling as well.  The application of fertilizer during planting will typically destress the situation for the young plants and give them the nutrients they need to begin growing in their new surroundings.

Summer Garden Maintenance

Again, this step isn’t rocket science. If you take the time to mulch, it will definitely help. You’ll spend much less time weeding and the water you apply to your summer garden will be retained much better.

Basically, you need to do three things to keep a garden in good order:

  1. Weed
  2. Water
  3. Harvest

You don’t have to worry about harvesting (with the exception of beans lettuce) for a while and the other two steps are relatively straight forward. It’s really hard to screw up a garden once it’s set, so take it easy and have fun.

Wrap Up

There you have it, how to plant your summer garden. It’s not terribly difficult and really is one of those things that you learn to do by doing it. So, please, go out and get your hands dirty this weekend! You’ll enjoy it!

Please let us know any tips you have for planting your summer garden in the comments or on our Facebook Page.

photo credit: Distant Hill Gardens via photopin cc

Plant Your Summer Garden


May Preview – Project TWH

May is lining up to be an interesting month at the Suburban Steader Homestead. In the May Preview of Project TWH, we’ll talk about a lot of things that may seem unrelated. A few are pure homesteading activities and a few are more general approaches to the suburban homesteading lifestyle. It’s an interesting mix of tasks that I think you’ll really enjoy.

As usual, we’ll be referencing The Weekend Homesteader throughout this month. In fact, our four main articles for the month will be centered around the four topics Anna Hess outlines for May:

  • Plant Your Summer Garden
  • Nutrition
  • Mulch
  • Teamwork

Plant Your Summer Garden

  • Goal: Plant a small garden
  • Cost: $0-20
  • Time: 1-5hrs
  • Difficulty: Easy
  • Kid-Friendly: Yes

Finally! The planning in April is paying off and you’re ready to put seeds and seedlings into the ground! In this post, we’ll spend time talking about when to plant and what information to take into account when planning. We’ll also discuss resources available to you which can help you time your plantings appropriately. Succession planting will be a topic we touch on as will how to plant. Finally, we’ll spend a little time talking about maintaining the garden once you’ve got crop in the ground.

May Preview - Project TWH

photo credit: Arya Ziai via photopin cc

Nutrition

  • Goal: Discover what types of food make your body healthy and happy
  • Cost: $0-5
  • Time: 1-10hrs
  • Difficulty: Easy
  • Kid-Friendly: Maybe

You can’t run a suburban homestead if you’re not of sound body. That means that nutrition and physical fitness are important to us. With that fact in mind, we’ll take a look at what is good nutrition and how do we acquire it. I’ll spend a little time talking about how I honed in my nutrition a bit (spoiler: I’m not perfect, and you don’t have to be) and I’ll wrap up with a list of resources that I recommend you look into in order to make your own informed decisions.

Mulch

  • Goal: Mulch your garden for weed control and organic matter production
  • Cost: $0-100
  • Time: 2-10hr
  • Difficulty: Medium
  • Kid-Friendly: Yes

Sick of weeding? Mulch is your solution. But there’s more benefits than just reduced garden labor when it comes to mulch. I’ll talk about the pros and cons of mulching and whether I believe it to be a solid tactic for your garden. We’ll dig a little into the science of mulching but don’t worry, you don’t need a degree in chemistry or biology for this discussion. We’ll finish the discussion by identifying different kinds of mulch, potentials places to source them and how to apply them to your garden.

Teamwork

  • Goal: Find a person or group of people whose homesteading skills complement your own
  • Cost: $0
  • Time: A lot or a little
  • Difficulty: Medium to difficult
  • Kid-Friendly: Maybe

While we aim for a self-sufficient, self-reliant life, suburban homesteaders aren’t going to go it alone. Nor should they. Building community through teamwork is key to long-term survival. I’ll spend some time talking about different roles within a team and how they might jive in a community setting. In the end, I’ll wrap it up talking about how I’m using a community teamwork approach to build my suburban homestead.

Conclusion

So there you have it, the May Preview of Project TWH.  Sounds like it’s going to be a busy month with a lot more hands-on activities than April. I’m really looking forward to a lot of the topics coming up this month – I could spend hours talking about nutrition and teamwork as they both relate to big parts of my past. I’m also VERY excited to get my garden in the ground. I hope you sit back, enjoy a cup of coffee and join on our suburban homesteading journey in May.

Like what we’re doing here? How about letting us know in the comments or on Facebook?

photo credit: Distant Hill Gardens via photopin cc

May Preview - Project TWH


Kill Mulch – Finally Getting Your Hands Dirty!

Finally! A part of Project TWH that actually involves something other than planning!

Let’s get your hands dirty!

Kill mulch, at its simplest, is a way to use the existing organic matter on the ground as nutrients for your new crops. The process basically kills (hence the name) all the living plants, grass, weeds, etc and spreads their nutrients into the soil through decomposition.

In this quick article, I’ll explain what kill mulch is, how it works and how to get it going on your suburban homestead. As always, I’ll take direction from Anna Hess in her book The Weekend Homesteader as well as throw in my two cents where appropriate.

What Is Kill Mulch?

I know I said kill mulch is a way of using existing organic matter as nutrients for your new crops. And that statement is a 100% true…it’s also quite vague.

You’re probably thinking “OK, so I’m using something that is/was growing on my land to provide nutrients for something new that’s going to grow on my land. Cool. But how?

Great question – the premise behind kill mulch is that it blocks the light from reaching grass and weeds, therefore killing them. The plants then die and rot in place producing a nutrient dense soil for future plantings.

How to Build Kill Mulch

Kill mulch – sometimes referred to as sheet mulch or lasagna mulch – is achieved by layering various substances.

You want to start with a compost. One that may contain weed seeds is permitted here. Next is a thick layer of light blocker – one layer of corrugated cardboard or a layer of twelve (minimum) newspaper sheets will do the trick.

Next, add a thick layer of weed-free compost. It is important that this layer is both thick and weed free. Remember that your plants’ will keep their roots in this layer for the first month or two until the cardboard or newspaper is broken down.

Finally, finish off the kill mulch with a layer of mulch – grass clippings or straw are perfect.

Why You Should Use Kill Mulch

Kill mulch’s biggest benefit is that it is a no-till approach. Aside from the labor involved in tilling a garden, tilling also has many drawbacks:

  • Erosion – Tilled soil can blow or wash away easily causing you to lose soil and reducing your garden’s fertility.
  • Loss of Soil Microorganisms – Bacteria and fungi are your friends! These wonderful items are important for plant growth and typically reside in the top three inches of soil. Tilling will destroy fungi-networks and move bacteria and fungi into different depths of the soil.
  • Increased Weeds – While a freshly tilled garden looks great at first, what you’re not seeing is the weed seeds that have moved to the top and are ready to sprout!
  • Soil Compaction – After that fluffy soil sees rain, it’ll compact down tight. Roots, seedlings and water will all have a tough time penetrating it at this point.

Wrap-Up On Kill Mulch

There’s the down and dirty on kill mulch. It’s a very effective process and, if done correctly, will result in some of the most fertile soil you can produce.

I used this approach, along with a woody bed/hugelkultur approach, on my new garden bed.

I laid down a little bit of compost and then dropped in layers and layers of newspaper to block the light getting to the grass underneath. The paper was then soaked endlessly – I left a hose on it for a couple of hours and allowed it to stay outside during rainstorms for a few weeks.

After that, I placed a thick (probably 6-10 inches) layer of wood down before filling the rest of the box with topsoil (I didn’t have enough compost). It will be interesting to see how the soil does in this area.

Please let us know any tips you have for building kill mulch in the comments or on our Facebook Page.

photo credit: London Permaculture via photopin cc

Kill Mulch