1

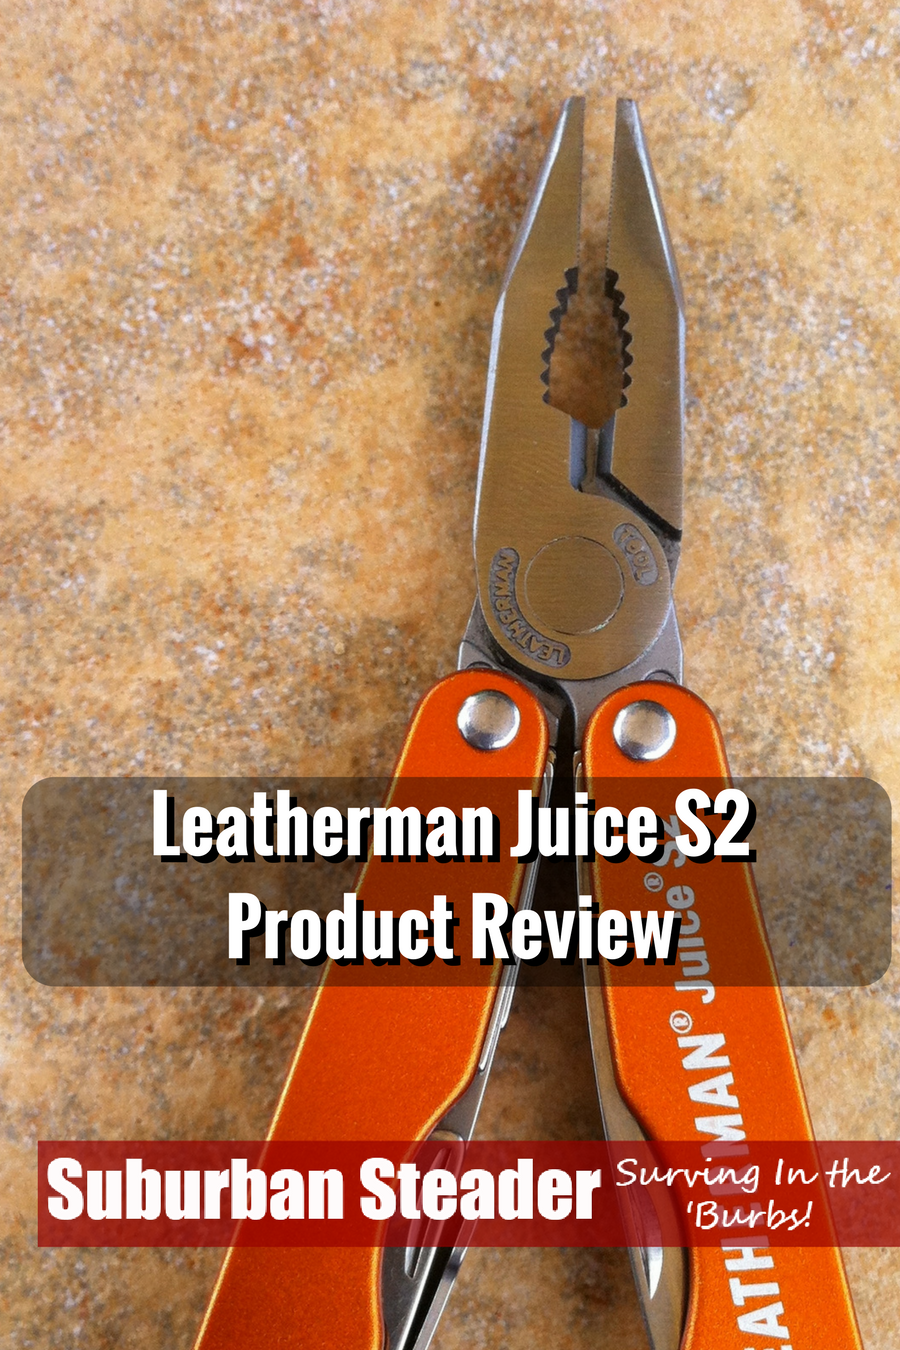
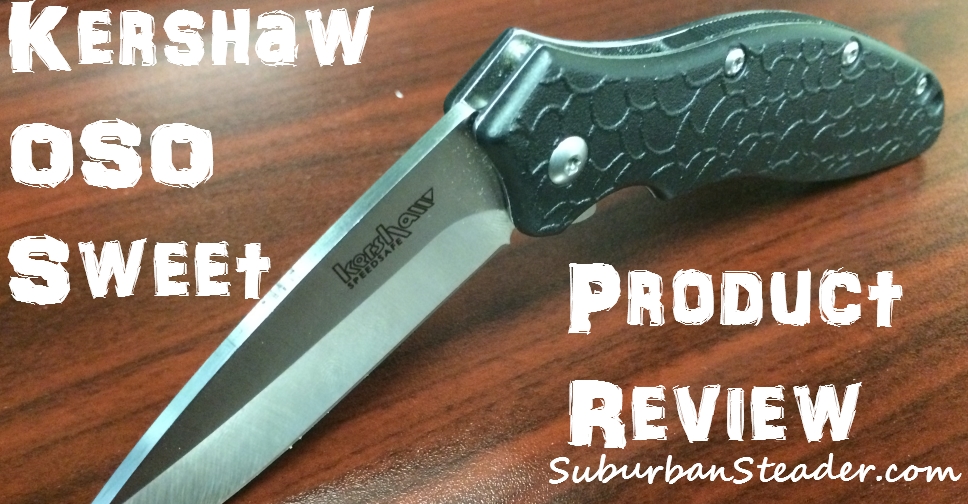
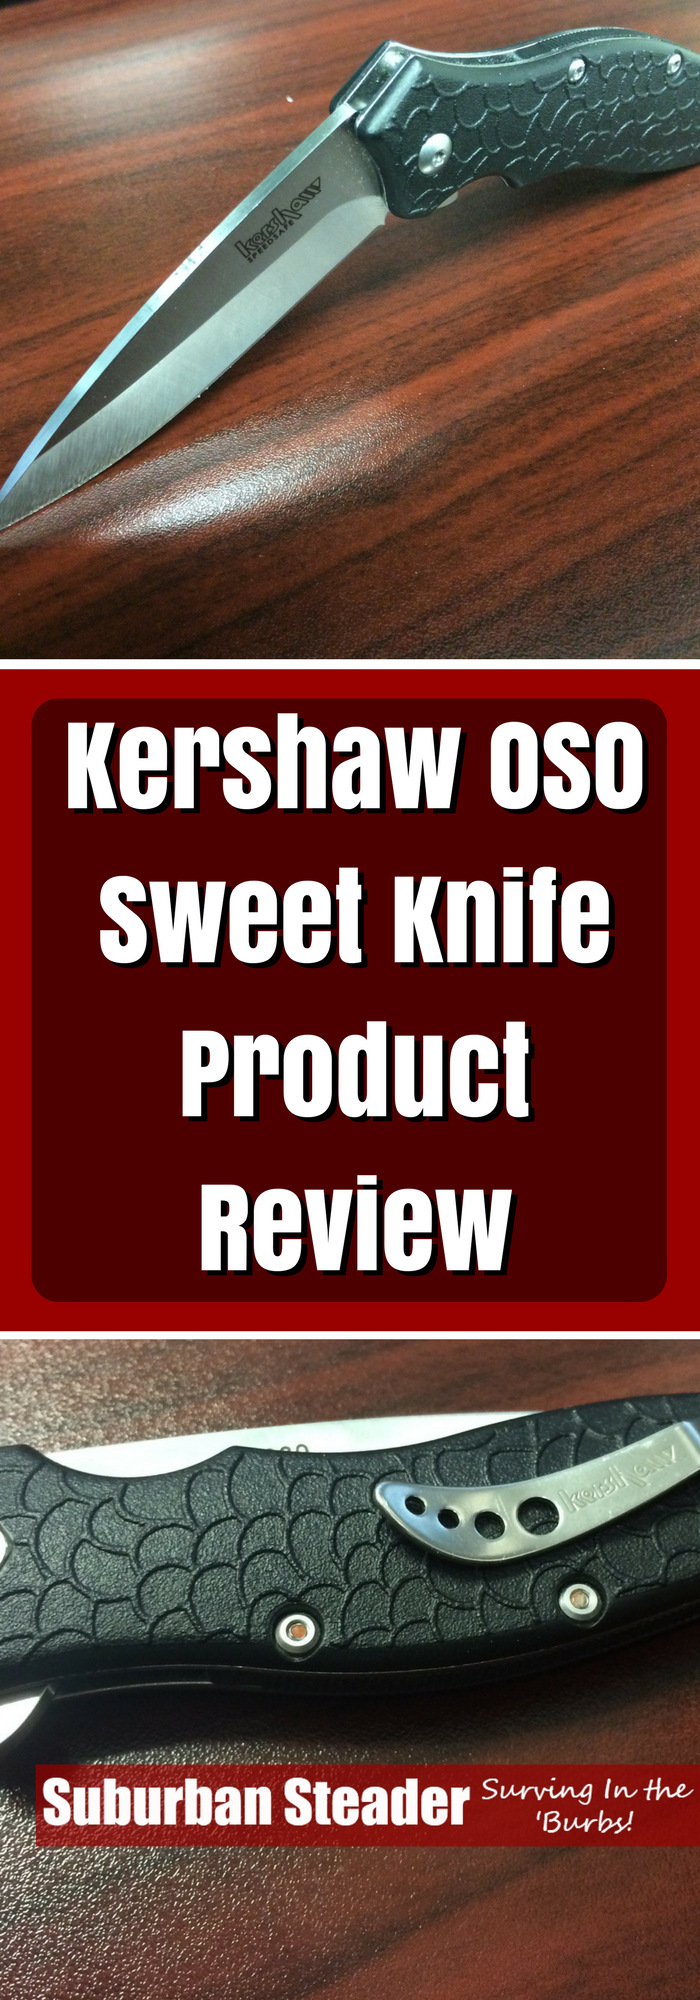
Kershaw OSO Sweet Knife (Product Review)

You know that I think every suburban homesteader should build their EDC in tiers and one of the items in the second tier is a good pocketknife.  I’ve been on the search for a low-cost EDC blade that held up to my demands and may have found it with the Kershaw OSO Sweet pocketknife.  I’ve been carrying this little guy around in my pocket for the last few months and decided it’s time for a review.

Kershaw OSO Sweet General Description

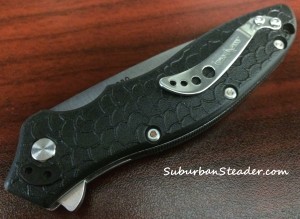
The Kershaw OSO Sweet isn’t going to win any awards for creativity or innovation.  It is, in the simplest sense, a locking pocketknife.  With that in mind, here’s the specs on the knife:

  • Closed length: 4.1 in. (10.5 cm)
  • Overall length: 7.25 in. (18.4 cm)
  • Blade length: 3.1 in. (7.9 cm)
  • Weight: 3.2 oz. (90.7 g)
  • Blade Material: 8Cr13MoV, satin finish steel
  • Handle Material: Glass-filled nylon
  • SpeedSafe® assisted opening
  • Liner lock (steel)
  • Reversible (tip-up/tip-down) pocketclip

The Pros

The Kershaw OSO Sweet met my first requirement for a pocketknife – cost.  I was able to buy one of these knives from Amazon for less than $20 (editor’s note: at time of publishing, it is selling for $21.77 on Amazon).  As you might imagine, the weight of this knife is also a big plus.  Coming in at a whopping 3.2oz (Editor’s Note: it came in at 2.98oz on my scale), this inexpensive pocketknife is light and you never really know it’s there.  In fact, I’ve reached down more than once just to make sure it’s still in my pocket.  The pocketclip is pretty sturdy, however, and I’ve never had a problem with it coming loose.

Kershaw OSO Sweet (Product Review)
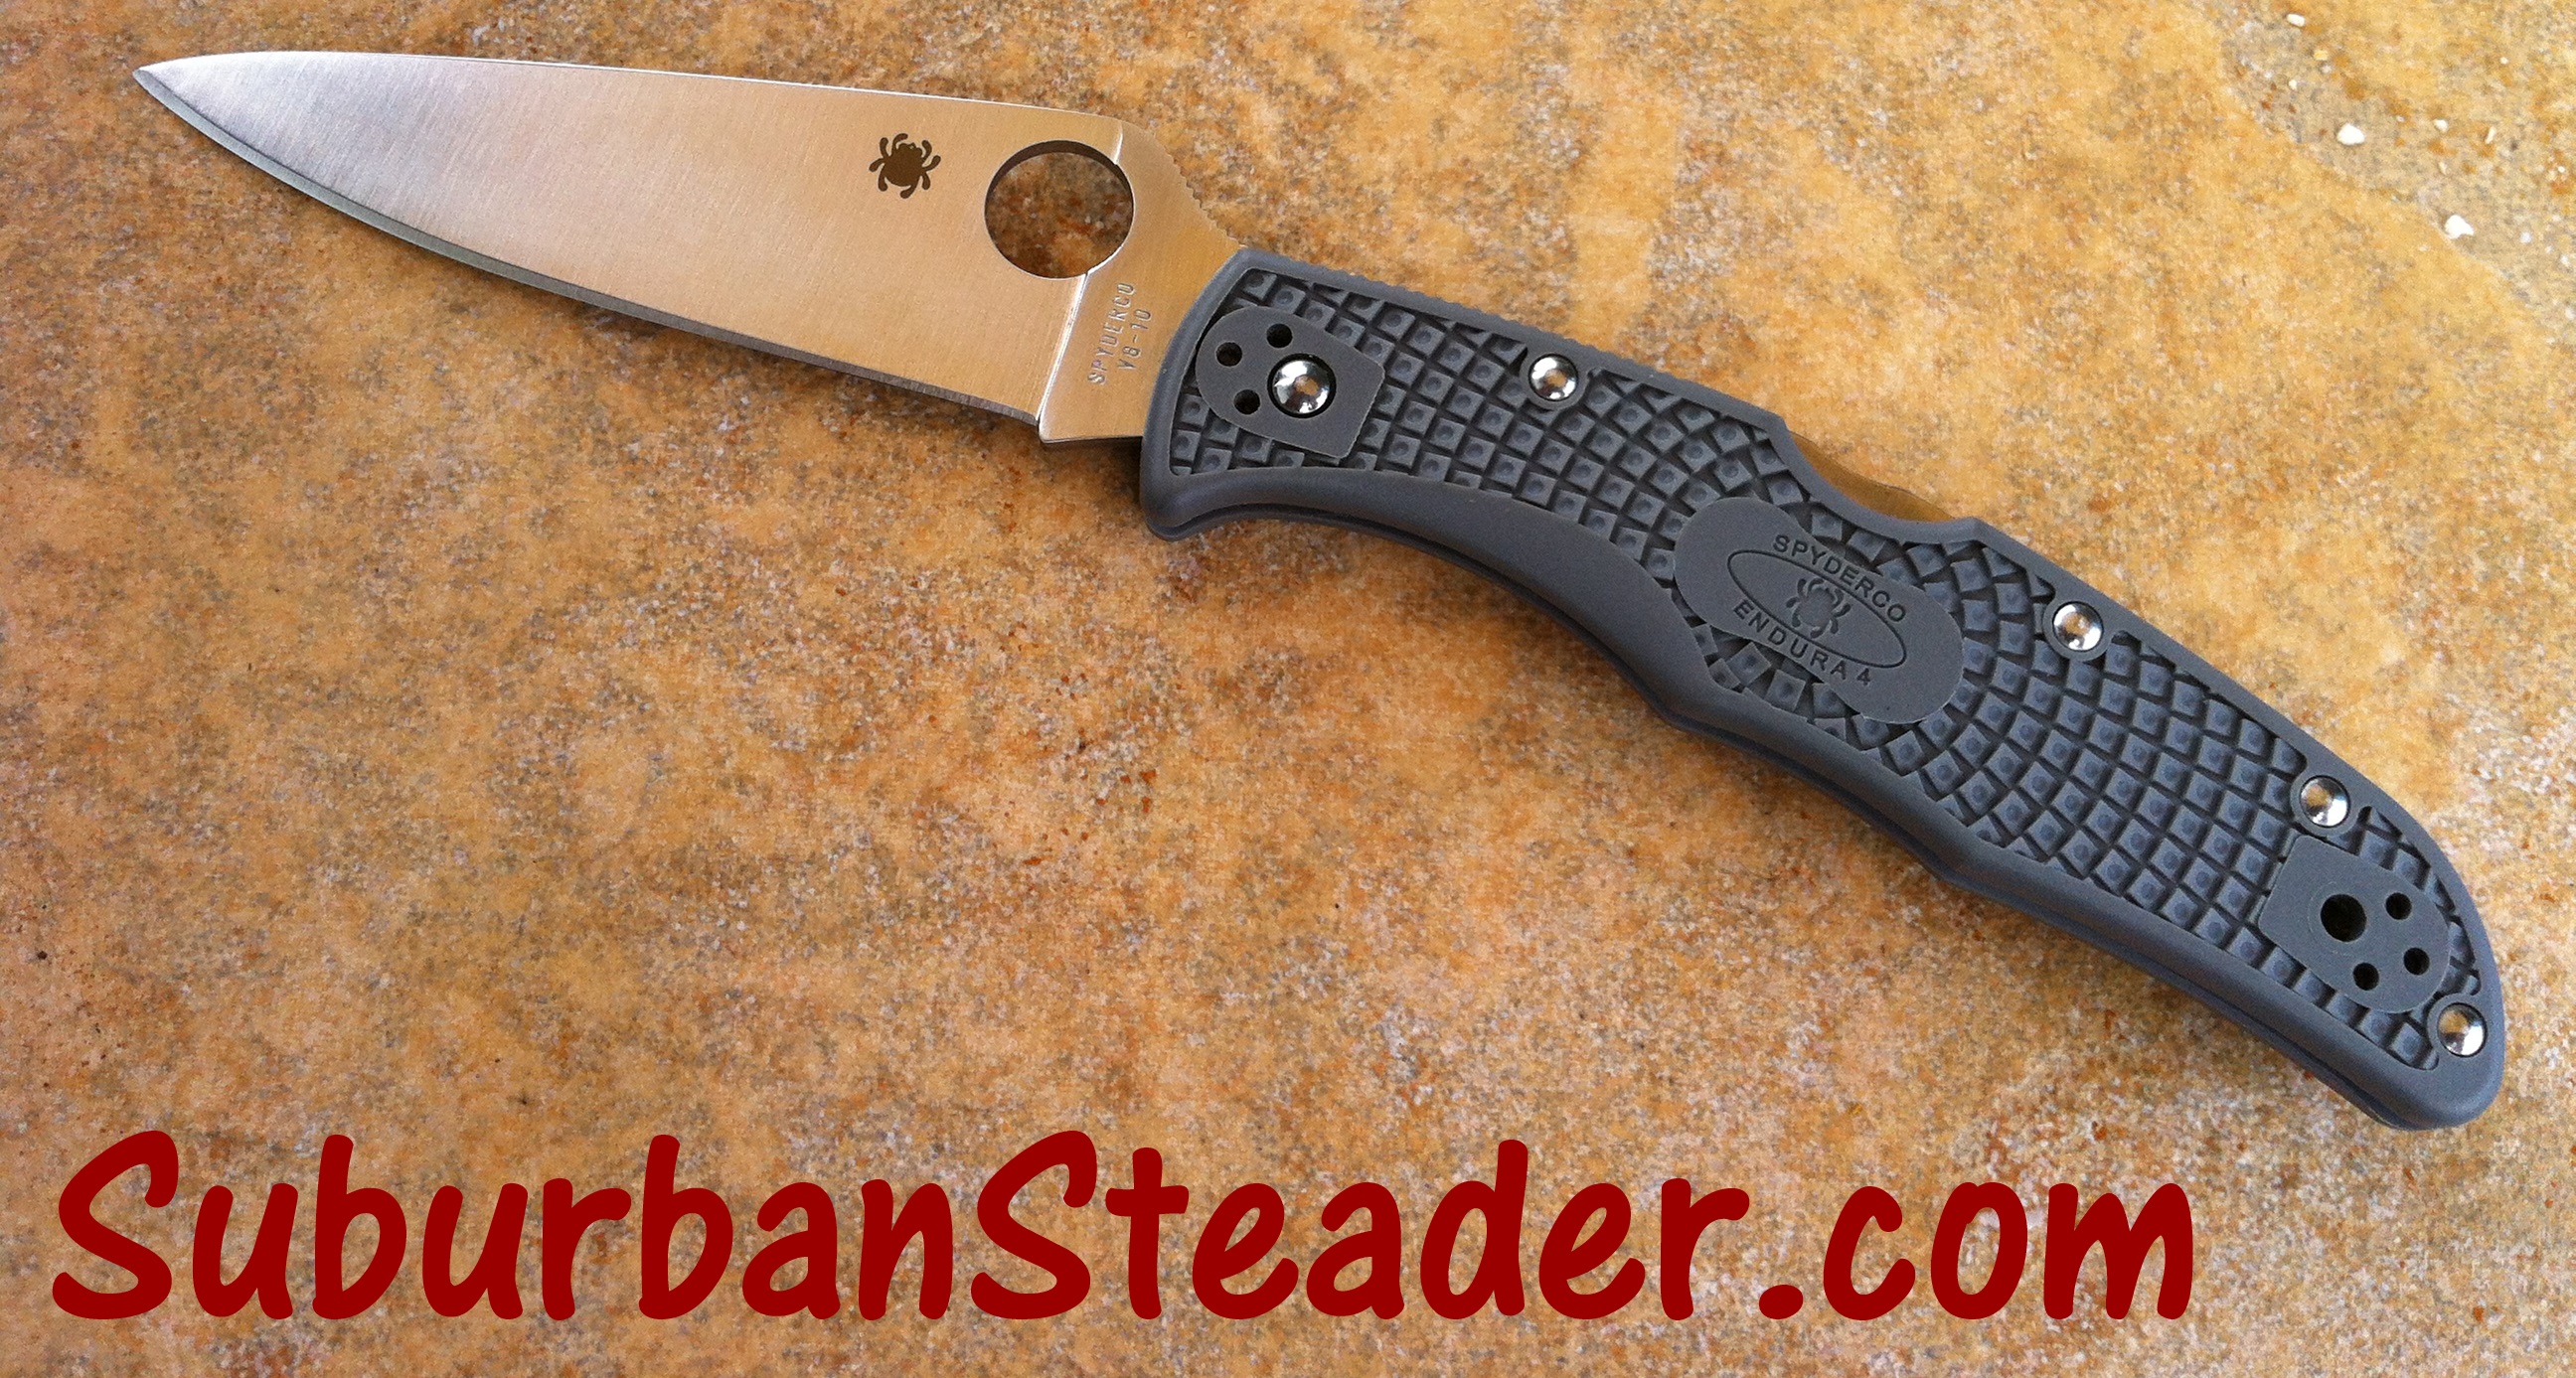
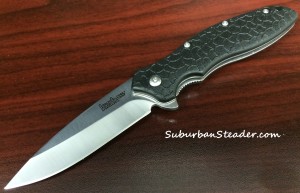
So the knife meets weight and cost requirements – but how does it handle?  The simple answer there is very well.  Let’s first talk about opening the knife.   The SpeedSafe® assisted opening functionality on this knife is simply awesome.  I can pull the Kershaw OSO Sweet from my pocket and have it ready for use with just a flick of my index finger.  The curvature of the body fits well in my hand – there is a hollowed-out portion of the body that my index finger sits in and the SpeedSafe® assisted opening tang acts as a kind of guard to prevent your hand from slipping forward during use.  The glass-filled nylon body has a fish scale pattern on it that provides sufficient grip.  It’s not as grippy as the pattern on the Spyderco Endura 4 FFG, but I find it more than sufficient for daily work.

The blade was quite sharp out of the box and Kershaw provides a lifetime sharpening policy for their knives if you are so inclined to use it (I prefer to sharpen my own knives).  Being that I’ve used this knife for EDC purposes, I’ve performed mostly normal, everyday tasks with it – opening letters, cutting cardboard, whittling wood and other similar tasks.  The blade has held up and hasn’t needed sharpening after about two months of daily use.  The 8Cr13MoV steel is apparently a Chinese version of AUS8.  I don’t have much experience with it, but the guys over at BladeForum.com give it a passing grade. I don’t have any experience sharpening it as it hasn’t needed it yet.

The knife itself is fairly innocent looking meaning that it “plays well” in an office setting like I am in.  In fact, the only time you will get a few odd looks is if you are quick on opening it – but it’s so fun to open!

[youtube_sc url=”9VMwI0_0iiI” title=”Kershaw%20OSO%20Sweet%20Pocket%20Knife%20Product%20Review” width=”559″ fs=”1″]

The Cons

I have to be perfectly honest here – for the price, it’s very hard to find major flaws with the Kershaw OSO Sweet.  It’s almost disposable at this price and makes dealing with imperfections or faults trivial.

That being said, my biggest complaint about this inexpensive pocketknife has to do with the part I probably love the most about it – the opening functionality.  The SpeedSafe® assisted opening function is awesome but also has the potential to lead to serious injury.  The blade comes flying out and, while you get used to it rather quickly, I have snagged my shirt and the heel of my hand on the tip of the blade.  It’s only a minor problem as you figure it out pretty quick, but it can be a safety issue.

The lack of gimping on the blade is a bit disappointing.  There is a hollow created for your thumb and the recess in the middle from where the blade spins gives your thumb decent traction, but I would have liked to see some solid gimping in place.

Kershaw OSO Sweet (Product Review)
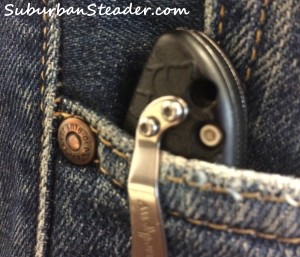
My other complaint – and this one is even more minor – has to do with the clip.  First, the clip is solid.  I’ve never had a problem with it not holding the knife in place.  That being said, I found two small flaws in it.  First, it can only sit on one side of the knife.  This design constraint is a non-issue for right-handed folks, but lefties may run into issues with how they want the knife to release from their pocket.  Second, I would prefer the clip to sit higher on the knife, giving less visibility to it in your pocket.  It’s a minor, minor detail but worth noting.

The last issue is that Kershaw makes the Kershaw OSO Sweet in China.  I prefer to buy American  made products when possible.  But, given its cost and surprisingly quality for that cost, I have no problem owning a foreign-made product, especially when it’s produced by an American-owned company.

Overall Impression

Kershaw OSO Sweet (Product Review)Bottom line, the Kershaw OSO Sweet has the best bang for the buck out of any pocketknife I have ever carried.  It’s light, sharp, locks well and doesn’t grant you “Tacticool” status when you use it in an office setting.  Outside the office – I have taken it hiking and also used for yard work – it has performed quite well.  Creating shavings for fire starting, making sparks off a ferro rod (the spine is rather stiff and at a nice right angle), cutting rope and zip ties, and working with plants have all been easily achieved with this inexpensive pocketknife.

I would recommend the Kershaw OSO Sweet for anyone looking for a good quality, low-cost EDC pocketknife.  To further that recommendation, I have to mention that I, in addition to carrying it as my EDC blade, I also have one included in my fire kit which I carry with me in my EDC bag.  This kit gets moved around from EDC bag, hiking/camping backpacks, and is on me just about all other times.  It’s that good!

Do you have any experience with the Kershaw OSO Sweet? Want more information? Drop me a line in the comments and let me know!

Kershaw OSO Sweet (Product Review)

Kershaw OSO Sweet (Product Review)


21 Prepper Skills You Can Improve This Weekend

I’m not sure what it’s going to be like by you this weekend but here, on Long Island, it’s the middle of winter.  We’re expecting a cold, raw weekend with some snow possibly coming our way.  It’s not really going to be outdoors weather, although learning how to survive in this kind of weather wouldn’t be a bad idea.  But, with this kind of weekend in mind, I got to thinking about how I could improve as a prepper.  I came up with this list of prepper skills that you (and I) could explore and improve over a weekend.  Make me one promise – don’t just read, do!

1. Cook Something

Cooking is one of the most important survival skills and, in my opinion, is one of the most important prepper skills you can master.  You all know that food is part of the Rule of 3’s – 3 minutes without air, 3 days without water, 3 weeks without food – but what you probably also realize is that food can be more than just energy for people.  It can be a comforting item, making those stressful situations a little better.  So learn how to cook.  I’ve got a few recipes on here that you can try including:

2. Go Shooting

Want to blow off some steam this weekend and have a good time doing it?  Then hit the range!  You’re sure to have a good time no matter if you’re shooting a handgun, zeroing in your rifle or popping clays with your shotgun.  Being that ammo is expensive, you could also improve your prepper skills by doing some tactical training at home.  It’s free and could be quite beneficial to you if bad times come knocking.

3. Improve Your DIY Skills

Preppers and suburban homesteaders meet at the crux of DIY.  Both sides have an innate ability to fix whatever is broken or create something out of random odds and ends.  Undertaking a project like the bullet casing earbuds I wrote about recently will improve your abilities and spark your creative nature.  You’ll start looking at common material around the house and figuring how your new-found prepper skills can use it to make something useful.

4. Start A Fire

No matter who you ask, the ability to start a fire is one of the top prepper skills – or survival skills in general – that everyone should have.  Spends some time learning how to start fires with all of these fire starters this weekend:

5. Get Your Preps Organized

Preparedness Planner Product ReviewBeing organized now will help you avoid running around like a maniac with all hell breaks loose.  I know, you’re thinking “Really? Being organized is one of the prepper skills you’re suggesting?”  Yup, I am absolutely advocating getting organized now.  There’s multiple reason to do so including having a much better understanding of where your weakness are and how you can improve your preps.  I recommend using this planner to get your preps in order.

6. Learn The Art Of Canning

As any prepper knows, food preservation is one of the most important prepper skills you can have.  Learning how to can different kinds of food will help you build your preps up and also save you money.  I’ve actually seen canning save money in multiple ways – people are putting food away to be eaten at a later time which saves money and they usually buy food in bulk when they are canning which reduces the overall food bill when you look at it on a per meal basis.  Plus, canning is just a great old-school skill to have in your repertoire.

7. Dutch Oven Cooking

So, you want your prepper skills to be a little more rustic, do you?  Why not try dutch oven cooking this weekend?  Cooking in a dutch oven is a great skill to have if the power goes out or if you’re camping.  Plus, there is just something so much tastier (to me, anyways) about food cooked in or on cast iron than food cook with regular kitchen equipment.  Get outside, stoke the coals and learn how to make food like your pioneering ancestors used to!

8. Start A Compost Pile

Picture your garden like a bank.  The crops are your return on investment and the soil is your principle.  How do you increase your principle?  You increase the value of the soil. And you do that by adding quality compost to the garden.  Building a compost pile is one of the prepper skills that I believe every prepper – from suburban homesteader to ultra hardcore survivalist – should have in their back pocket.  It’s super easy to do and can return huge profit to you.

9. Get Your Finances In Order

You shouldn’t be prepping if you are in debt.  In fact, what use is there in prepping if you are building up your debt.  Spend the weekend getting your finances in order to achieve financial independence.  You’ll take stress off yourself, your marriage and your career.  Not to mention, you’ll be able to buy some cooler preps now that you have more disposable money because you’re not paying those monthly bills!

10. Build A Black Out Box

This one is so simple that you should be ashamed if you haven’t done it already.  The most common event you are going to need to prep for is a power outage.  They occur more often than hurricanes, snowstorms, tornadoes or zombie apocalypses.  And building a black out box is so easy.  Spend a few hours with the kids this weekend and knock it out.  You’ll thank me later.

11. Outfit Your Automobile EDC

You spend a lot of your life in your car, whether its driving to and from work and taxiing the kids around to whatever activity they have next.  Are you prepared for an emergency if you got caught in your car?  Not sure?  Then maybe you should take a few minutes looking into your automobile’s EDC this weekend and making sure you can handle what kind of travel-trouble may come your way.

12. Get Your HAM License

Communication is one of those prepper skills that everyone talks about but very few people practice.  I’ll be the first to admit that communication is one of, if not the, weakest area of prepping for our family.  A good way to improve this skill is to get your HAM license.  Again, I can’t speak from personal experience, but everyone says it’s a fairly easy test.  They all recommend using a study guide prior to taking the test.

13. Read A Book

Want to brush up on some prepper skills, get lost in a good story or learn about the biology of your garden?  Then read a book.  Reading books is a great way to escape the world for a while and they also provide a wealth of knowledge.  You can go with a great fictional story like Glen Tate’s 299 Days series or jump into something more non-fiction like Jim Cobb’s “Prepper’s Long-Term Survival Guide.”  Either way, you won’t waste your time and might even learn something.

14. Go Hiking

Hiking as a prepper skill?  Believe it or not, yes.  Going out hiking puts you in the outdoors.  You get used to walking around with a pack on (ever actually spent time lugging your BOB around?), you learn what it’s like to be in the woods and you get some exercise.  All of those items are beneficial to the prepper.  Just make sure you’ve got sturdy footwear when you head out.

15. Build A Worm Bin

Remember how I said compost how you increase the principle in your garden?  Well worm castings and worm tea help as well.  It is super easy to build a worm bin and the return on investment is terrific!  For maybe an hours worth of work, you’ll be able to get pounds and pounds of great organic matter for your garden not to mention the awesome ‘worm tea’ that you can use to fertilize your fruits and vegetables.

Homemade Bread - 21 Prepper Skills You Can Improve This Weekend
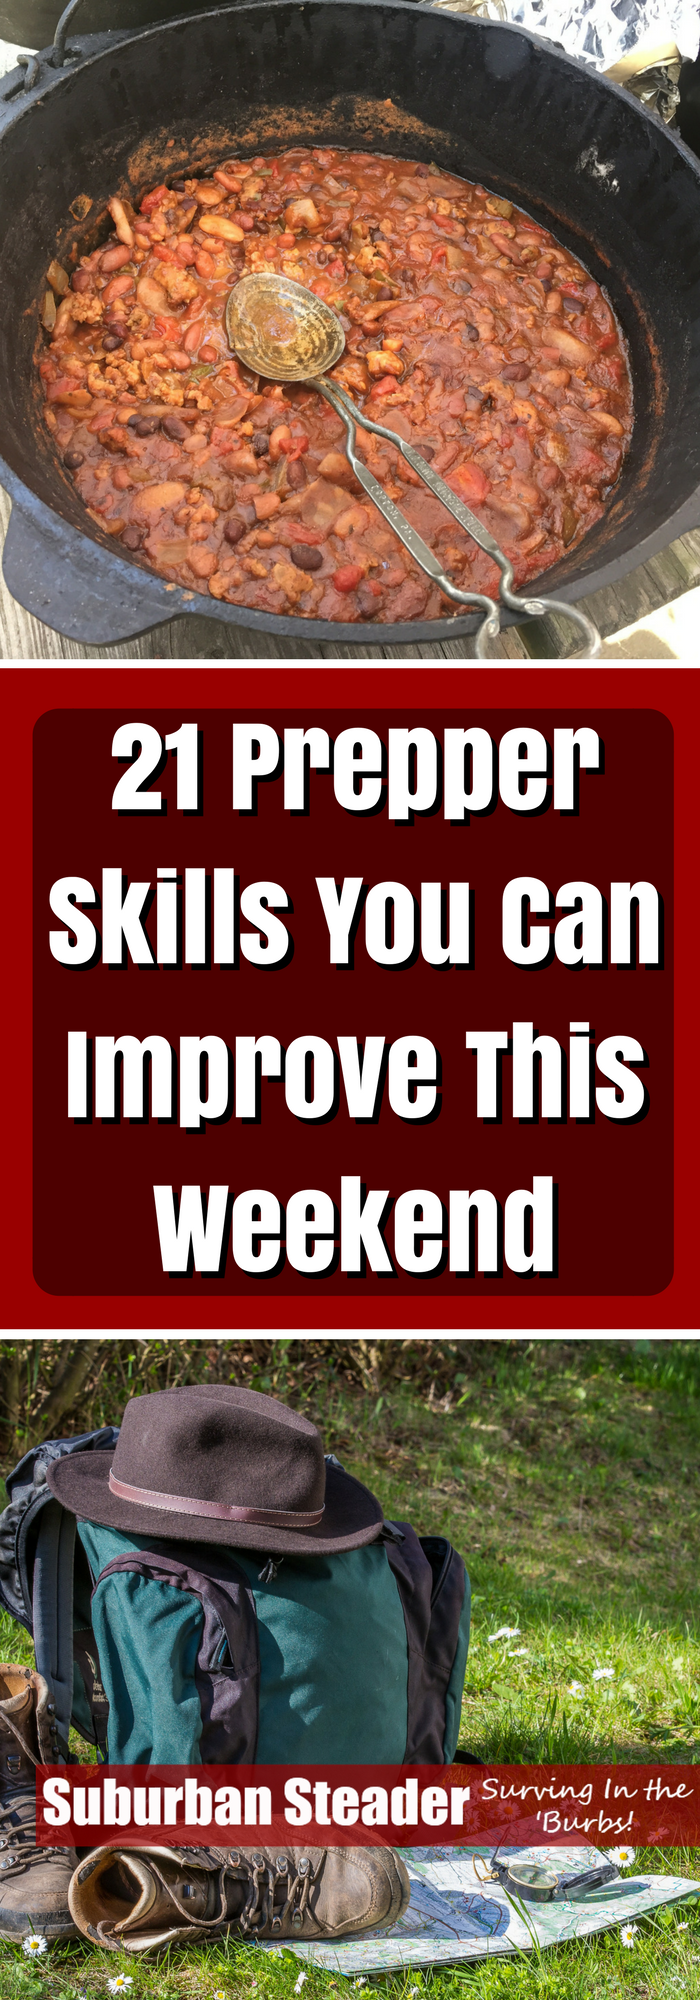
16. Bake Fresh Bread

My buddy Mike over at The Backyard Pioneer got me into baking bread at home.  I cannot begin to describe how comforting it is to smell bread baking in the oven.  And the taste! Oh, the taste!  You won’t get this kind of taste out of store-bought bread.  Baking bread probably isn’t tops on the list of required prepper skills but there is something so very

17. Perform A Site Survey

Still not sure what to do with your suburban homestead?  How about performing a site survey this weekend?  You can knock it out in a few hours and it will give you a great idea of your land, what you can and cannot do on it and where to plant different items.  It also provides a map of your property for any future developments you want to do.

18. Outfit Your Personal EDC

Prepping is all about being prepared and the way you guarantee you’re prepared when you’re just walking around is to be fully outfitted in your Every Day Carry (EDC).  You should take some time this weekend to think about your EDC methodology consider what you’ll put in your Tier 1 and Tier 2 kits.  Regardless of where they fit into your EDC kits, I recommend the following individual items having a home in your EDC:

19. Learn About Your Garden Zones

Learning about where you live is just as important as a skill for gardeners and homesteaders as understanding how your crops grow.  Prepper skills aren’t always hard skills; sometimes it’s about educating yourself.  Learning which USDA zone you live in will help you better understand which crops will grow best and when your first and last frost are.

20. Sharpen Your Knives And Tools

A sharp knife is a safe knife.  I can personally tell you that I have had more accidents with a dull tool than a sharp tool – to the point where I almost cut my fingertip off once.  Spending a weekend sharpening your knives and tools would be a great way to improve your prepper skills.  Not sure how to sharpen something? Check out this instructional video from Patrick at MTKnives.net.

21. Plan Your Spring Garden

There is absolutely no better way to shake the bone chill of winter on a cold, snowy night than to flip through seed catalogs while you plan your spring garden.  Planning a garden is both exciting and therapeutic.  You can explore all different kinds of produce that you might want to grow and also relax knowing that you won’t have a push in the spring to get your seeds on order and your planting all planned out.


So there you have it – 21 great ways you can improve your prepper skills this weekend.  Most of these tasks are free or fairly low in cost.  All of them will make you a better suburban homesteader and a better prepper.

What are you going to try?  Let us know in the comments below.

21 Prepper Skills You Can Improve This Weekend

21 Prepper Skills You Can Improve This Weekend


Winter EDC Upgrade Overview

With the impending Snowmaggedon bearing in on the Northeast – well, that’s what the meteorologists would like you to think – I thought it was a good idea to do a little winter EDC upgrade to make sure I’m covered no matter what happens.

Winter EDC Upgrade Methodology

I’m fortunate in the fact that I only work twenty-five (25) miles from my house. In addition, my commute is through mostly populated areas – areas with restaurants, hotels, stores, etc – not to mention homes of friends and family. All that means that, even in a SHTF scenario, I only have a 25-mile maximum walk home.

I’ve taken this information into account while planning my winter EDC upgrade. The essential requirements for my kit are (in order): warmth, water, food and shelter. As I’ve discussed, shelter will be in relative proximity no matter where I’m stranded on my daily commute, even if it’s my car for the night, so I haven’t spent much time on it1. Warmth, water and food is where I put most of my effort.

Main Compartment

During normal weather conditions, I carry the following items in the main compartment of my Maxpedition Jumbo Versipack EDC Bag.

Winter EDC Upgrade

As you can see, it was very light on the warmth department. To preface this section, I have to note that I do keep an eye on the weather. If snow or cold weather is in the forecast, I dress accordingly – warm clothing, proper footing, protective coats and hat/gloves. What is in my EDC kit is in addition to what common sense dictates I should have on me. In order to increase the ability to stay warm, I’ve changed the contents of my main compartment to these items:

Winter EDC Upgrade

  • Winter Hat – heat is lost primarily through your head, so this one is a no-brainer2
  • Wool Socks – important to keep those feet warm; no one wants frostbitten toes3
  • Radio w/earpiece – allows you to keep in touch with folks and also has weather stations to keep up with reports
  • Goggles – Ever tried to walk through blowing snow? My eyes will thank me for these
  • Balaclava – If it’s very cold, I’ll be able to keep my head and face warm; no frostbite on the nose
  • Gloves – Cold hands are never fun4
  • Glove Liners – Ideal for those colder days
  • Fleece Pullover – An additional layer to keep me warm

I’m fairly confident that these winter EDC upgrade items will keep me warm even in the worst of scenarios.

Side Compartment

The side compartment is stayed pretty much the same with a flashlight and compass. I also threw in a pair of iPhone headphones (the ones with the mic) so that I can send/receive phone calls (assuming the grid is still up) while keeping the phone tucked away as much as possible. I’ve found (through numerous snowboarding trips) that keeping my iPhone in the cold reduces its battery life faster than if it’s tucked into warmer areas of my clothing. When I don’t have my work bag on me, my Altoids kit also goes in here.

Winter EDC Upgrade

Front Compartment

My winter EDC upgrade involved slightly modifying the front compartment of my EDC bag. I already had a large folding knife, some tea, a County Comm EDC Kit and another flashlight. The tin that the County Comm EDC Kit comes in could act as a cup for boiling water if necessary. In addition to these items, I’ve added some food – walnuts and almonds. I don’t need much to last me, although I have thought about adding a different water container (one with a cup for boiling water) and a small Mountain House bag for one meal.

Winter EDC Upgrade

Flap Pockets

The flap of the Maxpedition Jumbo Versipack has two pockets – one on the top and one on the flap. In the flap, I have a Write In The Rain notebook5 and the manual for the handheld radio I carry. I carry my fire kit in the top compartment. I really don’t expect to use it, but if I get stuck in the car overnight, it may come in handy to start a fire both for warmth and state of mind.

Winter EDC Upgrade

Conceal Carry Pocket

Due to the wonderful restrictions placed upon us in the People’s Republic of New York, I cannot legally use this pocket for what it was intended for. Instead, I occasionally carry a larger notebook in it. And there’s always a bandana in there despite the fact that there’s always one in my pocket. I did not change anything on this pocket during my winter EDC upgrade.

Conclusion

I’ve transformed my EDC bag from a warm weather bag to one that will help me survive almost any cold weather scenarios. I suggest you perform a winter EDC upgrade on your gear now that winter has fully set in.

What will you carry? Let us know in the comments or on Facebook!

NOTES:
1. My EDC gets updated slightly if I’m taking a longer trip
2. I also keep a heavy wool hat in my car
3. I also keep a heavy pair of boots in my car – important when you wear dress shoes to work most days
4. I also keep two pair of heavy winter gloves in my car
5. I always have a been on my person

Winter EDC Upgrade


EDC Tier 2 – Necessary Tools

I’ve previously discussed tiered EDC methodology as well as what I consider ‘must have’ EDC items.  Continuing with the EDC series, I’ll discuss items on my EDC Tier 2 list which are commonly considered ‘necessary tools’ in an EDC environment.    These items are on my body 98% of the time and, while I don’t feel completely naked without them, I do feel quite uneasy most of the time I’m not carrying them.

EDC Tier 2 – What It Means

EDC Tier 2 items are items I leave the house without only on the rarest of occasions.  These items, for the most part, are on the “No Fly” list meaning I wouldn’t be able to get through airport security with them.  Despite this restriction, these items have tremendous utility and I use them all almost daily.

The five items in this list provide protection, utility, fire, entertainment and data transfer capability on a daily basis.  They include:

Pocket Knife

If you ready any prepper/survival/homesteading blog, you’re bound to run across numerous articles on pocket knives.  They seem to be a mainstay in most people’s base must haves and my EDC Tier 2 list is no different.  I constantly have a pocket knife on me with the exception of when I’m flying.  As I’ve discussed before, I typically carry the Spyderco Endura 4 FFG which is a simple, yet very functional pocket knife.  I use this pocket knife for everything from opening mail at the office to whittling sticks on the trail when I’m hiking.  If you don’t currently carry a knife, I cannot completely explain to you how often you will use one.  Take my word for it – you NEED an EDC pocket knife.

Multitool

I recently reviewed the Leatherman Juice S2 multitool that I carry as part of my EDC Tier 2 kit.  As useful as a pocket knife is, sometimes there are just times when you need more than a blade.  A multitool will give you pliers, screwdrivers, scissors and can openers in addition to other tools.  The functionality is almost limitless and allows you to get most emergency jobs done without carrying around a full toolkit.  I highly recommend the Leatherman Juice S2 for its size and convenience, but any multitool will meet your needs as long as you have a variety of tools contained within it.  If push came to shove and I could only carry either a pocket knife or a multitool, I’d go with the multitool for the simple reason that most multitools have blades built into them.

Small Lighter

Fire provides light, warmth, cooking ability and, possibly most important, comfort.  For that reason, I always carry a small lighter so that I can start a fire if need be.  The small Bic lighters are extremely tiny and can be carry in the fifth pocket of a pair of jeans without knowing it.  For that reason, they are a great edition to my EDC Tier 2 kit.  While I don’t smoke, I have on occasion provided a light for a smoker.  This act usually provides me with a way to start a conversation with a new person.  Meeting new people allows me to network and, in a tough situation, may produce allies or information.

Headphones

Headphones are definitely more of a comfort item than a ‘must have’ in terms of survival.  They have become part of my EDC Tier 2 kit for a few reasons.  First, when travelling, it is much easier to listen to music, podcasts, videos, etc on your smart phone without annoying those around you when you have a set of headphones.  Secondly, I like to keep my phone conversations to myself and the Apple iPhone headphones that I carry have a built in microphone which allows you to have a conversation without holding your phone or talking loudly.  Again, these are more of a comfort item but their small size and utility make them a must have for me.

USB Flash Drive

In my line of work, I’m constantly working between multiple computers.  A small USB flash drive fits easily in my pocket and allows me to easily move between workstations without problem.  I keep some important personal documents on this USB flash drive as well (encrypted, of course, in case I lose it).  These personal document may come in handy in a situation where I’m stranded or unable to get to the original documents.  They include PDF versions of driver’s licenses, birth certificates, bank account records, credit cards  and passports among other items.

EDC Tier 2

Conclusion

My EDC Tier 2 kit contains some very basic items that have a lot of functionality.  While I don’t need these items at all times, I do feel that I need must have them on a regular basis.  I highly recommend building an EDC Tier 2 kit similar to the one described above for your daily use.

What items do you consider part of your EDC Tier 2 kit? Let me know in the comments.

In case you’re interested, here’s where you can buy any of the items listed in this post:

  • Spyderco Endura 4 FFG Pocket Knife ($66 at Amazon.com)
  • Leatherman Juice S2 Multitool ($41 at Amazon.com)
  • Small Bic Ligther (at any drug store or grocery store)
  • iPhone Headphones ($29 at Apple.com)
  • SanDisk 8GB USB Flash Drive ($9 at Amazon.com)

EDC Tier 2


Prepping With Kids – It’s The Little Things

Prepping can be a lot of things – a means of survival, a way to keep your family safe or simply a fun hobby with a beneficial outcome.  Sometimes preppers, especially those of use with kids, can get so consumed with the big picture that we forget the simple fact that prepping with kids means we’re more apt to experience the little things than the big things.  I was reminded of these little things over the last few weeks.

Life Is Getting Fun

My wife and I have been blessed with twin daughters.  At four years old, they are just now getting to the point where I can start taking them into the outdoors for more than ten minutes.  I’m trying to use this time both to instill a love for the outdoors and teach them different survival and outdoors skills.  This process is, admittedly, a slow one but it’s one all of us are starting to truly enjoy – it’s very hard to tell who is more excited to go hiking every weekend!

Part of the process is letting kids be kids.  Typically we walk into the woods for twenty minutes or so and find a nice place to have a break, complete with a little snack.  I use this part of our trip to reinforce the ‘pack in, pack out’ mentality and we make it a point to pick up any extra trash we see.

After our snack, we continue on some more.  In most cases we look for a cool place to stop and let the girls run around.  In order to keep these trips fun (and keep the girls coming back), it’s important to allow them to have some kiddo time where they can run around and use their imagination.  They love ‘exploring’ on their own with the only rule being they have to stay within eye sight of me.  We’ve also started to build geocaching into our trips – it’s both exciting for the girls to find ‘buried treasure’ but it’s also teaching them navigation and situational awareness skills.

I was reminded  during one of these play sessions that prepping with kids means being prepared for the little things.

Kids Will Be Kids

On one of our hikes, we were exploring the coast of Long Island Sound.  Because it was low tide, there were a ton of tidal pools around and the girls were begging to explore on their own.  I, of course, encouraged it.  They took this opportunity to take their shoes off, run through the tidal pools, try to skip rocks and run onto the little sandbar (which they called their island).  They had a blast running around and I had an equally fun time watching them.  Side note – watching four-year olds try to skip rocks may be one of the funniest and cutest things I’ve ever seen!

Prepping With Kids

When it was time to go, I was wiping the sand off their feet before putting their shoes on when one of my rugrats started howling.  Taking a closer look, I realized she had cut her foot open during her adventures.  I can only assume it was on a jagged sea shell as I was pretty diligent about looking for broken glass, metal or anything else that may have been present from unsavory previous visitors.

A situation like this one would have been a bit more chaotic in the past.  But, since I had my EDC Bag and my Altoids EDC Kit (more on that in a future article), I was easily able to take care of it.  I flushed out the cut with some fresh water, applied some anti-bacterial cream and a band-aid.  Her shoes held the band-aid in place perfectly and she was able to walk without comfort.  We were good to go.

Prepping With Kids Pays Off In Multiple Ways

Being able to treat my little lady paid major dividends for me.  First and foremost, I was able to take care of my kiddo – that’s a primary concern for any parent.  But, more importantly, it gave her confidence that being prepared is a good thing and it gave me a way to talk about being prepared with her – “It’s a pretty good idea that daddy carries this stuff with him, huh?”  On a personal note, it helped me due to the fact that we were about a quarter to half mile from the car and I would have had to carry her back if I hadn’t been able to bandage her up.  She’s not heavy, but the terrain was sandy with large rocks, not the easiest place to walk when you’re carrying a child.

Personal reasons aside, being able to take care of my daughter and have a chance to promote being prepared were well worth lugging in my ‘man purse‘ with some key pieces of kit.  At the end of the day, she was happy that Daddy took care of her boo-boo, I was happy that I was able to take care of her and we were able to bond over something that could produce a lifetime of good habits – both exploring the outdoors and being prepared while you do it.


What are your experiences prepping with kids?  We would love to hear your stories in the comments or on our Facebook page!

Prepping With Kids


Streamlight Stylus Pro Product Review

Light – it’s the often the difference between getting out of a dangerous situation and running into big problems. Be it fire or pure illumination, light is a key ‘must have’ in most precarious situations. From an EDC perspective, the need for light is almost a mandatory. In order to meet that requirement, I carry the Streamlight Stylus Pro flashlight.

Specifications

Before we get into the pros and cons of this flashlight, let’s lay out the specifics of the product (from Streamlight website):

Streamlight Stylus Pro

  • C4® LED technology (50,000 hour lifetime)
  • Unbreakable and scratch resistant polycarbonate lens
  • C4® LED (white): 1,033 candela peak beam intensity; 48 lumens measured system output; 6.25 hours runtime
  • Powered by two “AAA” alkaline batteries
  • Push button tail switch – momentary or constant on operation
  • O-ring sealed, shock proof and drop-tested construction
  • Water resistant per IPX4; in accordance with specification EN 60529:1992
  • Tear resistant nylon holster
  • Unbreakable pocket clip
  • L x D: 5.3″ x .6″ (134 x 15 mm)
  • 1.64 oz (46.9 g)

The Pros

There’s a lot to like about this little guy.

Size & Weight

The Stylus Pro is a just about the size of a thick pen and doesn’t weight much more. That makes it very easy to carry and allows it to be comfortably tucked into a shirt or pants pocket. The addition of the strong pocket clip makes it stay in place very nicely.

Streamlight Stylus Pro

Tail Switch

The push button tail switch makes momentary use very easy. This trait is great if you’re trying to signal people (Morse Code, etc) or if you are in a situation where constant light may give away your location.

AAA Batteries

One of the greatest things about this handy little flashlight is the fact that it runs on two (2) AAA batteries.  Other flashlights run on harder to find battery sizes like a CR123A.  You can find AAA batteries anywhere which makes this flashlight easy to run.

Lumens

This handy little flashlight pumps out about 48 lumens of light with a full battery load. While that is not, quantitatively, as high as some of the high performance lights on the market, it’s more than enough for most EDC situations. It’s important to remember that this type of light is being created only by two (2) AAA batteries. This performance item is not something that can be described well – it must be seen to be fully appreciated.

Streamlight Stylus Pro

The Cons

There is only one thing I don’t like about this flashlight and that is the ability to put it in constant mode. The tail switch, while great for using in a momentary setting, has a very high actuation force needed to switch it to a constant mode. Likewise, switching to off requires high pressure to turn it off.

Overall Impression

Despite the tough actuation pressure to turn it on or off, I highly recommend the Streamlight Stylus Pro. Its small size and solid construction make it a great EDC flashlight. I keep this flashlight in my EDC bag only because I always have that bag with me. When there are situations where I don’t have my EDC bag, I have no problem carrying this flashlight in a pocket.

I highly recommend the Streamlight Stylus Pro if you’re looking for a good quality, inexpensive flashlight. You can find one for around $20 on Amazon.com.

Are you a Streamlight Stylus Pro user? Do you want more information on this great little tool? Give me a shout in the comments below and I’ll be sure to respond!

Streamlight Stylus Pro Product Review


Leatherman Juice S2 Product Review

If you’re anything like me, you see the need to carry more than just a sharp blade on your person at all times.  There are times when you need to grip something, cute wire or turn a screw.  That’s where a multitool comes into play.  Lately, my multi-tool of choice has been the Leatherman Juice S2.

Leatherman Juice S2 General Description

The Leatherman Juice S2 is a fairly small multitool, measuring in at 3.25in in length when closed.  Also, it only weighs about 4.4oz.  The tool package in this multitool consists of needlenose pliers, regular pliers, wire cutter, hard-wire cutter, knife, scissors, three (3) flat-blade screwdrivers (extra-small, small and medium size), phillips head screwdriver, bottle opener, can opener and a lanyard ring.  According to the Leatherman website, it’s available in Flame Orange and Storm Gray and retails between $40 and $45 online.  The blade is made of 420HC steel which is strong enough for a multitool.  Remember, this blade isn’t your primary EDC blade, right?

The Pros

I’m going to be right up front about it – there’s lots to like about this little guy.  First, let talk about size.  At about 3.25in long (closed) and about 4.4oz, this little guy fits nicely into your pocket.  In fact, it fits perfectly into the watch pocket in your jeans (that little pocket in your right hip pocket that no one knows what to do with).  I’m not exaggerating when I say that the Juice S2 fits into this pocket better than any sheath you could buy.

The second feature I really like about this multitool is the fact that the knife can be used without opening the tool.  Many of the multitools I’ve owned in the past (and most of them were from Leatherman) required you to open the ‘plier handles’ part of the tool in order to access the blade.  Not with this little guy!

All the tools are sturdy and strong.  I’ve used all the screwdrivers as well as the scissors and pliers.  All of them worked well and I haver felt like the tool was going to break or slip.

Leatherman Juice S2

As you can see in the pictures, I picked up the orange version of the Juice S2.  Truth be told, I didn’t realize they made a gray version until after I bought it.  Had I known that, I would have probably picked that color (I don’t like to stand out this much).  That being said, I really like this color for a few reasons.  First, it’s easy to identify your tool when it’s on a table or with a group of other items. Honestly, how many bright orange tools do you have?  And, moreover, how many bright orange tools do other people have?  Secondly, there’s a lot less weird looks when you break out a bright orange tool that has a knife on it.  The fact that it’s not “tacticool” looking helps out a lot in day to day life – especially when you’re an office dweller like I am.

The Cons

Nothing is perfect and the Leatherman Juice S2 is no exception.  There are things about it that I don’t like, but not many.

First on the list is the fact that there is no spring load on the pliers.  Most multitools that I have owned have a spring load on the pliers that force the pliers into an open position when not in use.  This feature is particular useful when you’re working a nut and are turning then opening your pliers repeatedly.  With the Juice S2, you have move your fingers inside the pliers and open it when you’re ready to reposition your tool.  This movement isn’t a huge inconvenience, but it does take some getting used to.  I would prefer a spring in the handle that would separate the pliers if possible.

Second on the hit list is the grip.  I have two problems with it.  First is the finish. The aluminum seems to be anodized and is already showing signs of wear.  Not a big deal – it is a tool after all.  That being said, I’ve only carried this tool for a few months and expect a little more wear and tear durability than that.  The second problem with the anodized handles is the texture.  There are no grooves or texture machined into the handles.  The smooth nature of the finish makes the tool not always feel stable in your hands.  I’ve had a few occurrences where wet or oily hands have made the tool seems like it might slip out of my hands.  This feeling is the exact opposite of the handle on the Spyderco Endura 4 FFG which I recently reviewed.

Overall Impression

While it does have a few downsides, I highly recommend the Leatherman Juice S2.  Its small size and quality construction in conjunction with its accessible design far outweigh the minor drawbacks that it has.  I have used this multi-tool for a variety of different uses both around the office, at the office and in the garage with great success.

I highly recommend the Leatherman Juice S2 if you’re looking for a good quality, inexpensive pocketknife.  You can find one for between $40 and $45 on Amazon.com.

Are you a Leatherman Juice S2 user?  Do you want more information on this great little tool?  Give me a shout in the comments below and I’ll be sure to respond!

Leatherman Juice S2 Product Review


Spyderco Endura 4 FFG Product Review

I was lucky enough to win a Spyderco Endura 4 FFG pocketknife through a contest on TheBackyardPioneer.com. This knife has been in my EDC rotation since I received it in late April 2013 and it’s time for a review.

Spyderco Endura 4 FFG General Description

The Spyderco Endura 4 FFG – which stands for FRN Flat Ground – is a relatively inexpensive pocketknife.  It retails for between $55 and $65 with the cost driver being color.  In it’s collapsed state, the Spyderco Endura 4 FFG measures about 4.0-inches.  The 3.75-inch blade, which is made out of medium grade stainless steel (VG-10), gives you a total length of 8.75-inches – pretty big for a folder.  As expected, the signature Spyderco finger loop is present for easy one-handed opening.  The handle is made out of Fiber Reinforced Nylon (FRN) with steel liners and is held together by torx screws – a deviation from Spyderco’s typical pinned design.  A strong back locking mechanism is included in this knife.  All of these components add together to form a knife that weighs about 3.4 ounces.

The Pros

The first thing I noticed about this knife was its weight – or the lack thereof.  This baby is light!  I’ve carried a lot of knives in the past which are heavy enough to constantly remind you that you have a knife in your pocket.  The Endura 4 FFG is the exact opposite of those knives – in fact, I sometimes reach for my pocket to make sure I haven’t dropped this knife.

Spyderco Endura 4 FFGIn addition to its low-weight, this knife handles well.  The gimping on the back of the blade and the end of the handle provide a comfortable spot for your thumb while working with the knife.  The FR4 is machined in such a manner that the handle won’t slip in your hand.  I’ve used this knife with wet, slippery hands and never had the knife slip out of my hands.

The blade, as is common on all Spyderco knives, was razor sharp out of the box.  My use of this knife has consisted mostly of mundane, daily tasks – cutting cardboard, opening letters, light garden work and the like.  The blade has held up and hasn’t needed a sharpening.  That being said, I have no experience with how hard or easy it is to sharpen the VG-10 blade.

In addition, I really like the gray color that this knife came in.  It’s a pretty non-intimidating color and doesn’t draw as much attention that “Cool Guy Black” typically does.  That being said, a 3.75-inch blade in an office setting does draw a few odd looks now and again.

The Cons

My biggest complaint about this knife has to do with the locking mechanism.  The mechanism itself is quite strong.  When the blade is locked, there is no jiggling or movement which provides for safe use.  My problem is when you try to retract the knife.  The release is located about halfway down the handle and tends to cause the user to put his fingers in the area where the blade with retract into.  This could cause a situation where the top of your fingers gets sliced as the blade tries to retract.  You definitely need to be careful when retracting the blade.

Spyderco Endura 4 FFGMy other complaint – and this one is minor – has to do with the clip.  On my knife, the clip is painted black and is beginning to chip and show wear.  I would have preferred a stainless steel or anodized (clear or colored) aluminum clip that wouldn’t show wear and tear as much.

The last issue is that, being one of Spyderco’s lesser expensive pocketknives, this one is made in Japan.  I prefer to buy American  made products when possible.  But, given its cost (and cost to me), I have no problem owning a foreign-made product, especially when it’s produced by an American-owned company.

Overall Impression

Short and simple, the Spyderco Endura 4 FFG is the best EDC pocketknife I have ever carried.  It’s light, sharp, locks well and isn’t “scary” to folks when you pull it out.  Granted, I work an office job so I’m not using this knife for tough work day-to-day.  I have, however, taken this knife with me hiking and fishing.  It has held up well there as well – providing good shavings for fire starting, cutting both fishing line and rope, and letting me work with moleskin to handle some blisters.

I highly recommend the Spyderco Endura 4 FFG if you’re looking for a good quality, inexpensive pocketknife.  As mentioned earlier, you can find them for between $55 and $65; you can find it on Amazon.com.

Do you have any experience with the Spyderco Endura 4 FFG? Want more information? Drop me a line in the comments and let me know!

A reliable EDC knife is very important. Check out why the Spyderco Endura 4 FFG is one that I completely recommend.


Automobile EDC: More Than Just Junk In The Trunk

Everyone knows that anything can happen at any time, especially on the road.  Whether you’re with your family, your fishing buddies or taking a Sunday drive by yourself, you need to be prepared for anything that may come up.  With that fact in find, we’ve compiled a list of must have automobile EDC items to keep you ready for any situation.

Tire Blowout

  • Spare Tire
  • Car Jack
  • Flashlight
  • Wrench/Socket Wrench Kit

One of the most common things that can happen on the road is a tire blowout.  Whether it happens to you or you pass by someone else with this problem, you should have the above tools on-hand to get yourself back on the road as fast, and painlessly, as possible.  The spare tire in itself is pretty self-explanatory.  The car jack (this 2-ton Craftsman model should be sufficient) is necessary to lift the car high enough to take the tire off and replace it1.  A good socket/wrench kit is needed to take off the nuts that hold the tire in place. An Ace Gear 30 piece socket/wrench kit should be sufficient for any vehicle.

Locked Outside Your Car

  • Spare Key

An extremely common emergency with a rather simple solution. A spare car key, usually placed on the underside of the vehicle, will work just fine for when you accidentally forget that you left your keys are in your car.  Also, if you car is equipped with a keyless entry feature (usually a numeric keypad of some kind), be sure to know the combination so that you may gain access quickly.

Injury

  • First Aid Kit

There is always a chance of injury when on the road, whether occurring while driving or while on a trip. It is important to have an up-to-date First Aid kit available, should the need arise. A standard American Red Cross kit or a AAA model would be more than efficient to tend to any wounds that may arise. Any major injuries should be tended to by a doctor at the nearest hospital.

Crashing Into A River

  • Glass Cutter

While many think these situations only occur in movies and TV shows, crashing off of a bridge or falling into a river happens more frequently than one would expect it to. Due to the pressure the water creates on the vehicle, being able to apply force strong enough to break a window can be problematic at its minimum, fatal at worst. This is especially true if water has entered the vehicle. A glass cutter would save any life when used efficiently. Kolbat makes a quality glass cutter and comes highly recommended.

Running Out Of Gas/Oil

  • Spare Gas Can
  • Spare Oil Can

Sometimes when on road trips with friends and family, especially out in the middle of nowhere, you simply just run out of gas or oil. Whether gas stations just ended up being few and far in between, or you just forgot to take care of that oil change, you need to be ready for such an occasion. A spare gas can or spare oil can will remedy this issue without a hitch.

Miscellaneous For The Odd Situation

  • Bottles of Water
  • Spare Clothes
  • Hygiene Equipment
  • Bungee Cords
  • Utility Knife
  • Flashlight
  • Flares

When all is said and done, there are situations that can arise that one simply just can’t account for. It is important to have certain things on hand to deal with these events. Such as bottles of water in case of a heat/dehydration emergency or spare clothes if yours get soiled or ruined. If stranded in an unknown area for a prolonged period of time, hygiene equipment will be necessary should you have to go to the bathroom or have other needs. Bungee cords are needed if something breaks and you need to strap something down. A utility knife can be used for defense, cutting something, or opening a can of beans if the need calls for it. Finally a sturdy flashlight, such as a Maglite model, is needed when things get dark and you need help to see. Flares will work when all else fails and you need to signal the nearest authorities and call for help.

Conclusion

With all the above equipment on hand, you should be more than ready to handle any emergency. Whether by yourself, with your drinking buddies, or with the family, you will be prepared for any situation. Everyone needs to be well prepared for anything, and no one will doubt that you have the situation under control.

Editor’s Notes:

  1. While the third-party car jack is convenient and easy to use, most vehicles come with a OEM jack that is designed to work with that vehicle.  Limited financial funds may be better spent elsewhere if your vehicle already has a OEM jack.

Think we missed something?  Be sure to let us know in the comments or on our Facebook page!

Automobile EDC: More Than Just Junk In The Trunk

photo credit: aaron_anderer via photopin cc


EDC Tier 1 – Must Haves

If you’re like me, then each item in your EDC kit has a level of importance associated to it.

Some items you can survive without, but others are “must haves” that you will always have with you.

In my last post, I talked about this overarching tier approach. Today I want to expand specifically on my Tier 1 items.

EDC Tier 1 – What It Means

Plain and simple, Tier 1 items are the core components I won’t leave the house without.  It doesn’t matter if I’m going on vacation a few states away with the entire family or down the street to pick up a gallon of milk.  These items are ALWAYS on my person.

The four items in this list provide the most basic of essentials to me: purchasing power, communication, navigation and safety/protection.

The list is short, but distinguished:

Cellphone

Being the technology-obsessed person I am, I never go anywhere without my cellphone.  I’m currently running an iPhone as you can see in the picture above. My cellphone provides me with many different assets including communication, navigation (compass, maps, etc) and information access via internet hookup. It also acts as a camera if a situation needs documentation and a flashlight in emergency situations.

Keys

Obviously, my keys provide me the ability to operate my vehicle. They also ensure that I can lock/unlock my house.

In addition to my keys, I also carry a ResQMe Car Escape device.  This item is crucial for any possible situation where you are trapped in your car.  It provides you with the ability to break glass and cut a car safety belt.

The final item on my keychain is a bottle opener (thanks to Jack at The Survival Podcast).  You always have to be prepared to open an adult beverage or two!

Also, remember that keys can be used as a defense item in a pinch.  Imagine getting punched by a guy with keys sticking out between his knuckles.  I doubt that would feel good.

Wallet

The cash (you always carry cash, right?) and credit/debit cards I carry allow me to purchase items I may need (water, gas, food, medicine, etc).  I also have ID and a AAA card on me. You never know when you’re going to need any of that. No more needs to be said here.

Watch

This item is probably the most ‘aesthetic’ item out of the group, but it still serves multiple purposes. I’m obviously able to tell time with it.  By wearing a watch, I have a backup (redundancy is key) to the clock on my cellphone which has become my primary time keeper.

Also, this particular model watch has a tachymeter on it. I’m not going to get into the specifics of what a tachymeter is (you can read about it here) other than to say that it provides me with the ability to measure speed and/or distance.

Finally, a non-digital watch gives me the ability to find north via the location of the sun.

Conclusion

Overall, my Tier 1 EDC kit is pretty basic, but contains a handful of items I could not and would not leave the house without. Functioning, and getting home, without these items would be incredibly difficult.  The best part about this kit is that it can be worn on your body at all times no matter what kind of clothes you are wearing.

What are the items you can’t leave the house without? Let me know in the comments.

In case you’re interested, here’s where you can buy any of the items listed in this post:

Each item in your EDC kit has a level of importance associated to it. Some items you can survive without, but others are "must haves" that…