1

21 Prepper Skills You Can Improve This Weekend

I’m not sure what it’s going to be like by you this weekend but here, on Long Island, it’s the middle of winter.  We’re expecting a cold, raw weekend with some snow possibly coming our way.  It’s not really going to be outdoors weather, although learning how to survive in this kind of weather wouldn’t be a bad idea.  But, with this kind of weekend in mind, I got to thinking about how I could improve as a prepper.  I came up with this list of prepper skills that you (and I) could explore and improve over a weekend.  Make me one promise – don’t just read, do!

1. Cook Something

Cooking is one of the most important survival skills and, in my opinion, is one of the most important prepper skills you can master.  You all know that food is part of the Rule of 3’s – 3 minutes without air, 3 days without water, 3 weeks without food – but what you probably also realize is that food can be more than just energy for people.  It can be a comforting item, making those stressful situations a little better.  So learn how to cook.  I’ve got a few recipes on here that you can try including:

2. Go Shooting

Want to blow off some steam this weekend and have a good time doing it?  Then hit the range!  You’re sure to have a good time no matter if you’re shooting a handgun, zeroing in your rifle or popping clays with your shotgun.  Being that ammo is expensive, you could also improve your prepper skills by doing some tactical training at home.  It’s free and could be quite beneficial to you if bad times come knocking.

3. Improve Your DIY Skills

Preppers and suburban homesteaders meet at the crux of DIY.  Both sides have an innate ability to fix whatever is broken or create something out of random odds and ends.  Undertaking a project like the bullet casing earbuds I wrote about recently will improve your abilities and spark your creative nature.  You’ll start looking at common material around the house and figuring how your new-found prepper skills can use it to make something useful.

4. Start A Fire

No matter who you ask, the ability to start a fire is one of the top prepper skills – or survival skills in general – that everyone should have.  Spends some time learning how to start fires with all of these fire starters this weekend:

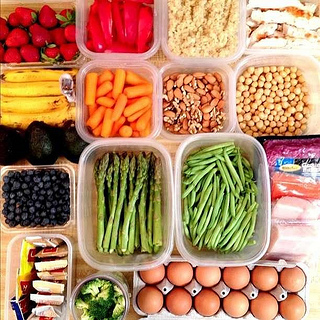
5. Get Your Preps Organized

Preparedness Planner Product ReviewBeing organized now will help you avoid running around like a maniac with all hell breaks loose.  I know, you’re thinking “Really? Being organized is one of the prepper skills you’re suggesting?”  Yup, I am absolutely advocating getting organized now.  There’s multiple reason to do so including having a much better understanding of where your weakness are and how you can improve your preps.  I recommend using this planner to get your preps in order.

6. Learn The Art Of Canning

As any prepper knows, food preservation is one of the most important prepper skills you can have.  Learning how to can different kinds of food will help you build your preps up and also save you money.  I’ve actually seen canning save money in multiple ways – people are putting food away to be eaten at a later time which saves money and they usually buy food in bulk when they are canning which reduces the overall food bill when you look at it on a per meal basis.  Plus, canning is just a great old-school skill to have in your repertoire.

7. Dutch Oven Cooking

So, you want your prepper skills to be a little more rustic, do you?  Why not try dutch oven cooking this weekend?  Cooking in a dutch oven is a great skill to have if the power goes out or if you’re camping.  Plus, there is just something so much tastier (to me, anyways) about food cooked in or on cast iron than food cook with regular kitchen equipment.  Get outside, stoke the coals and learn how to make food like your pioneering ancestors used to!

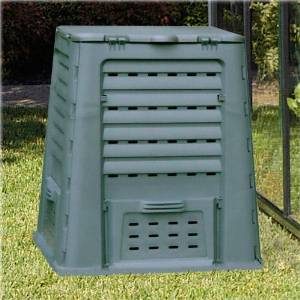
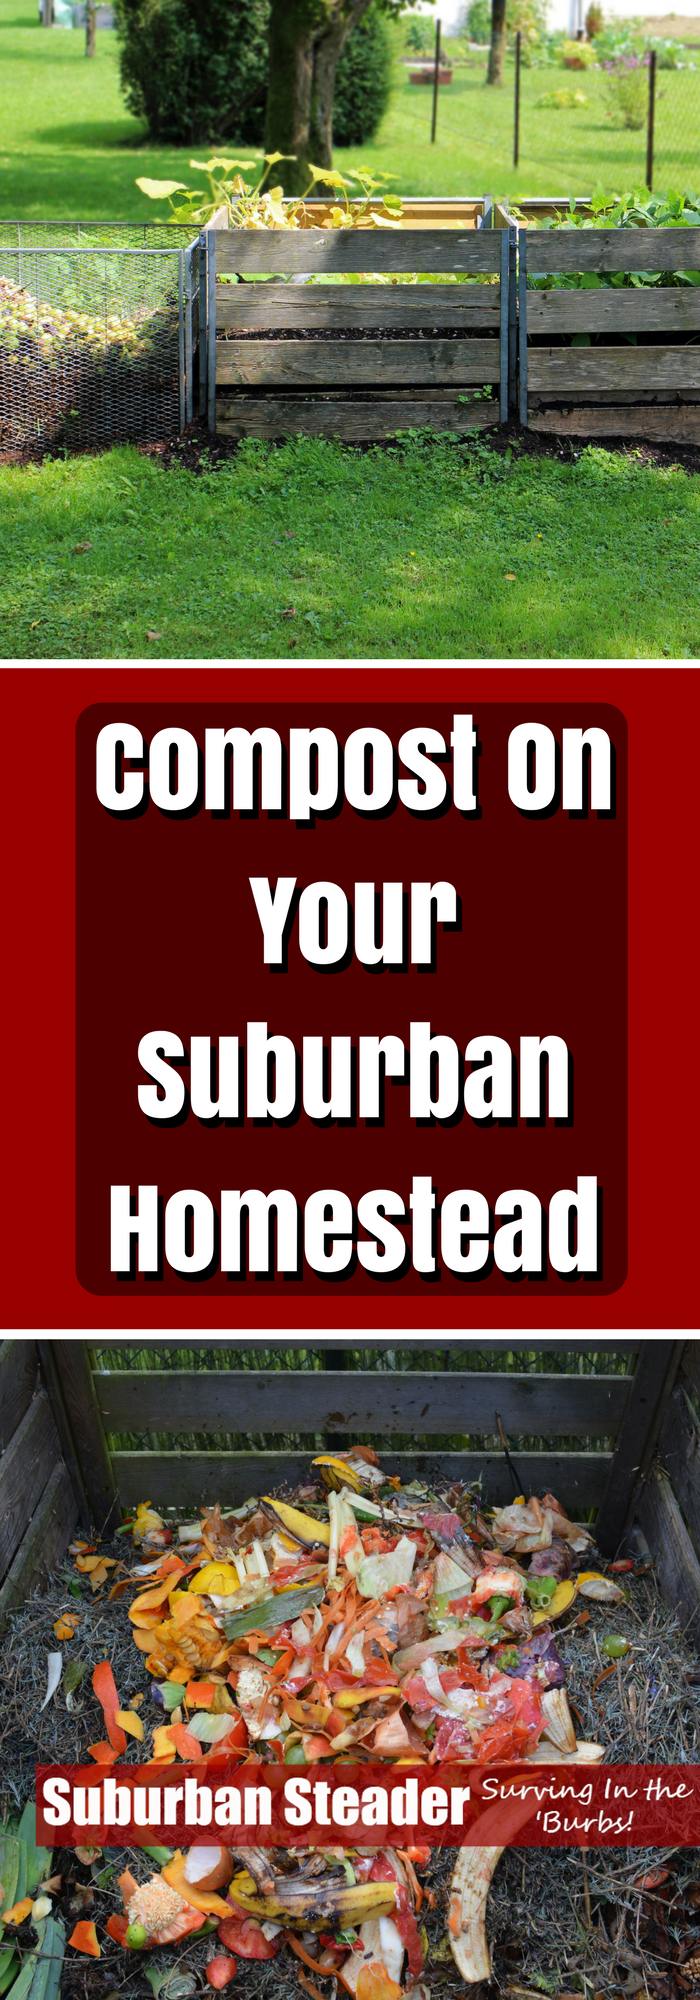
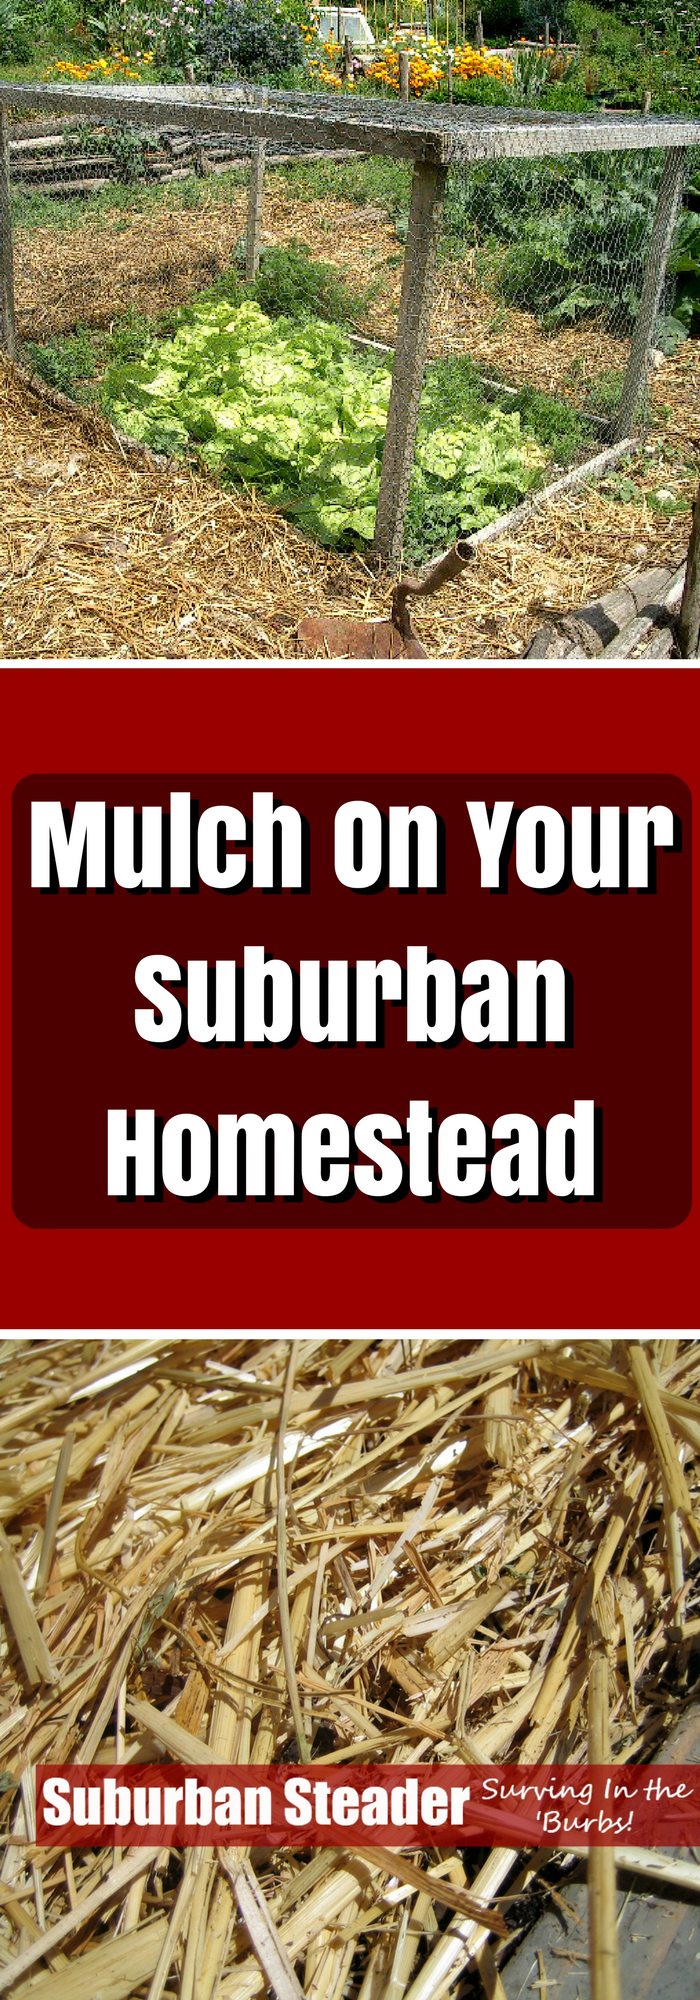
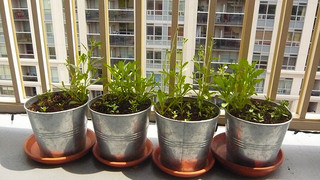
8. Start A Compost Pile

Picture your garden like a bank.  The crops are your return on investment and the soil is your principle.  How do you increase your principle?  You increase the value of the soil. And you do that by adding quality compost to the garden.  Building a compost pile is one of the prepper skills that I believe every prepper – from suburban homesteader to ultra hardcore survivalist – should have in their back pocket.  It’s super easy to do and can return huge profit to you.

9. Get Your Finances In Order

You shouldn’t be prepping if you are in debt.  In fact, what use is there in prepping if you are building up your debt.  Spend the weekend getting your finances in order to achieve financial independence.  You’ll take stress off yourself, your marriage and your career.  Not to mention, you’ll be able to buy some cooler preps now that you have more disposable money because you’re not paying those monthly bills!

10. Build A Black Out Box

This one is so simple that you should be ashamed if you haven’t done it already.  The most common event you are going to need to prep for is a power outage.  They occur more often than hurricanes, snowstorms, tornadoes or zombie apocalypses.  And building a black out box is so easy.  Spend a few hours with the kids this weekend and knock it out.  You’ll thank me later.

11. Outfit Your Automobile EDC

You spend a lot of your life in your car, whether its driving to and from work and taxiing the kids around to whatever activity they have next.  Are you prepared for an emergency if you got caught in your car?  Not sure?  Then maybe you should take a few minutes looking into your automobile’s EDC this weekend and making sure you can handle what kind of travel-trouble may come your way.

12. Get Your HAM License

Communication is one of those prepper skills that everyone talks about but very few people practice.  I’ll be the first to admit that communication is one of, if not the, weakest area of prepping for our family.  A good way to improve this skill is to get your HAM license.  Again, I can’t speak from personal experience, but everyone says it’s a fairly easy test.  They all recommend using a study guide prior to taking the test.

13. Read A Book

Want to brush up on some prepper skills, get lost in a good story or learn about the biology of your garden?  Then read a book.  Reading books is a great way to escape the world for a while and they also provide a wealth of knowledge.  You can go with a great fictional story like Glen Tate’s 299 Days series or jump into something more non-fiction like Jim Cobb’s “Prepper’s Long-Term Survival Guide.”  Either way, you won’t waste your time and might even learn something.

14. Go Hiking

Hiking as a prepper skill?  Believe it or not, yes.  Going out hiking puts you in the outdoors.  You get used to walking around with a pack on (ever actually spent time lugging your BOB around?), you learn what it’s like to be in the woods and you get some exercise.  All of those items are beneficial to the prepper.  Just make sure you’ve got sturdy footwear when you head out.

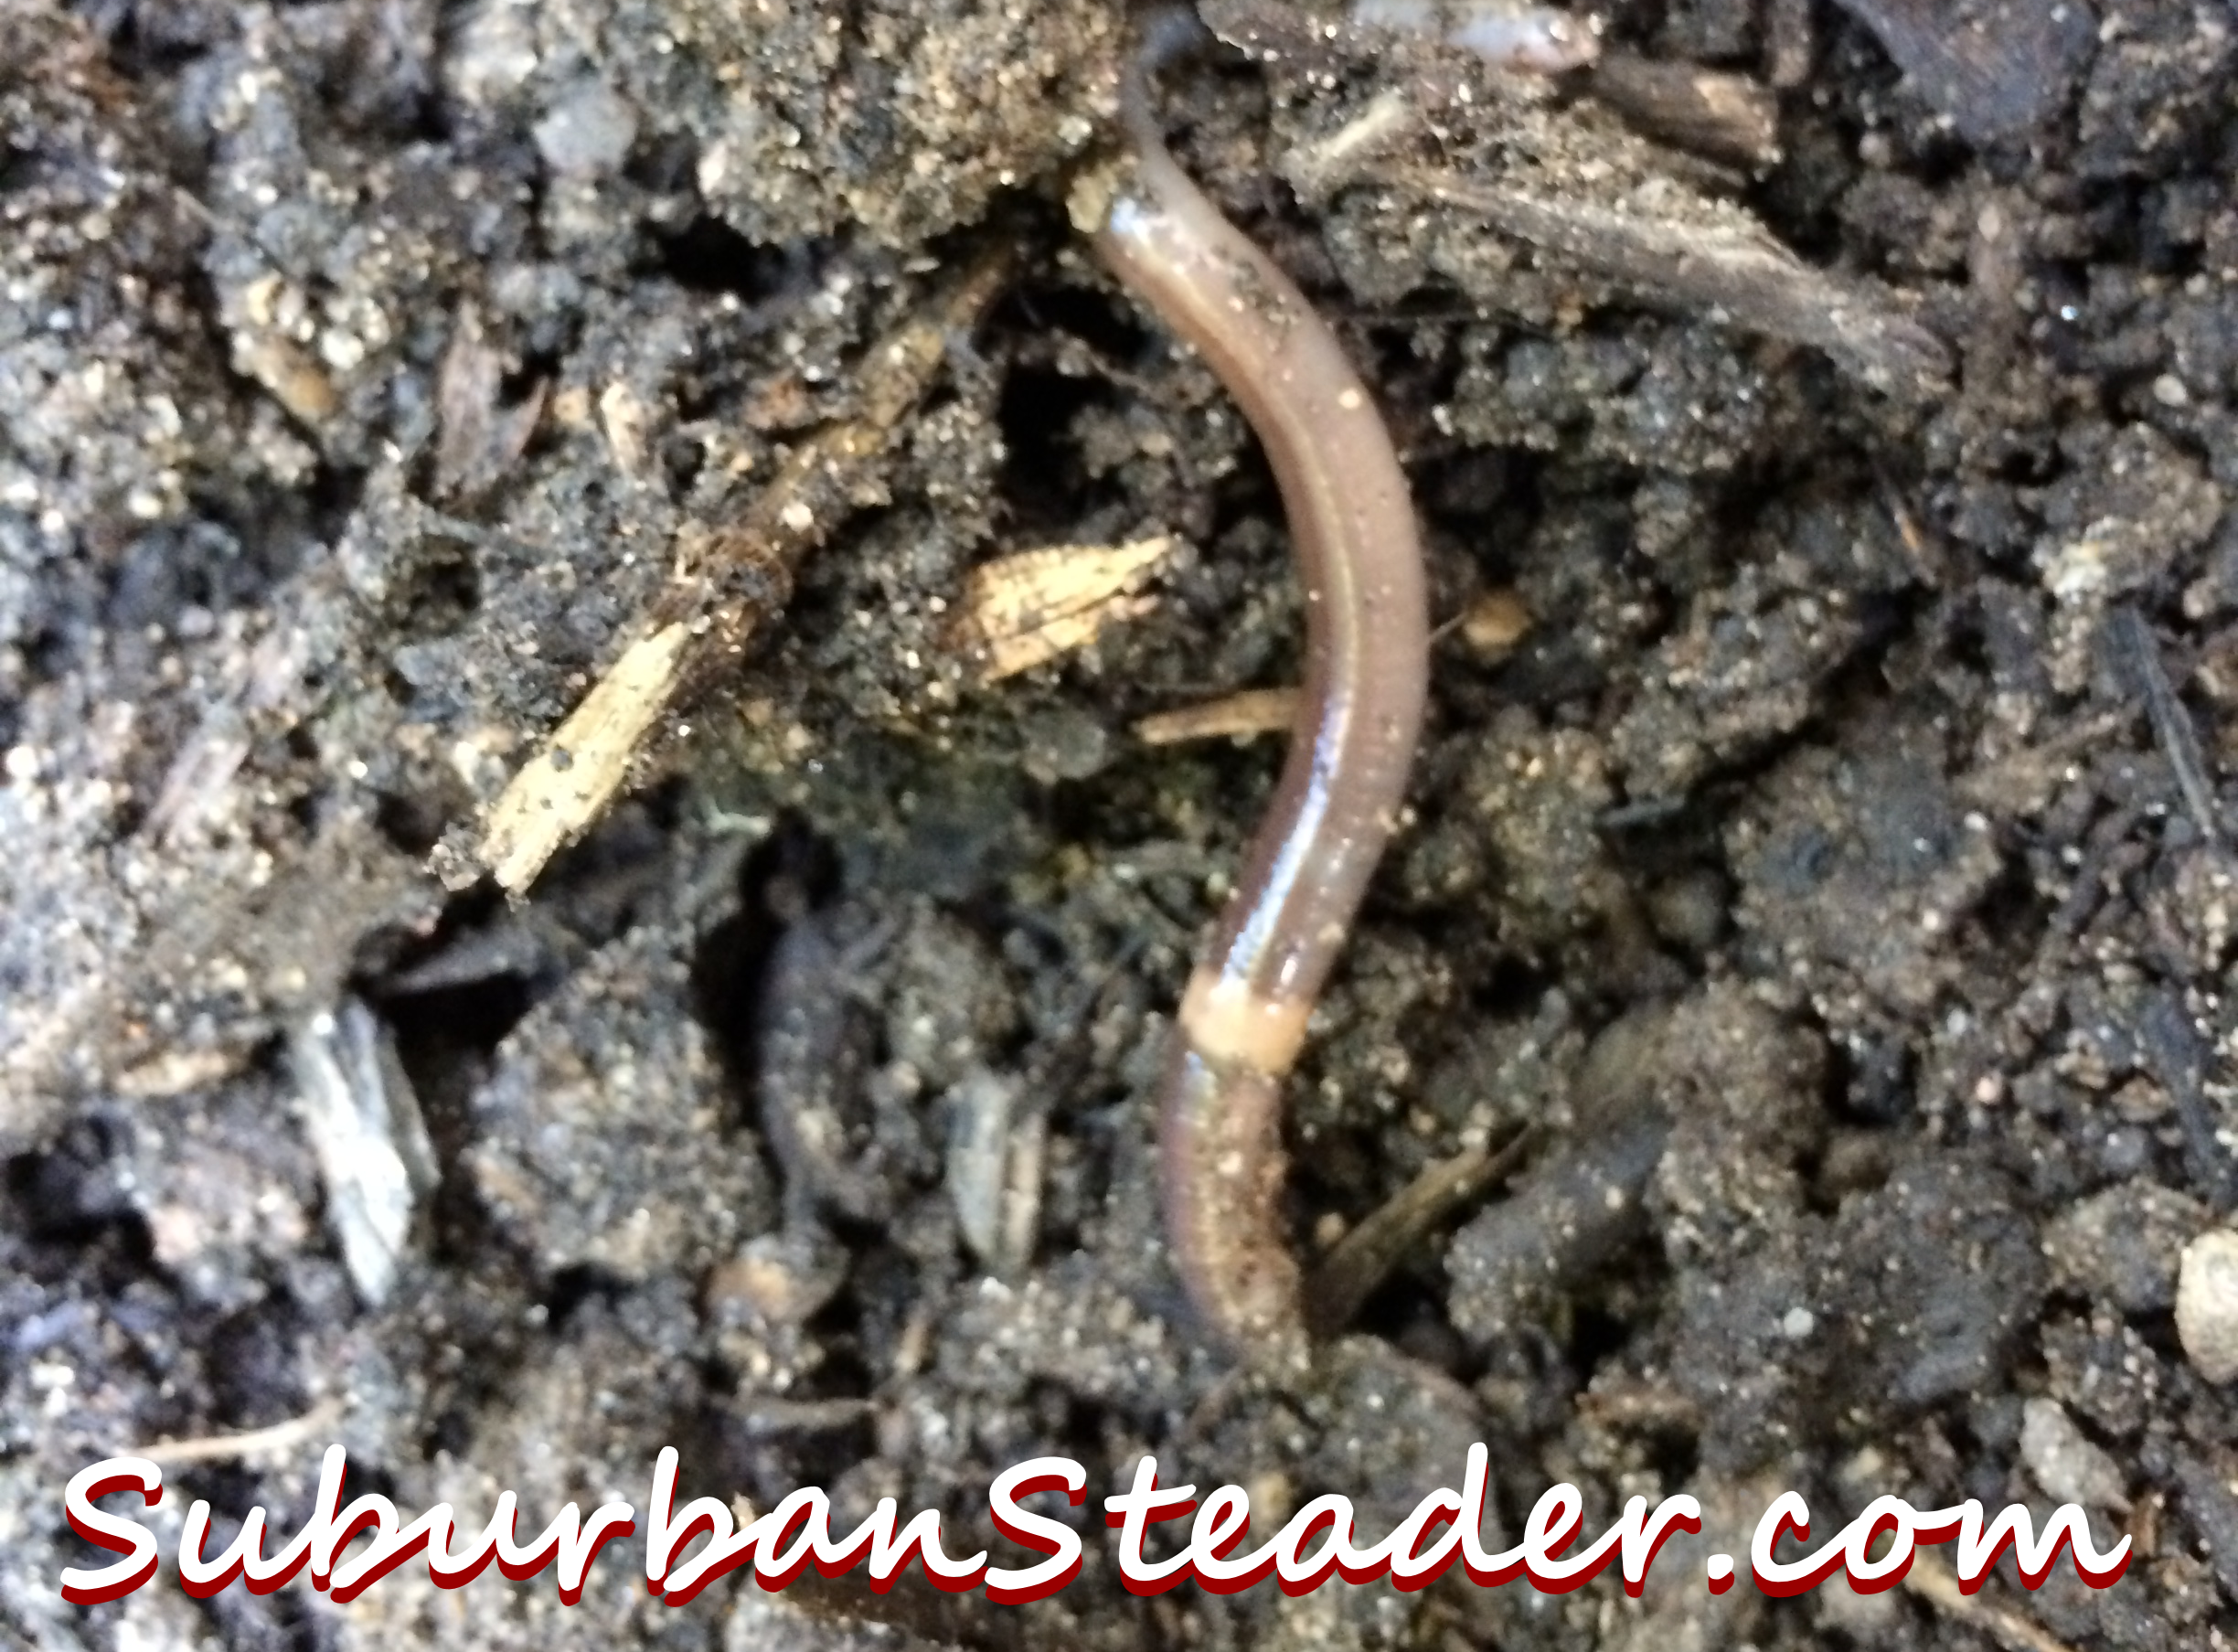
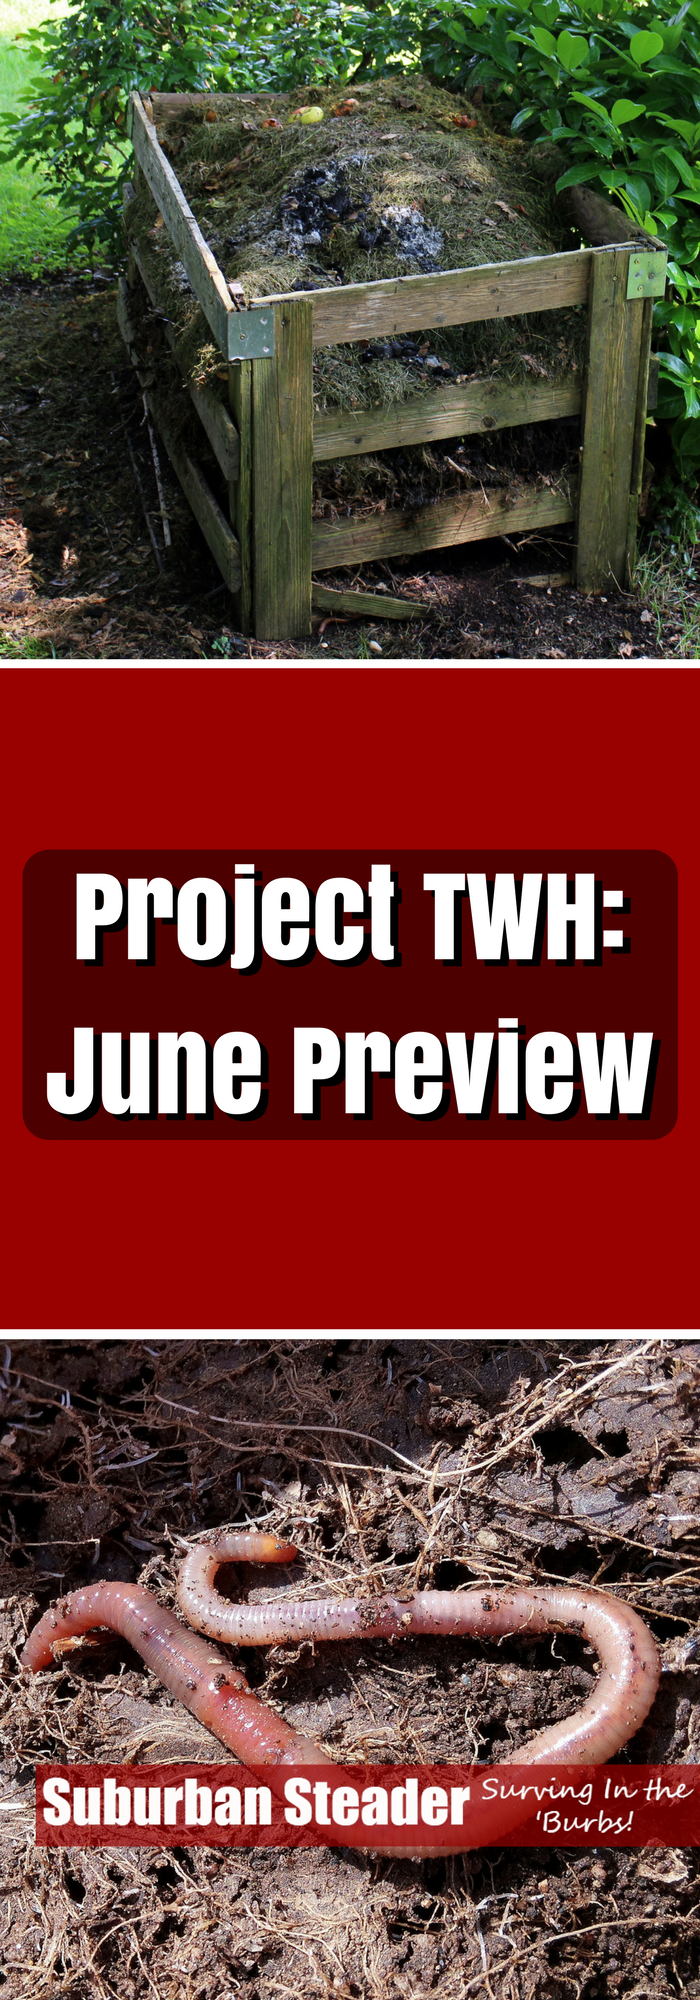
15. Build A Worm Bin

Remember how I said compost how you increase the principle in your garden?  Well worm castings and worm tea help as well.  It is super easy to build a worm bin and the return on investment is terrific!  For maybe an hours worth of work, you’ll be able to get pounds and pounds of great organic matter for your garden not to mention the awesome ‘worm tea’ that you can use to fertilize your fruits and vegetables.

Homemade Bread - 21 Prepper Skills You Can Improve This Weekend16. Bake Fresh Bread

My buddy Mike over at The Backyard Pioneer got me into baking bread at home.  I cannot begin to describe how comforting it is to smell bread baking in the oven.  And the taste! Oh, the taste!  You won’t get this kind of taste out of store-bought bread.  Baking bread probably isn’t tops on the list of required prepper skills but there is something so very

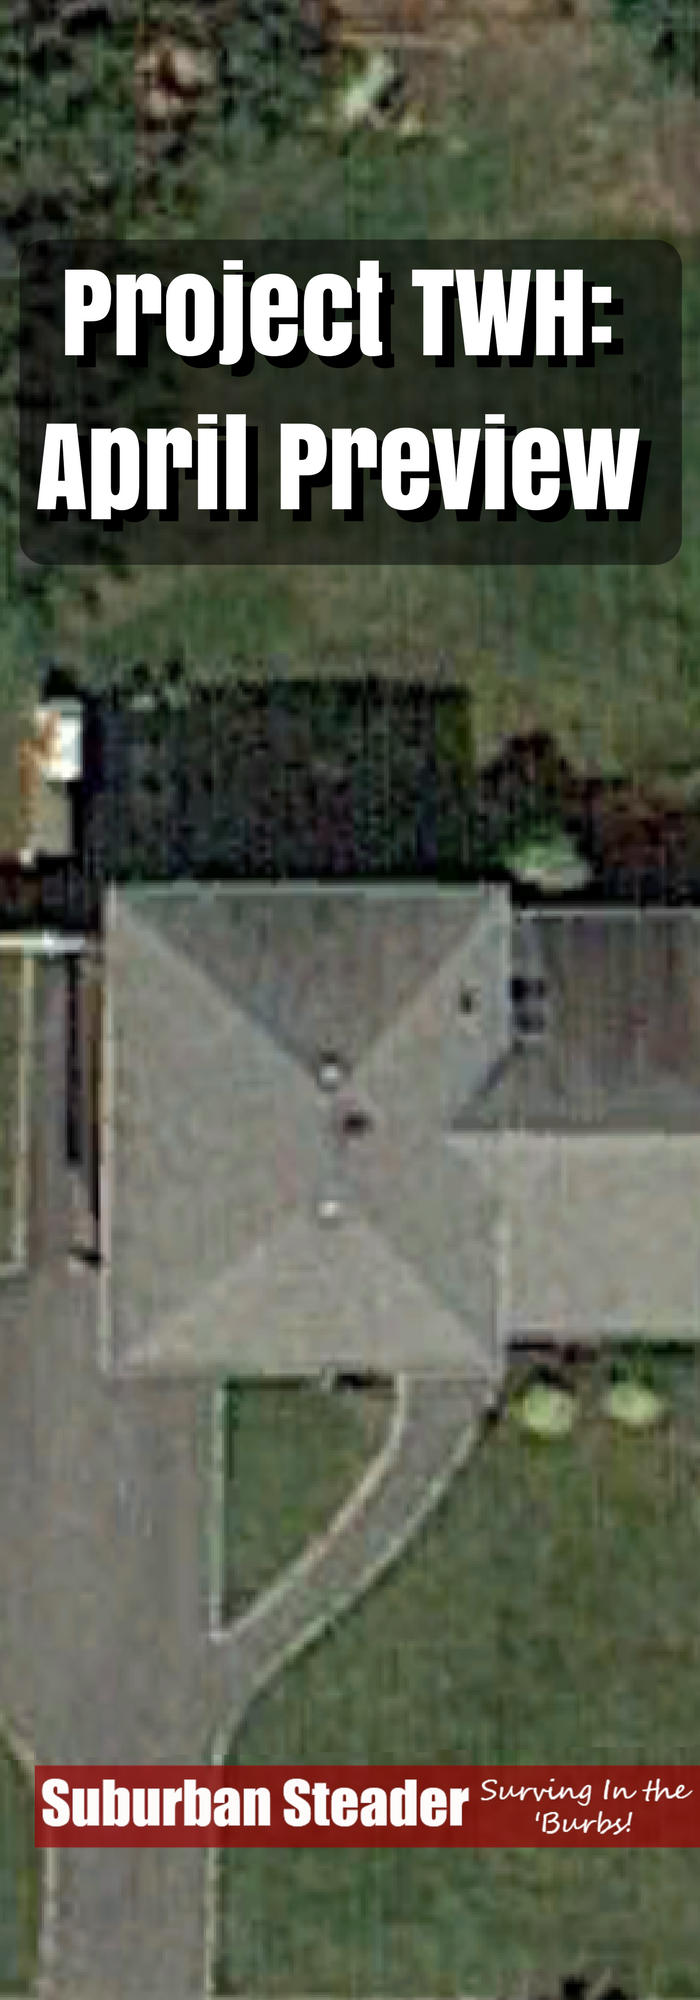
17. Perform A Site Survey

Still not sure what to do with your suburban homestead?  How about performing a site survey this weekend?  You can knock it out in a few hours and it will give you a great idea of your land, what you can and cannot do on it and where to plant different items.  It also provides a map of your property for any future developments you want to do.

18. Outfit Your Personal EDC

Prepping is all about being prepared and the way you guarantee you’re prepared when you’re just walking around is to be fully outfitted in your Every Day Carry (EDC).  You should take some time this weekend to think about your EDC methodology consider what you’ll put in your Tier 1 and Tier 2 kits.  Regardless of where they fit into your EDC kits, I recommend the following individual items having a home in your EDC:

19. Learn About Your Garden Zones

Learning about where you live is just as important as a skill for gardeners and homesteaders as understanding how your crops grow.  Prepper skills aren’t always hard skills; sometimes it’s about educating yourself.  Learning which USDA zone you live in will help you better understand which crops will grow best and when your first and last frost are.

20. Sharpen Your Knives And Tools

A sharp knife is a safe knife.  I can personally tell you that I have had more accidents with a dull tool than a sharp tool – to the point where I almost cut my fingertip off once.  Spending a weekend sharpening your knives and tools would be a great way to improve your prepper skills.  Not sure how to sharpen something? Check out this instructional video from Patrick at MTKnives.net.

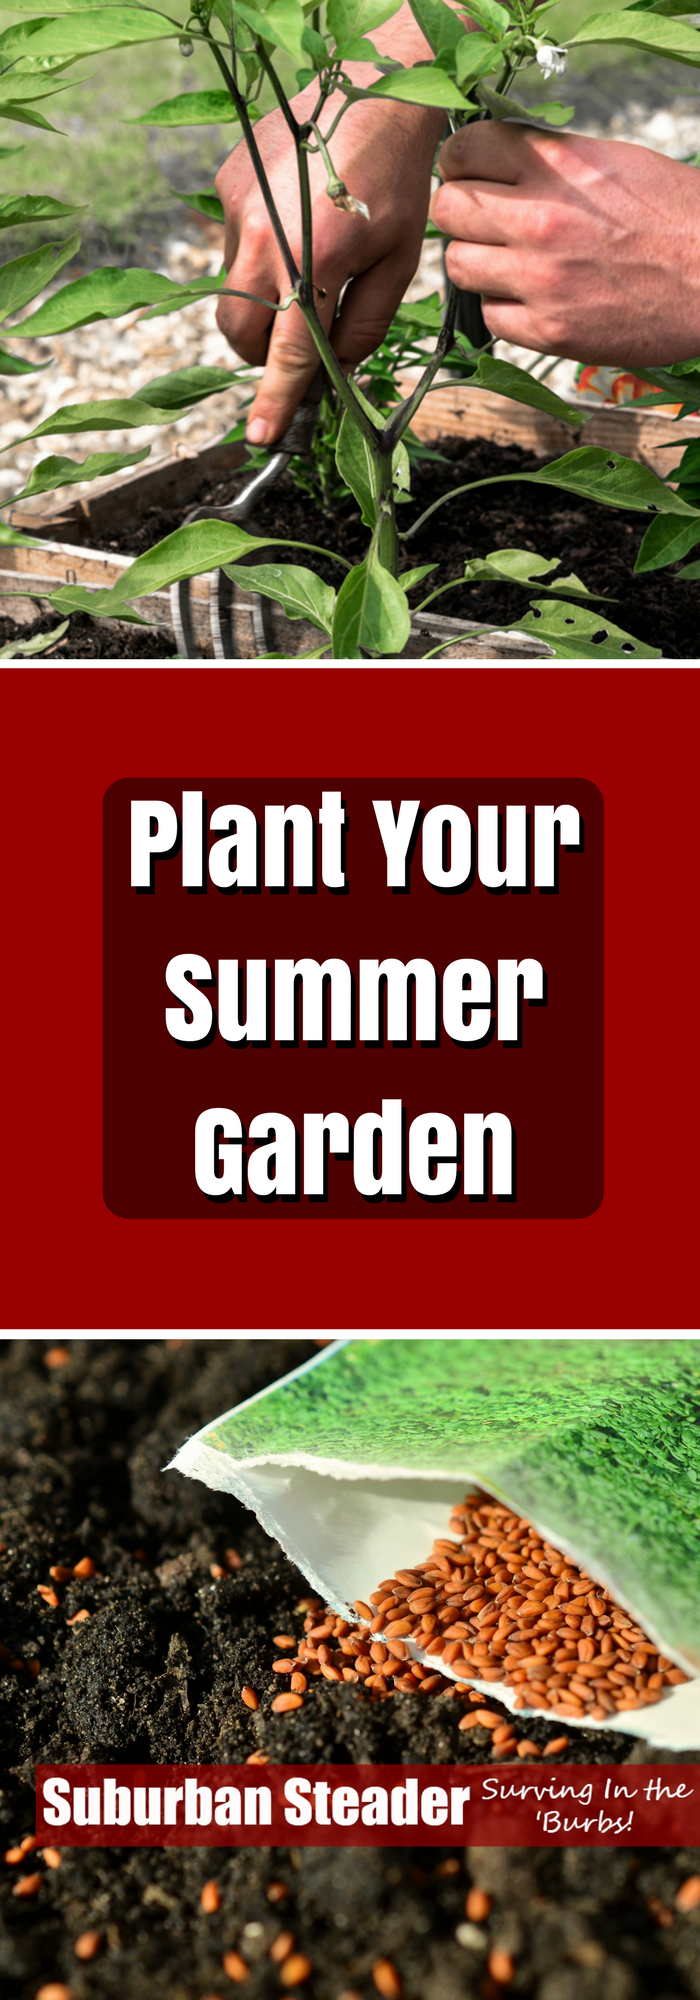
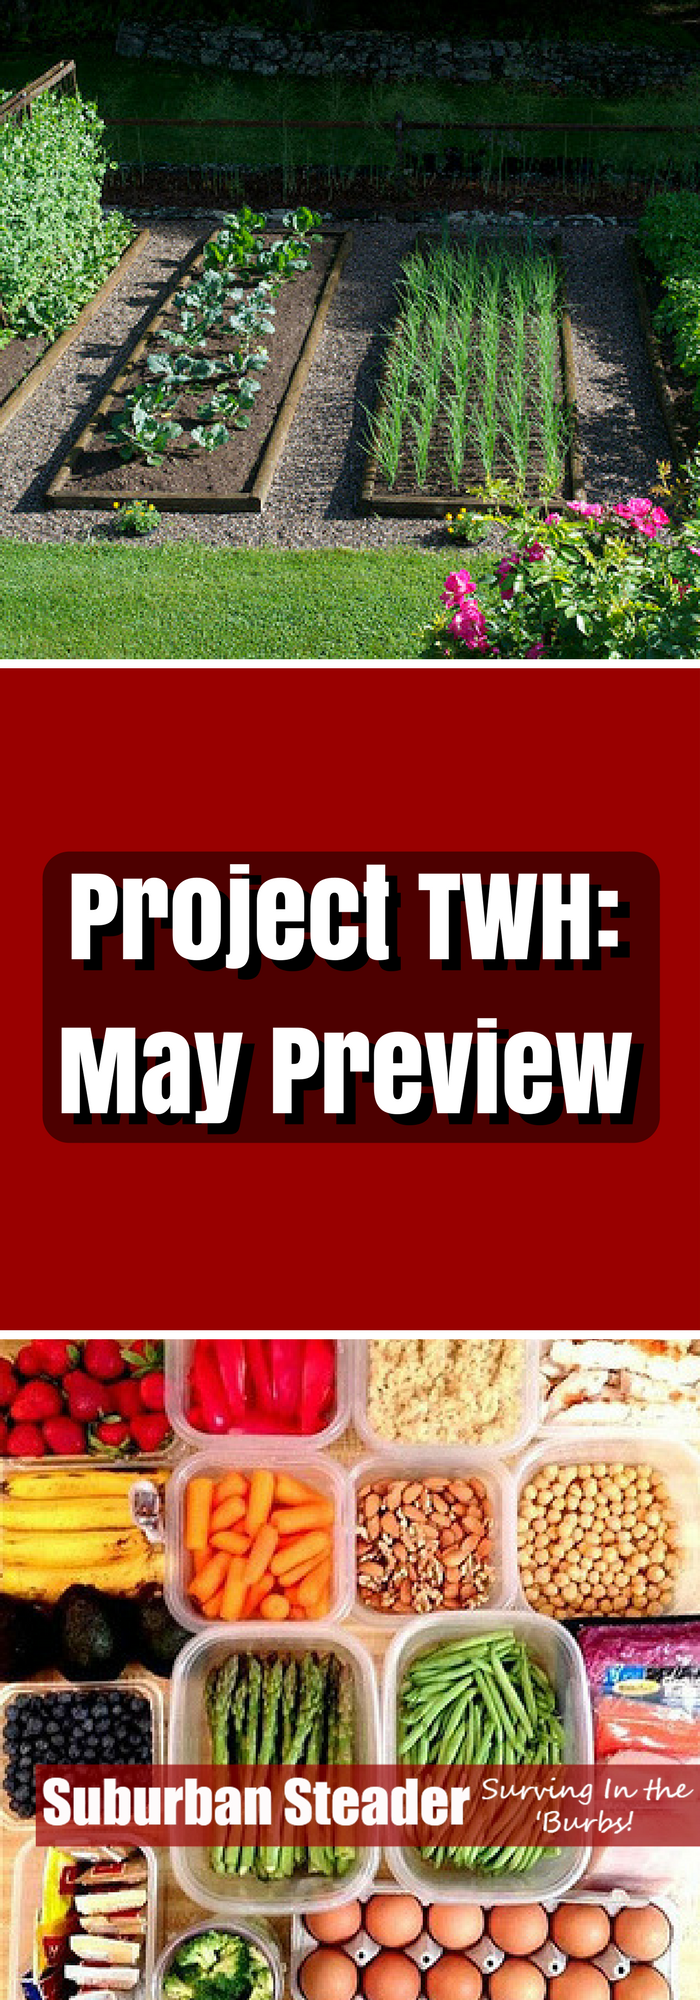
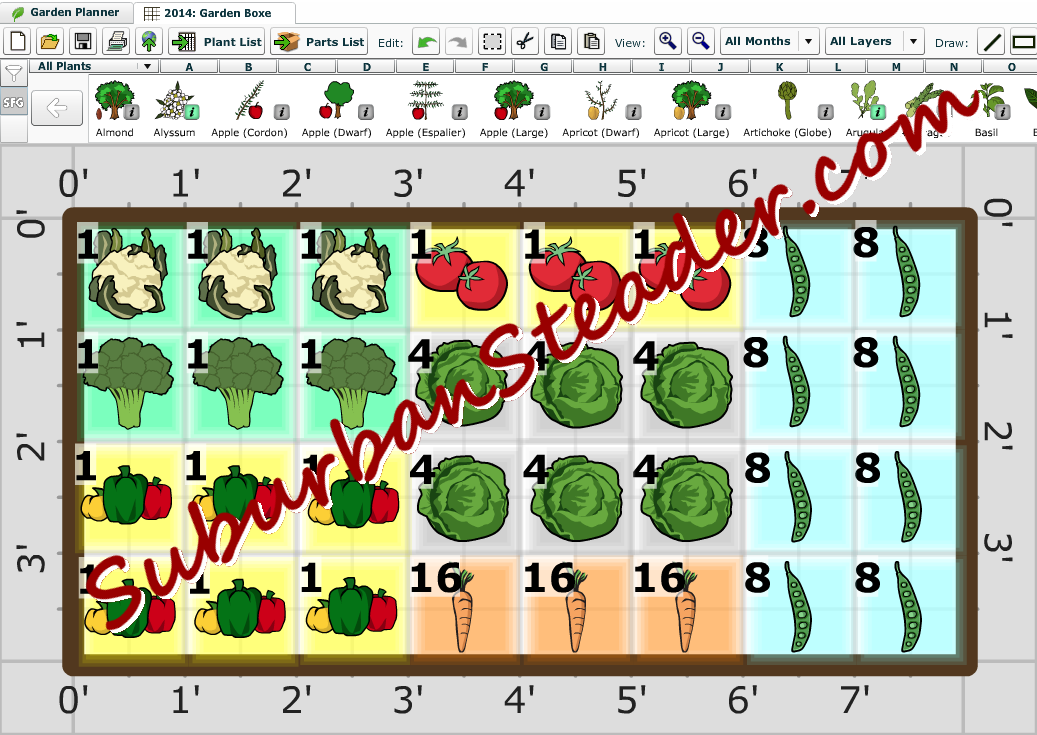
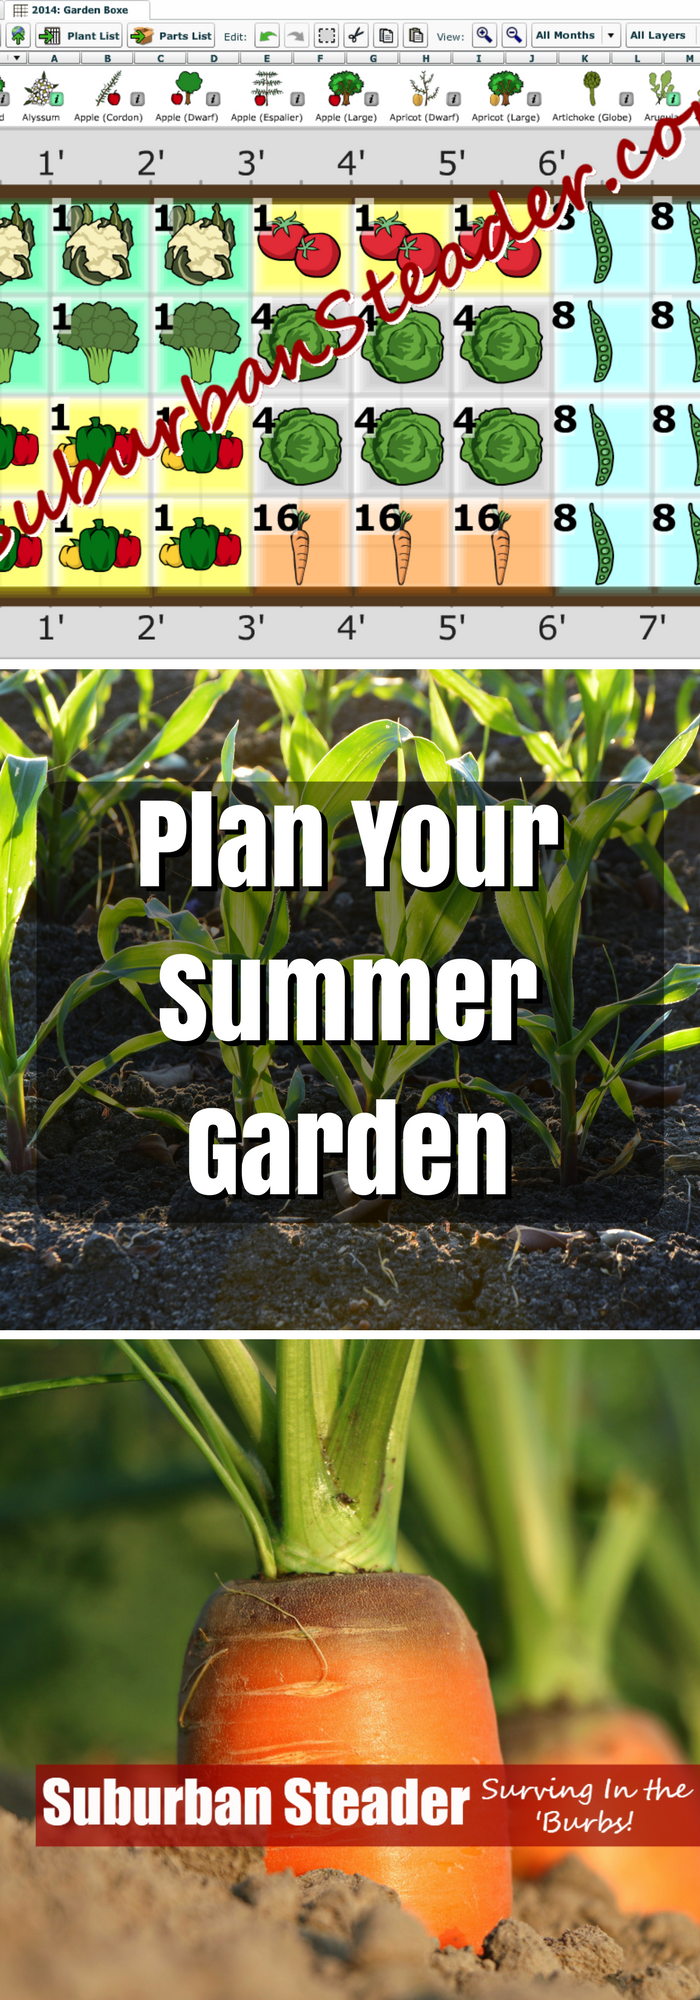
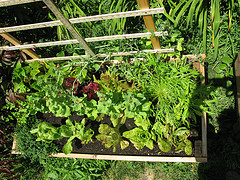
21. Plan Your Spring Garden

There is absolutely no better way to shake the bone chill of winter on a cold, snowy night than to flip through seed catalogs while you plan your spring garden.  Planning a garden is both exciting and therapeutic.  You can explore all different kinds of produce that you might want to grow and also relax knowing that you won’t have a push in the spring to get your seeds on order and your planting all planned out.


So there you have it – 21 great ways you can improve your prepper skills this weekend.  Most of these tasks are free or fairly low in cost.  All of them will make you a better suburban homesteader and a better prepper.

What are you going to try?  Let us know in the comments below.

21 Prepper Skills You Can Improve This Weekend

21 Prepper Skills You Can Improve This Weekend


Compost On Your Suburban Homestead

What comes to mind when you hear the word compost? Do you think of some stinky pile where food scraps get thrown and flies live? If that’s what comes to mind then you need to know something – you’re doing it wrong! Compost is a decidedly simple yet effective process that anyone on a small suburban lot can partake in.  You’ll see incredible benefits in your garden once you take the plunge into making good compost.

Compost Science

The ‘art’ of making compost is actually quite easy – it’s less art and science and more…well, just doing. You need to make sure you have the right ingredients and keep them moist (not wet). You also need to make sure you’re turning it often to keep the heat up inside the pile. And, while it’s a very forgiving process, it’s also good to have an understanding of what goes into compost.

Temperature

Temperature can be a fickle creature in the world of compost. On one hand, an elevated temperature can help you. Keeping the compost at a minimum of 104°F for five days (hitting 131°F for five hours during that time) will make sure that all the weed seeds and pathogens in your compost are killed. Likewise, if you get too hot it’s not good either. For example, if you hit 160°F, all the microorganisms – basically bacteria and fungi – that make the compost action happen will die.

Heat is caused in the compost pile when the microorganisms begin to decompose the plant material you’ve included. You are most likely not going to have to cool down your compost pile (it’s pretty hard to get it that hot). But, if you do see smoke on your compost pile, all you have to do is add water to cool it down. Adding a mixture of high carbon ingredients (dead leaves are great) after the water is a good idea.

Browns and Greens

If you remember the post about Mulch and Your Suburban Homestead, you’ll remember how we talked about the C:N ratio. This ratio is commonly thought of as the ratio of browns to greens. The table below gives you a few examples of browns and greens:

Browns Greens
Autumn Leaves Grass Clippings
Wood Chips Fruit/Veggie Scraps
Sawdust Coffee Grounds
Shredded Paper Manure


The easy way to remember which is which is to remember that greens are typically moist and colorful (with the exception of coffee grounds and manure – both of which are moist).  Everything else is browns.

You want to start your pile at a rough C:N ratio of 30:1 meaning your browns are 30x more prevalent than your greens.  This scenario will whittle down to roughly 10:1 or 15:1 as the decomposition occurs.

An ammonia type smell coming from your compost pile means you have too many greens.  Likewise, if you don’t see a lot of decomposition action going on, you’re probably too high on the browns.

If you’re the analytical type, check out this compost calculator to see how well you are doing.

Compost On Your Suburban HomesteadParticle Size and Shape

Believe it or not, size and shape greatly influence your compost.  As a rule of thumb, the smaller the better.  The microorganism can more easily digest small pieces.  A good example of this phenomenon is an apple.  We put a whole apple in our compost pile and then chopped one into small pieces and placed it in there as well.  After a certain amount of time, the small pieces were barely recognizable and the whole apple was more or less intact.

Remember that shape is equally important.  If you have material that is so small that it can mat together when wet – whole sheets of paper, full lettuce leaves, or very finely ground up food – the air and water will not be able to get in and help the microorganisms work their magic.

Aeration

As I eluded to above, air is critical to the decomposition process in a compost pile.  Much like humans, microorganisms take in oxygen and expel carbon dioxide.  If these little guys can get oxygen, they’ll eventually be smothered and replaced with anaerobic microorganisms (anaerobic = no oxygen).  These guys stink (literally) and don’t decompose your compost nearly as well as their aerobic counterparts.

So how do you aerate your compost pile?  Easy – keep it open to the air and turn it often.

Moisture

Again, the microorganisms are like you and I in that they also need moisture to live.  But, much like temperature, moisture can be a fickle situation.  Too little moisture and your microorganisms will perish.  Too much and they’ll drowned; being replaced by their anaerobic counterparts.

You can tell if your compost pile is sufficiently moist by grabbing a handful of the compost.  If it feels like a wrung-out sponge when you squeeze it, it’s good.  For the most part, you won’t have to worry about this problem as your greens and rainfall will give the pile enough moisture.

Turning

Turning is one of those things that people have differing opinions on.  Some folks say that nature does this kind of process without turning a forest floor.  And they’re completely correct.  But those people are usually more patient and willing to wait a year or more for a compost pile to be ready.

Those of us who are a bit more impatient will turn the pile on occasion.  Turning the pile provides a few benefits to the compost pile.  First, the temperature at the middle of the pile is always going to be greatest so turning it allows for a more thorough compost.  Second, turning the compost pile helps aerate it and break up clumps that may shed water.

We here at the Suburban Steader Homestead turn our pile because we believe it provides a better quality compost in a shorter time.

Compost On Your Suburban HomesteadCompost Bins

Good news – science class is over!  Now we’re getting into the hands-on part of this post.

The question also becomes: What should I make my compost in?

My answer is usually a simple Nothing.

To be perfectly frank, the compost pile on the Suburban Steader Homestead is just a pile on the ground.  We add our table scraps, scrapped paper, straw, etc to it and turn it on occasion.  We’ll water it during especially dry spells but those are far and few between considering where we live.

But, you may not want to have a compost pile just laying on your property somewhere so let’s talk about what you can do:

Pallet Compost Bin

This concept is very simple.  Make a four-sided area out of wooden pallets and put some hinges on it so you can open up one pallet.  Now make another one next to it in the same manner.  Once one bin is full, use a pitchfork to move it to the second bin.  This movement will aerate the compost pile for ‘finishing’ in the second bin.  You can now start a new pile in the first bin.  By the time you’ve filled the first bin again, the second bin material should be ready to use.

Compost Tumblers

You can either buy these at your local big box store or make one out of a plastic 55-gallon drum (with a cover) and a pipe.  Put the pipe through the barrel length-wise so the barrel can spin around it and support the pipe with a wooden frame.  Now all you have to do is cut and opening in the barrel – make sure you can close it again – that you can both add material and retrieve your compost from.  Now all you have to do is add material and give it a spin.  These aerate your compost quite well and generally produce quality compost at a faster rate.  The problem is that the amount you produce is significantly smaller than what you can with a pallet bin or pile situation.

Using Compost In Your Garden

Using compost in your garden is soooo simple.  Follow these three rules:

  1. Pull back mulch
  2. Apply compost
  3. Reapply mulch

That’s it.  Following these simple will help build up the health of your soil.  The sponge-like capability of the compost will retain moisture in the garden, the nutrients will attract earthworms which will work the compost deeper into your garden.  Pretty soon your soil will be darker and richer with a higher level of microorganisms.

Wrap Up

Compost is a wonderfully easy and inexpensive tool that every suburban homesteader should have in their toolbox.  While there’s a plethora of science behind, the premise is pretty simple.  Throw some browns and greens together, add moisture and oxygen, turn it occasionally and get out of the way.  Nature will do the rest of the work.

You’ll see incredible benefits in your garden and you’ll enjoy knowing that your soil is getting more and more fertile which means you can grow better and better produce.  Everyone wins!

Additional Resources

Please let us know any tips you have for making compost in the comments or on our Facebook Page.

Compost On Your Suburban Homestead

Compost On Your Suburban Homestead


June Preview – Project TWH

First, let me apologize. The end of May and June were a crazy time around the Suburban Steader Homestead. I don’t really feel like going into detail, but a lot of family issues came up. Long story short, everyone is happy and healthy(er) now, so we’re moving on. And, while it’s early June, we’re going to continue with the Project TWH and discuss the June Preview.

As an aside, my goal is to write about both the June and July topics this month in hopes of getting caught up. If it spills a little into August, so be it, but please know that I am committed to this discussion and believe it’s beneficial for both my readers and myself.

In what seems to be a theme lately, the June Preview of Project TWH is a mismatch of topics. Some of the topics are straight-up homesteading related. Others are more suburban homestead related and can be related to a general approach for bettering your life.

As usual, we’ll be referencing The Weekend Homesteader throughout this month. In fact, our four main articles for the month will be centered around the four topics Anna Hess outlines for June:

  • Compost
  • Worm Bins
  • Seasoning
  • Your Real Hourly Wage

Compost

  • Goal: Build a compost pile
  • Cost: $0-50
  • Time: 1-3hrs
  • Difficulty: Medium
  • Kid-Friendly: Yes

Compost – the lifeblood of a garden. Well, maybe that’s water, but you get the point. We’ll spend a good amount of time talking about the science behind compost and how to create it. Not sure what browns and green are? Should you turn or aerate your compost? Do you need to water it? Don’t worry about it because we will talk about all these topics and more. We’ll also get a little into how to store or contain your compost with bins and store-bought systems.

Worm Bins

  • Goal: Build an under-the-sink worm bin
  • Cost: $35-100
  • Time: 1-2hrs
  • Difficulty: Medium
  • Kid-Friendly: Yes

Yup, you hear that right. Worms! And we’re going to teach you how to build a worm bin to grow them! Well, the purpose of the worm bin isn’t really to grow worms, it’s to produce worm casting and worm tea for composting and fertilization needs. This post will be a kind of “How-To” in that we’ll walk you through building a worm bin and getting started with growing a worm colony. We’ll talk about what to do with the by-products of your bin and wrap up with a list of resources to get started on this most interesting adventure in suburban homesteading

Seasoning

  • Goal: Expand your culinary horizons by trying out new spices and herbs
  • Cost: $0-10
  • Time: 1-2hrs
  • Difficulty: Easy
  • Kid-Friendly: Yes

The first two posts for this month will concentrate on helping your garden grow and this post will give you some advice on what to do with its product. When you think about it, we garden and raise animals on our suburban homestead for one reason – to feed ourselves! Seasoning, however, makes this goal that much more interesting. Herbs and spices add whole new level of taste, texture and nutritional input to your diet. We’ll talk about the basic herbs and spices, how to use them in your cooking and where you might want to try experimenting with ‘off the beaten path’ herbs and spices.

Your Real Hourly Wage

  • Goal: Discover the true value of your time
  • Cost: $0
  • Time: 1-2hrs
  • Difficulty: Easy
  • Kid-Friendly: No

It’s probably not a stretch to assume that, as a suburban homesteader, you probably live in the (gasp!) suburbs. That being said, it’s probably safe to assume that you don’t own enough land to be completely self-sufficient. That means that one of you (at least) must have a full-time job. And I bet you can either tell me how much you get paid annually or per hour. But is that really what you make? In this post, we’ll spend some time talking about how to calculate your real hourly wage and what to do with those numbers. This article and it’s tasks will be an interesting introspective activity for you; I expect it will really get you thinking about what’s important to you and what isn’t.

Conclusion

So there you have it, the June Preview of Project TWH. As usual, it’s going to be an eclectic and busy month. There are some hands on activities as well as some non-gardening activities – this blog is about suburban homesteading after all and gardening is just one subset of that. I’m definitely interested in a few of the article this month – worm bins and real hourly wage especially. So sit back, enjoy a cup of coffee and join us on our suburban homesteading journey in June.

Like what we’re doing here? How about letting us know in the comments or on Facebook?

June Preview - Project TWH


Mulch and Your Suburban Homestead

If you’ve been following Project TWH and implementing the suggestions on your own homestead, you most likely have a nice summer garden planted. And, if you have your summer garden planted, you’ve probably experienced weeding which is one of the downsides of a garden. Fortunately, we have the solution to your weed problems – mulch! Not only will mulch reduce or eliminate the weeding that you have to do, but it will also improve your soil over time. Double bonus! Let’s get into it:

Pros and Cons of Mulch

Mulch provides many benefits to your garden including:

  1. Blocks light to soil; greatly reducing weed germination
  2. Holds moisture that would otherwise evaporate
  3. Filters water from heavy rains; reduces soil run off
  4. Slowly breaks down into compost – increases organic matter and lightly fertilize soil
  5. Moisture holding keeps worms, salamanders and the like in the moisture during hot, sunny summer months

Despite these benefits, there are some detractors from adding mulch to your garden:

  1. Moisture holding increases the presence of pests such as snails, slugs and burrowing critters like moles and voles.
  2. Cost – sourcing good organic mulch can be difficult

I’ve never had major problems with pests but you might want to think twice about using mulch if you are already fighting these critters without the presence of mulch. In terms of cost, you might be able to skirt that issue if you grow your own mulch.

Grow Your Own Mulch

The key to this approach is cover crops. Cover crops can be defined as a crop grown for the protection and enrichment of the soil. The general approach is that a crop such as buckwheat, autumn seed oats, oil seed radishes and the like is planted. They grow quickly and either are ‘chopped and dropped’ or winter kill in place, providing mulch for the area. Sometimes legumes are used as they pull nitrogen from the air and it can be added to the earth. There is a free publication Manager Cover Crops Profitably that I would recommend for further reading on this topic.

Mulch C:N Ratio

C:N is a ratio of carbon to nitrogen. This ratio is expressed as a function of weight, so when talking about the C:N ratio of mulch, we’re talking about the pounds of carbon in the mulch material divided by the pounds of nitrogen in the material. A C:N above 1 means that the mulch has more carbon; a C:N below 1 means that the mulch is heavier in nitrogen. In The Weekend Homesteader, Anna Hess explains that “nitrogen provides quick meals for plants and bacteria, while the energy in carbon can only be accessed slowly, often by fungi. Knowing the C:N ratio of a material helps you decide whether to use that organic matter as compost, mulch, or neither.”

Common C:N Ratios

  • Humus: Humus is a stable form of organic matter and has a C:N ratio of 10:1.
  • Compost: Well built compost will weigh in around 30:1 which allows micro-organisms to thrive and quickly turn organic matter into humus. A C:N ratio of 30:1 is too low for mulching due to the fact that it will cause the organic material to ‘melt’ into the soil and will need to be replaced sooner than later.
  • Mulch: Mulch will typically have a C:N ratio greater than 30:1. This ratio makes it difficult for micro-organisms to survive and, as such, don’t pull the nitrogen out of the soil.

Types of Mulch

With the basic chemistry and biology of mulch explained, we can step into the different kinds of mulch available to you:

Straw Mulch for your Suburban Homestead

photo credit: stellar678 via photopin cc

Straw

The preferred choice of garden mulch on the Suburban Steader Homestead. The C:N ratio of straw comes in at a healthy 50:1 and, moreover, it sticks around for about 6-8 months. Cost is usually a sticking point for us but we use such little of it (1 bale takes care of both gardens) that it doesn’t pose that big of a problem. On Long Island, I can get straw for about $7-$8/bale. It’s important to understand the difference between straw and hay. Straw is sterile and is nothing but stalks from which the grain (seed) has been harvested. Hay consists of the entire harvested grass plant and is full of grass and weed seed. It is NOT a suitable mulch because, in effect, you are seeding your garden with a grass crop.

Rotten Wood Chips

Fresh wood chips range in the 200:1 (softwoods) to 600:1 (hardwoods) range and are too high in carbon for a mulch. If you let these chips sit for two years or so, they’ll decompose about halfway and be ready for use. Most people use this type of mulch around fruit trees with great success. Be careful with this kind of mulch as you can’t be sure of what’s in it if you don’t do the chipping yourself.

Municipal Waste Mulch

Many municipalities (including mine) collect grass clippings, leaves, branches and other organic material. They then grind it down and compost it into a mulch. It is often very reasonably priced – in my area, it is free to home owners assuming you can carry it from the processing area (they even bag it for you). The problem with this kind of mulch is the contents. You have no idea what is in there. Have people treated their grass with chemicals? Is there pesticides on the tree branches? Are there a bunch of ground up weeds with Round-Up in there? Think long and hard about whether you want to put that kind of thing on the soil that is growing food you want to eat.

Grass Clippings

The C:N ratio of this kind of mulch is about 20:1. Not ideal, but it will work for a short duration. The main positive of grass clippings is its availability. If you cut your own grass, you have almost a limitless supply for this kind of mulch. Likewise, if you live in the suburbs, it’s likely that your neighbors also cut their grass giving you a large supply of mulch. But not so fast. Do you or your neighbors use herbicides or pesticides on your grass? If so, skip this step. Also, you don’t want to use grass that is going to seed. It essentially defeats the purpose of mulch. If you don’t use anything on your grass and it’s not going to seed, then by all means use it as mulch. Just be prepared to replace it more often. The low C:N ratio means that the grass will ‘melt’ into the soil and need to be replaced sooner than later.

Comfrey Leaves

Much like grass, they work great assuming there is nothing added to them from the herbicide or pesticide family. You can grow a few plants in an out-of-the-way area and cut the leaves back every few weeks for mulch. I have no personal experience with this approach to mulching.

Autumn Tree Leaves

Everyone who has trees has wondered what to do with all those leaves. Well, there’s hope my friends! With a 50:1 C:N ratio, leaves tend to match straw in their level of use for mulch. And, for the most part, leaves are free. The downside to leaves is that they tend to blow away if not shredded. I have had good luck enriching my soil by adding a layer of leaves (roughly 1-3″ thick) under a layer of straw when I put my garden beds to sleep for the winter.

Compost

It can do the trick, but I don’t recommend it. Compost will, for a time, stock the propagation of weed growth. However, it will allow the weeds to grow eventually. Add that to the fact that you’re probably putting in some decent effort to make a quality mulch to better your soil and this approach is one I would steer clear of.

Cardboard and Paper

We’ve used cardboard in our kill mulch to much success. And, in a typically mulching situation, it works well too. The problem with cardboard and paper is their propensity to fly away if not held down. I typically recommend a layer or cardboard or paper under a layer of straw. Be aware that both items will likely decompose in a few months. Also, make sure to stay away from glossy and colored paper.

How To Mulch

OK, we’ve armed ourselves with all this information and procured just the right mulch for our application. How do we apply it? The first step is to weed your garden. Pull anything out that you don’t want to grow. Be sure to pull out the entire weed, root and all. Next, lay down enough mulch so that no weeds will germinate through it. I’ve found that the sweet spot in my gardens is anywhere between 2 and 4 inches, but you’ll have to experiment for yourself. Obviously, you’ll have thinner mulch around seedlings versus established plants. That’s about it. Maintenance is almost nonexistant. If you see a weed, pull it out and thicken up that area of mulch a bit. If you notice your vegetables are turning yellow, you probably have too high of a C:N ratio meaning you have a nitrogen deficiency. There are a few things you can do to fix this: add diluted urine (yes, you read that right), compost tea or a layer of compost to get things back in order. I’ll cover diluted urine and compost tea in June.

Wrap-Up

You’ve just done a little bit of work to make your life that much easier. Sit back, sip on a cold beverage and enjoy watching your neighbors scurry around weeding their gardens. Got a tip or question regarding mulching? Please let us know in the comments or on our Facebook Page. Mulch and Your Suburban Homestead

photo credit: hardworkinghippy via photopin cc

Mulch and Your Suburban Homestead


Plant Your Summer Garden

If you’ve been following Project TWH, you’ve learned how to find room to homestead, performed a suburban homestead site survey, planned your summer garden and maybe even used the kill mulch technique to get your garden area ready. Now it’s time to really get your suburban homestead moving in the right direction – we’re going to plant your summer garden!

If you refer back to The Weekend Homesteader, you’ll see that planting your summer garden has four main components to it:

  • Knowing When To Plant
  • Succession Planting
  • Knowing How To Plant
  • Garden Maintenance

When To Plan Your Summer Garden

Determining when to plant your summer garden is probably one of the most frustrating parts of starting a suburban homestead garden. Plant too early and your crop is prone to late freezes that could kill it off early. Plant too late and your crop might bolt right to seed and have a horribly small yield.

What’s a gardener to do?

If you remember the 5 Tips To Start Your Garden that I provided a while back, you’ll remember that the first tip was to know your zone.

Your hardiness zone is a good indication of when last freeze and first freeze occur in your area and it also will have information about when to plant different species relative to these dates.

You can find more information on your hardiness zone by clicking here: USDA Hardiness Zone Map.

Hardiness Zone - Plant Your Summer Garden

Back in the article on Planning Your Summer Garden, I gave you five or six different vegetables that I considered ‘easy’ to grow. In general, the swiss chard can be started about a month before last frost and the rest can be planted after the frost-free date. Mint can be planted just about any time of the year.  You should consult with your seed providers and local nurseries for tips specific to your area.

Succession Planting

What’s worse than having a small harvest? How about a HUGE harvest that all happens at the same time? What are you ever going to do with ALL of these vegetables when they show up at the same time?

By staggering your planting, you will pretty much guarantee that not all your crops show up at the same time. How you use this method is up to you. Personally, I try to stagger plantings every week or so. That means that when the crop in one area is harvested, I’ll have some more coming up in another area a week later and a week after that in another area.

You can also use this approach to work with your schedule. Are you a teacher with the summer off? Plant so that there’s no harvest until mid-June. Or, if you plan to be on vacation mid-August, plan out your plantings so that nothing will be ready for harvest then.

How To Plant Your Summer Garden

You just dig a hole and throw the seeds or seedlings in. Right? Well, it’s not quite that simple, but it’s not terribly difficult either.

Here’s the really simple approach I recommend:

  1. Rake back the mulch
  2. Depress the soil as required
  3. Place seeds in ground
  4. Fill hole, tamp in place

It’s really not that hard. All you really need to remember is that the seeds you’re using need access to soil and water so making sure they are planted deep enough (but not too deep) is important.

If you’re using the Square Foot Gardening approach, I recommend building the garden stamp shown in the following video. Super easy to make and VERY useful:

[youtube_sc url=”yOZNRvlECic”]


If you’re using seedlings (or sets as others call them), I recommend planting them so that the first set of leaves is right above the soil. This approach gives the best chance for roots to grow and will also give your stems the most stability as they grow.  You might want to consider some fertilizer when you plant your seedling as well.  The application of fertilizer during planting will typically destress the situation for the young plants and give them the nutrients they need to begin growing in their new surroundings.

Summer Garden Maintenance

Again, this step isn’t rocket science. If you take the time to mulch, it will definitely help. You’ll spend much less time weeding and the water you apply to your summer garden will be retained much better.

Basically, you need to do three things to keep a garden in good order:

  1. Weed
  2. Water
  3. Harvest

You don’t have to worry about harvesting (with the exception of beans lettuce) for a while and the other two steps are relatively straight forward. It’s really hard to screw up a garden once it’s set, so take it easy and have fun.

Wrap Up

There you have it, how to plant your summer garden. It’s not terribly difficult and really is one of those things that you learn to do by doing it. So, please, go out and get your hands dirty this weekend! You’ll enjoy it!

Please let us know any tips you have for planting your summer garden in the comments or on our Facebook Page.

photo credit: Distant Hill Gardens via photopin cc

Plant Your Summer Garden


May Preview – Project TWH

May is lining up to be an interesting month at the Suburban Steader Homestead. In the May Preview of Project TWH, we’ll talk about a lot of things that may seem unrelated. A few are pure homesteading activities and a few are more general approaches to the suburban homesteading lifestyle. It’s an interesting mix of tasks that I think you’ll really enjoy.

As usual, we’ll be referencing The Weekend Homesteader throughout this month. In fact, our four main articles for the month will be centered around the four topics Anna Hess outlines for May:

  • Plant Your Summer Garden
  • Nutrition
  • Mulch
  • Teamwork

Plant Your Summer Garden

  • Goal: Plant a small garden
  • Cost: $0-20
  • Time: 1-5hrs
  • Difficulty: Easy
  • Kid-Friendly: Yes

Finally! The planning in April is paying off and you’re ready to put seeds and seedlings into the ground! In this post, we’ll spend time talking about when to plant and what information to take into account when planning. We’ll also discuss resources available to you which can help you time your plantings appropriately. Succession planting will be a topic we touch on as will how to plant. Finally, we’ll spend a little time talking about maintaining the garden once you’ve got crop in the ground.

May Preview - Project TWH

photo credit: Arya Ziai via photopin cc

Nutrition

  • Goal: Discover what types of food make your body healthy and happy
  • Cost: $0-5
  • Time: 1-10hrs
  • Difficulty: Easy
  • Kid-Friendly: Maybe

You can’t run a suburban homestead if you’re not of sound body. That means that nutrition and physical fitness are important to us. With that fact in mind, we’ll take a look at what is good nutrition and how do we acquire it. I’ll spend a little time talking about how I honed in my nutrition a bit (spoiler: I’m not perfect, and you don’t have to be) and I’ll wrap up with a list of resources that I recommend you look into in order to make your own informed decisions.

Mulch

  • Goal: Mulch your garden for weed control and organic matter production
  • Cost: $0-100
  • Time: 2-10hr
  • Difficulty: Medium
  • Kid-Friendly: Yes

Sick of weeding? Mulch is your solution. But there’s more benefits than just reduced garden labor when it comes to mulch. I’ll talk about the pros and cons of mulching and whether I believe it to be a solid tactic for your garden. We’ll dig a little into the science of mulching but don’t worry, you don’t need a degree in chemistry or biology for this discussion. We’ll finish the discussion by identifying different kinds of mulch, potentials places to source them and how to apply them to your garden.

Teamwork

  • Goal: Find a person or group of people whose homesteading skills complement your own
  • Cost: $0
  • Time: A lot or a little
  • Difficulty: Medium to difficult
  • Kid-Friendly: Maybe

While we aim for a self-sufficient, self-reliant life, suburban homesteaders aren’t going to go it alone. Nor should they. Building community through teamwork is key to long-term survival. I’ll spend some time talking about different roles within a team and how they might jive in a community setting. In the end, I’ll wrap it up talking about how I’m using a community teamwork approach to build my suburban homestead.

Conclusion

So there you have it, the May Preview of Project TWH.  Sounds like it’s going to be a busy month with a lot more hands-on activities than April. I’m really looking forward to a lot of the topics coming up this month – I could spend hours talking about nutrition and teamwork as they both relate to big parts of my past. I’m also VERY excited to get my garden in the ground. I hope you sit back, enjoy a cup of coffee and join on our suburban homesteading journey in May.

Like what we’re doing here? How about letting us know in the comments or on Facebook?

photo credit: Distant Hill Gardens via photopin cc

May Preview - Project TWH


Plan Your Summer Garden

Over the last few weeks, I’ve talked about Finding Room to Homestead and how to perform a Suburban Homestead Site Survey. Now that you know how you’re going to approach your suburban homestead and where on your land you’ll be conducting different suburban homesteading activities, it’s time to plan your summer garden.

For most suburbanites, setting up a garden is the first step to a suburban homestead. Guidance from The Weekend Homesteader is quite useful in making sure that you avoid a few pitfalls and are aware of a couple of tricks and tips for this otherwise simple task. With that thought in mind, we’ll be covering the following topics in this post as well as talking about how we implement these areas of knowledge on the Suburban Steader Homestead:

  • Garden Size
  • Garden Location
  • Garden Layout
  • Simple Vegetables and Herbs

Garden Size

If you remember one thing from this post, remember this:

You don’t set and forget a garden

You will be working this area extensively throughout the season – weeding, harvesting, planting and maintaining. The reason I emphasize this point is because the biggest mistake you can make when you plan your summer garden is to bite off more than you can chew. Designing a space that is too large will be more detrimental to your suburban homesteading success.

Why is too big worse than too small you ask?

The answer lies in availability of time. You only have a certain amount of time that you can spend gardening. This fact is especially true with suburban homesteaders as they are not working the homestead all day, every day. Typically a garden is a weekend and/or after work activity for most of you.

So, how big of a garden should you build?

If you’ve never gardened before, I suggest you plan your summer garden in an area that is roughly four (4) feet by eight (8) feet. This approach will give you forty-eight (48) square feet of gardening space. Anything more than that is going to be too intimidating. You can have a few side items if you like outside of this area (potted tomatoes, blueberry bushes, etc.) but the majority of gardening should happen in this area.

Note that Anna Hess disagrees with me. She recommends beginners can go up to one hundred forty-four (144) square feet – three times what I recommend! All I can say to that is remember that it’s always easier (mentally and physically) to expand your garden than decrease its size.

Suburban Steader Homestead Garden Size

For the last half decade or so, I’ve used a roughly forty-eight square foot area for my garden. By using the space efficiently – I implement Square Foot Gardening principles – I have successfully offset my family’s vegetable consumption by a significant margin. Please do not take that to mean that we are anywhere near self-sufficient.

I’ve doubled our garden space this year with the addition of a four foot by eight foot raised bed. In addition, I have some perennials (blueberries, strawberries, etc.) on other locations which are above and beyond this ninety-six square feet of garden area we now have.

Garden Location

In my last post, I talked extensively about how to lay out your suburban homestead based upon a long list of factors. There’s not much more to be said here that hasn’t been outlined in that post. The one bit of advice I would give is to plan your summer garden so that it is not far from the house. The closer you are to your garden, the more apt you will be to work on it and the better success you will experience.

Suburban Steader Homestead Garden Location

As you’ve seen in this picture, the new garden box I put in is right next to our patio. The old garden box is about as far away from the patio as you can get on my land. This update is already paying dividends. I spend a few minutes each day tending to the closer garden box whereas I don’t walk out to the other one as much. This little bit of knowledge has taught me that I’m going to put the more needy crops in the closer box.

Garden Layout

I have two main tips when you plan your summer garden on your suburban homestead:

  1. Remember the Two Foot Rule
  2. Visual Record Keeping

The Two Foot Rule

This rule is something I learned from Mel Bartholomew in his Square Foot Gardening principles. Most people cannot reach into a bed more than two feet. If you design your garden so that you can reach every piece of soil with this rule in mind, you’ll never have to walk on your garden (compressing the soil) and you’ll be able to utilize all your land. That’s part of the reason I recommend four foot by eight foot beds. As long as the maximum dimension on one side is four feet, you’ll be able to reach the middle on either side.

Visual Record Keeping

I’ll be perfectly honest – I have a crappy memory.

I can’t remember what I planted or where I planted it, especially if I’m starting from seed. That is why I use a visual record keeping system. Not only does it remind me of what I planted where, but I can track when I planted it, how many plants/seeds I planted and plan accordingly.

I use a piece of software called Garden Planner from GrowVeg.com. While I’m a kind of tech geek, there’s nothing wrong with good old paper and pencil to keep track of your garden layout.Plan Your Summer Garden - Garden Planner Software

Simple Vegetables and Herbs

All this work to plan your summer garden and you don’t even know what you’ll be growing yet. Not any longe!.

It’s time to pick your produce!

As a novice gardener, Anna Hess and I agree that picking simple, easy to grow vegetables will give you early wins and build your confidence. With that thought in mind, we recommend the following items:

  • Swiss Chard – A summer green that is virtually work free. Cooks up like spinach but much easier to grow.
  • Summer Squash (inc. Zucchini) – Big and beefy, these veggies will provide you with lots of produce as well as lots of confidence. There’s something boastful about growing a plant as big as summer squash can get. With that in mind, summer squash does take up a lot of room, so if space is at a premium, you might want to think this one over.
  • Green Beans – Quick to sprout and quick to harvest, these guys will give you a quick, bountiful victory. Bush beans don’t need a trestle but will grow very quickly meaning you’ll be replanting a lot.
  • Tomatoes – They love sun! While they’re a bit more finicky than some of the other veggies mentioned, you can’t beat the taste of a homegrown tomato. Buy them in seedling sets and plant them deep. Too much water is a problem for these guys.
  • Mint – A quick grower and a perennial to boot! Mint will take over your garden if you’re not careful so make sure you have a root barrier in place or, better yet, start it in a pot.
  • Basil – Drop the seeds, water and walk away. You’ll have fragrant leaves all summer.

Anna also recommends okra – I can’t really comment on that as I’ve never grown it. I will say that the items I would add to the list are romaine lettuce and broccoli. Both grow rather easily from either seed or seedlings.

The most important thing to do when picking what you grow is remembering what you eat. It’s a shame to grow tomatoes if your family dislikes them. At best, you’ll have a harvest and not know what to do with it and, at worst, you won’t work your garden because the outcome doesn’t interest you.

Wrap-Up

There you have it – how to plan your summer garden in a few simple steps. Remember that, at the end of it all, gardening should be a relaxing endeavor, not something you feel is a chore. That’s not to say it’s not a lot of hard work, but if you find yourself resenting the garden, take a step back and figure out why. You should be enjoying this work – you get to reap all the rewards!

Please let us know any tips you have for planning your summer garden in the comments or on our Facebook Page.

Plan Your Summer Garden


Finding Room To Homestead

Suburban homesteading is a different animal than normal homesteading. Finding room to homestead can be a tricky task for the typical suburban homesteader, especially those who live on small plots of land or in apartments. Granted, if you live in the suburbs but have a large plot, this task may be easy for you.

Those of you with minimal to no land need not fret – we’re here for you. This article will help you find room to homestead on your lot. We’ll use our lot as an example and concentrate on three main areas:

  • Lawns
  • Container Gardens
  • Areas Beyond Your Yard

Finding Room To Homestead

photo credit: gfpeck via photopin cc

Lawns

A lawn is one thing most suburban homesteader have at their disposal. Even if you live on a small lot, there’s a lot of room to homestead on that nice green carpet you have.

But how, you ask? That’s simple – landscape integration!

Even though it’s a lot of land from a homesteading standpoint, your lawn is something many suburban homesteaders don’t want to completely get rid of. Plus, what would the neighbors think?

First, forget about the neighbors. They don’t pay your rent or mortgage, so what they think doesn’t matter (unless you are unfortunate enough to live in an HOA). If you’re really concerned about your neighbors, you can keep your front yard untouched and hide your homesteading in the backyard.

Second, realize that you can incorporate homesteading into your lawn in a way that is aesthetically attractive while still functional.

Here’s a few examples of how you can incorporate homesteading into your lawn:

  • Incorporate bushes (blueberry, strawberry, etc) into areas where you’d normal put box hedge or other partioning bushes
  • Place fruit trees in areas you want to create shade
  • Build garden boxes and raised beds into your landscape rather than large inground gardens
  • Stick with hens if you are going to have chickens (and build an attractive tractor for them)

How We Use Our Lawn

We follow most of the suggestions above at the Suburban Steader homestead.

First, we do not have an in-ground garden. All of our gardening area is built into the landscape as raised beds. They allow us to landscape around the garden and provide a more aesthetically appealing element to the backyard.

Second, our backyard is fenced off and we have mulch beds around the majority of the fencing. We have been planting many perennial plants like strawberries and blueberries in these areas. This approach stacks functions as it puts an aesthetically pleasing plant in the mulched area and also provides an additional  food producers. If I’m going to maintain a plant, I’d prefer that it produces food for me.

We have primarily worked in the backyard.  The front yard is currently untouched but we do have plans for it. As we clean up the remnants of the former owner, we do plan on putting in some fruit trees – probably apple – in the future as well as some more “fedge” (food hedge) type plants on the peripherals.

Find Room To Homestead

photo credit: Bad Alley via photopin cc

Container Gardens

You’re not out of luck if you don’t have a lawn. You can still find room to homestead with container gardens. A sunny balcony, stoop or window can provide more room than you think for growing food. You’ll obviously be limited to what you can grown, but if you center on herbs and easier to grow plants like tomatoes and peppers, you’ll do just fine.

The one thing you need to pay attention to with container gardening is light. South facing areas will get more sun than others, but you can work with just about any light source. Do a little research on what grows best with the amount of sun you’ll get.

Soil will also be a concern. You don’t have the advantage or having seemingly limitless nutrients from the ground so you need to be sure to use a good soil full of organic matter at the onset and then supplement it with something like compost tea (we’ll talk about that later on in this series) on a regular – probably monthly – basis.

How We Use Container Gardening

Our use of container gardening goes back to the aesthetic approach. For the most part, the Suburban Steader homestead uses container gardening for easy access items like herbs. We place containers on the wall of our patio during the summer and grow items such as oregano, basil, parsley, rosemary and mint in them. These items are easily accessible when we are cooking (especially when cooking outside) and provide a fragrant aroma to our patio area.

Areas Beyond Your Yard

Taken up all the space your little window and stoop offer and want to do more? Here’s a few places you might be able to find room to homestead away from your home:

  • Community gardens
  • Empty lots
  • Neighbor’s lots
  • Churches or schools

Definitely talk to the folks who own the land before you go ahead and start homesteading on land that isn’t yours.

I want to make a point that, while we have talked almost exclusively about gardening, homesteading isn’t all gardening. You can do a lot of other suburban homesteading tasks like canning, cooking and food storage if you don’t have a piece of land to garden on.

How We Expand Our Homesteading

The Suburban Steader homestead is currently confined to our lot. We haven’t expanded much beyond our quarter acre other than to build community.

Wrap-Up

So there you have it – how to find room to homestead. Most of these steps are pretty easy. Take a look at your own little spot in life and see how you can tweak it to your needs.

Please let us know any tips you have for finding room to homestead in the comments or on our Facebook Page.

photo credit: Al_HikesAZ via photopin cc

Finding Room To Homestead


April Preview – Project TWH

In the April Preview of Project TWH, we’ll review the tasks we have lined up for this month.  A lot of these tasks are planning-related.  This April Preview couldn’t come at a better time for us.  The weather is finally warming up here on Long Island which means  it’s time to start planning our suburban homestead activities for the upcoming growing season.

In The Weekend Homesteader, Anna Hess outlines four tasks that we’ll tackle in April:

  • Find Room To Homestead
  • Survey Your Site
  • Plan Your Summer Garden
  • Kill Mulch

Find Room To Homestead

  • Goal: Seek out growing space even if you don’t own land
  • Cost: $0
  • Time: 1-2hrs
  • Difficulty: Medium
  • Kid-Friendly: Maybe

This task is rather simple despite the semi-ambiguous title.  We’ll spend a little time figuring out what we have in terms of our land.  During this time, we’ll take a look at what we can change/use/not use to grow and improve our suburban homestead.  We’ll look at the kind of land we have – lawn, forest, unused areas, etc – as well as areas where we might want to consider non-conventional approaches to suburban homesteading.  In addition, we’ll consider the use of areas beyond our yard (empty lots, churches, neighbors’ yards, schools, etc.) for expansion of our suburban homesteading use.

April Preview - Project TWHSurvey Your Site

  • Goal: Figure out the assets and problems presented by your yard and community
  • Cost: $0-5
  • Time: 2-5hrs
  • Difficulty: Medium
  • Kid-Friendly: Maybe

Now that we’ve identified WHERE we are going to homestead, it’s time to figure out HOW we’re going to homestead.  We’ll start by sketching a map of our land – don’t worry, you can print out images from Google Earth if you failed art – and determine what we really have to workout.  The map can be used to develop a sun and shade profile (possible in conjunction with Google Earth and SketchUp Make).  It will also be used to determine paths commonly used on the property.  Similarly, we will identify areas that are accessed the most and areas accessed the least.  The soil in each area will be analyzed for its ability to grow crop.  The culmination of this information will allow us to create a plan for our land and determine what activities will take place where.

Plan Your Summer Garden

  • Goal: Decide on the size, location and layout of your summer garden and choose the vegetables to plant
  • Cost: $0-20
  • Time: 1hr
  • Difficulty: Easy
  • Kid-Friendly: Maybe

Again, this task is fairly simple – we’ll take a look at the site survey and determining what we’ll plant where.  Each location and layout within each location will be reviewed.  In addition, a small discussion on record keeping and  it’s importance for a suburban homestead will take place.  The end result will be a list of vegetables we intend on growing.  We’ll also develop a general plan for where on the property each vegetable will be grown.

Kill Mulch

  • Goal: Prepare a garden plot without tilling the soil
  • Cost: $0-100
  • Time: 1-4hrs
  • Difficulty: Medium
  • Kid-Friendly: Maybe

Finally a task that involves real work and not just paper and pencil planning!  Kill mulch is “an easy way to turn last year’s vegetable plot…into a no-till garden” according to The Weekend Homesteader.  In the simplest description, we’re going to chop the current growth as close to the ground as we can, lay down some mulch or compost that has seeds in it, followed by wet cardboard or newspaper.  The kill mulch will be finished with weed-free compost and a thick layer of mulch.  This approach will ensure our garden area does not have any growth that we don’t want and will also build up the health of the soil.

Conclusion

So there you have it, the April Preview of Project TWH.  There’s not many of exciting things in this month’s task list but a lot of important steps to set up for a successful suburban homestead.  As the information and plan evolves, so will the homestead.  Now that we’ve laid out the plan for the month, we’ll keep you updated as we start to execute on each of these tasks.  Looks like the beginning of a fun journey!

Like what we’re doing here? How about letting us know in the comments or on Facebook?

photo credit: roman.petruniak via photopin cc

Project TWH: April Preview