1

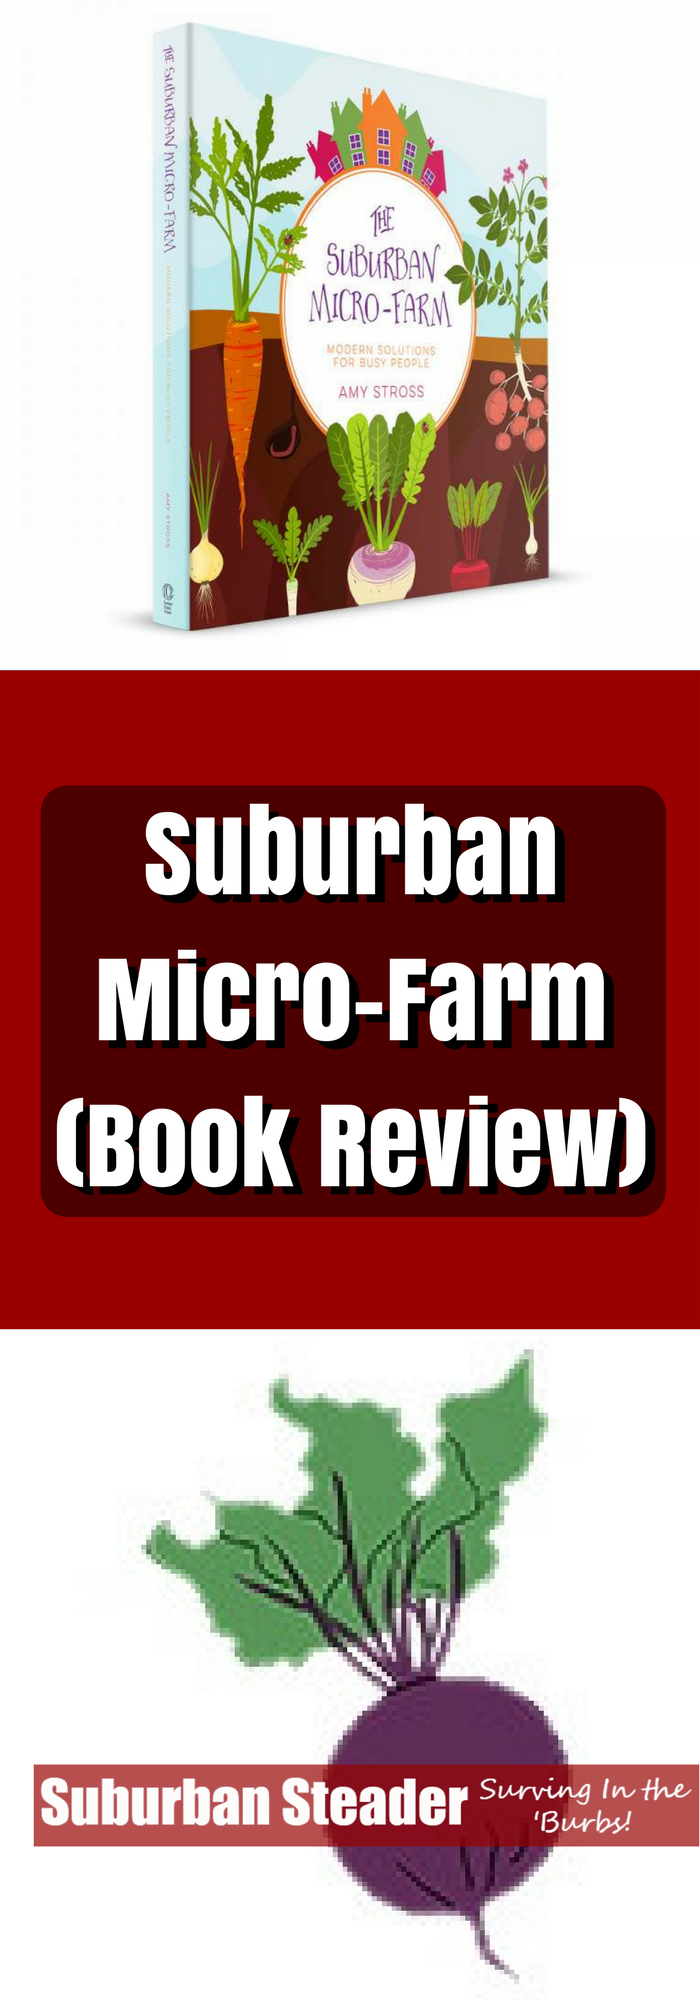
Suburban Micro-Farm (Book Review)

What is the first thing that a suburban homesteader does?  I’m sure you guessed correctly – they start a garden.  It’s probably the easiest thing to do to start a self-reliant lifestyle because of many reasons. There’s a low barrier to entry – you just need some dirt and a few seeds – and it’s also more socially acceptable than storing large quantities of food, water and/or ammunition. Amy Stross of TenthAcreFarm.com fame has realized this fact.  She also knows that starting a micro-farm on her suburban plot has started her walk to self-reliance.  She’s taken all she’s learned during her years of micro-farming (read: large-scale gardening) and put it together in one of the most well-written, easy to read books on the topic that I’ve ever read.  Read on to find out why you need The Suburban Micro-Farm in your suburban homesteading library today!

Book Set-Up

Amy put her heart and soul into this book and it’s quite obvious.  She takes a very intelligent approach to the layout of the book.  It is broken down into three parts – Getting To Know the Micro-Farm, Becoming A Micro-Farmer and Advanced Micro-Farming Techniques.  Each part has sub-chapters and each chapter has subsections.  This intensive breakdown allows you to use this book as a reference book and quickly get to the area that you need immediate information on.

Likewise, the book is written in such a way that you can read it from beginning to end (I did) and build upon the sections you’ve already read.

The parts and chapters of this book are as follows:

Introduction

The Introduction is just that – an introduction to the book and a general layout of what Amy plans on teaching us and how the book is laid out.

Part I – Getting To Know The Micro-Farm

Chapter 1 – Suburbia: Civilization’s Opportunity

This chapter consists of the following parts:

  • The Suburban Problem
  • Suburban Micro-Farming Myths
  • The Suburban Micro-Farm Solution

Chapter 1 is a very interesting chapter because you get to hear a lot about Amy’s journey through suburban gardening to suburban farming.  You hear – at a high level – about some of her pitfalls and the errors she made.  You also get to explore some of the myths associated with farming/gardening in the suburbs and what the truth really is.

Chapter 2 – Managing Expectations

This chapter consists of the following parts:

  • Prevent Garden Overwhelm Syndrome
  • Life Hacks for the Busy Micro-Farmer
  • When It’s Not Enough
  • Overcoming Brown Thumbs
  • Setting Up Your Neighborhood for Success

Many suburban gardeners and farmers are discouraged when they don’t have immediate success.  Amy walks you through some life hacks to see better results early and get a few quick wins.  You’ll build on these wins and get comfortable as a suburban farmer.  The biggest tip I took out of this section was to spend fifteen minutes every day (every.single.day) in the garden.  This approach will make sure that you see what’s going on and don’t let things go too far and become a bigger problem.

Chapter 3: Developing Healthy Soil

This chapter consists of the following parts:

  • Building Soil Health and Fertility
  • Guide to Organic Soil Amendments
  • No-Till Micro-Farming
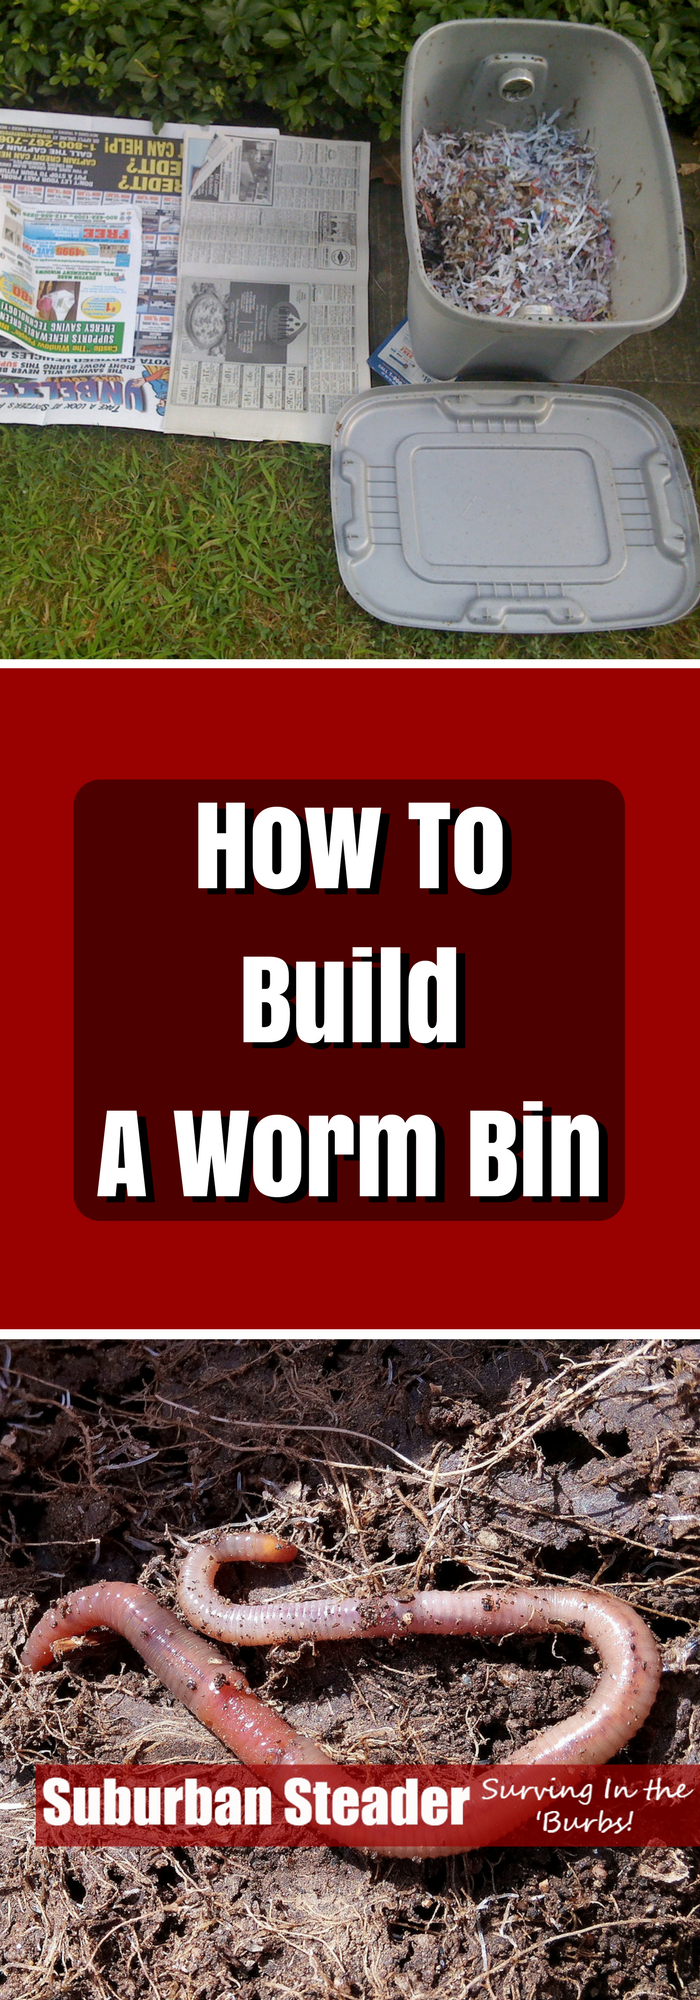
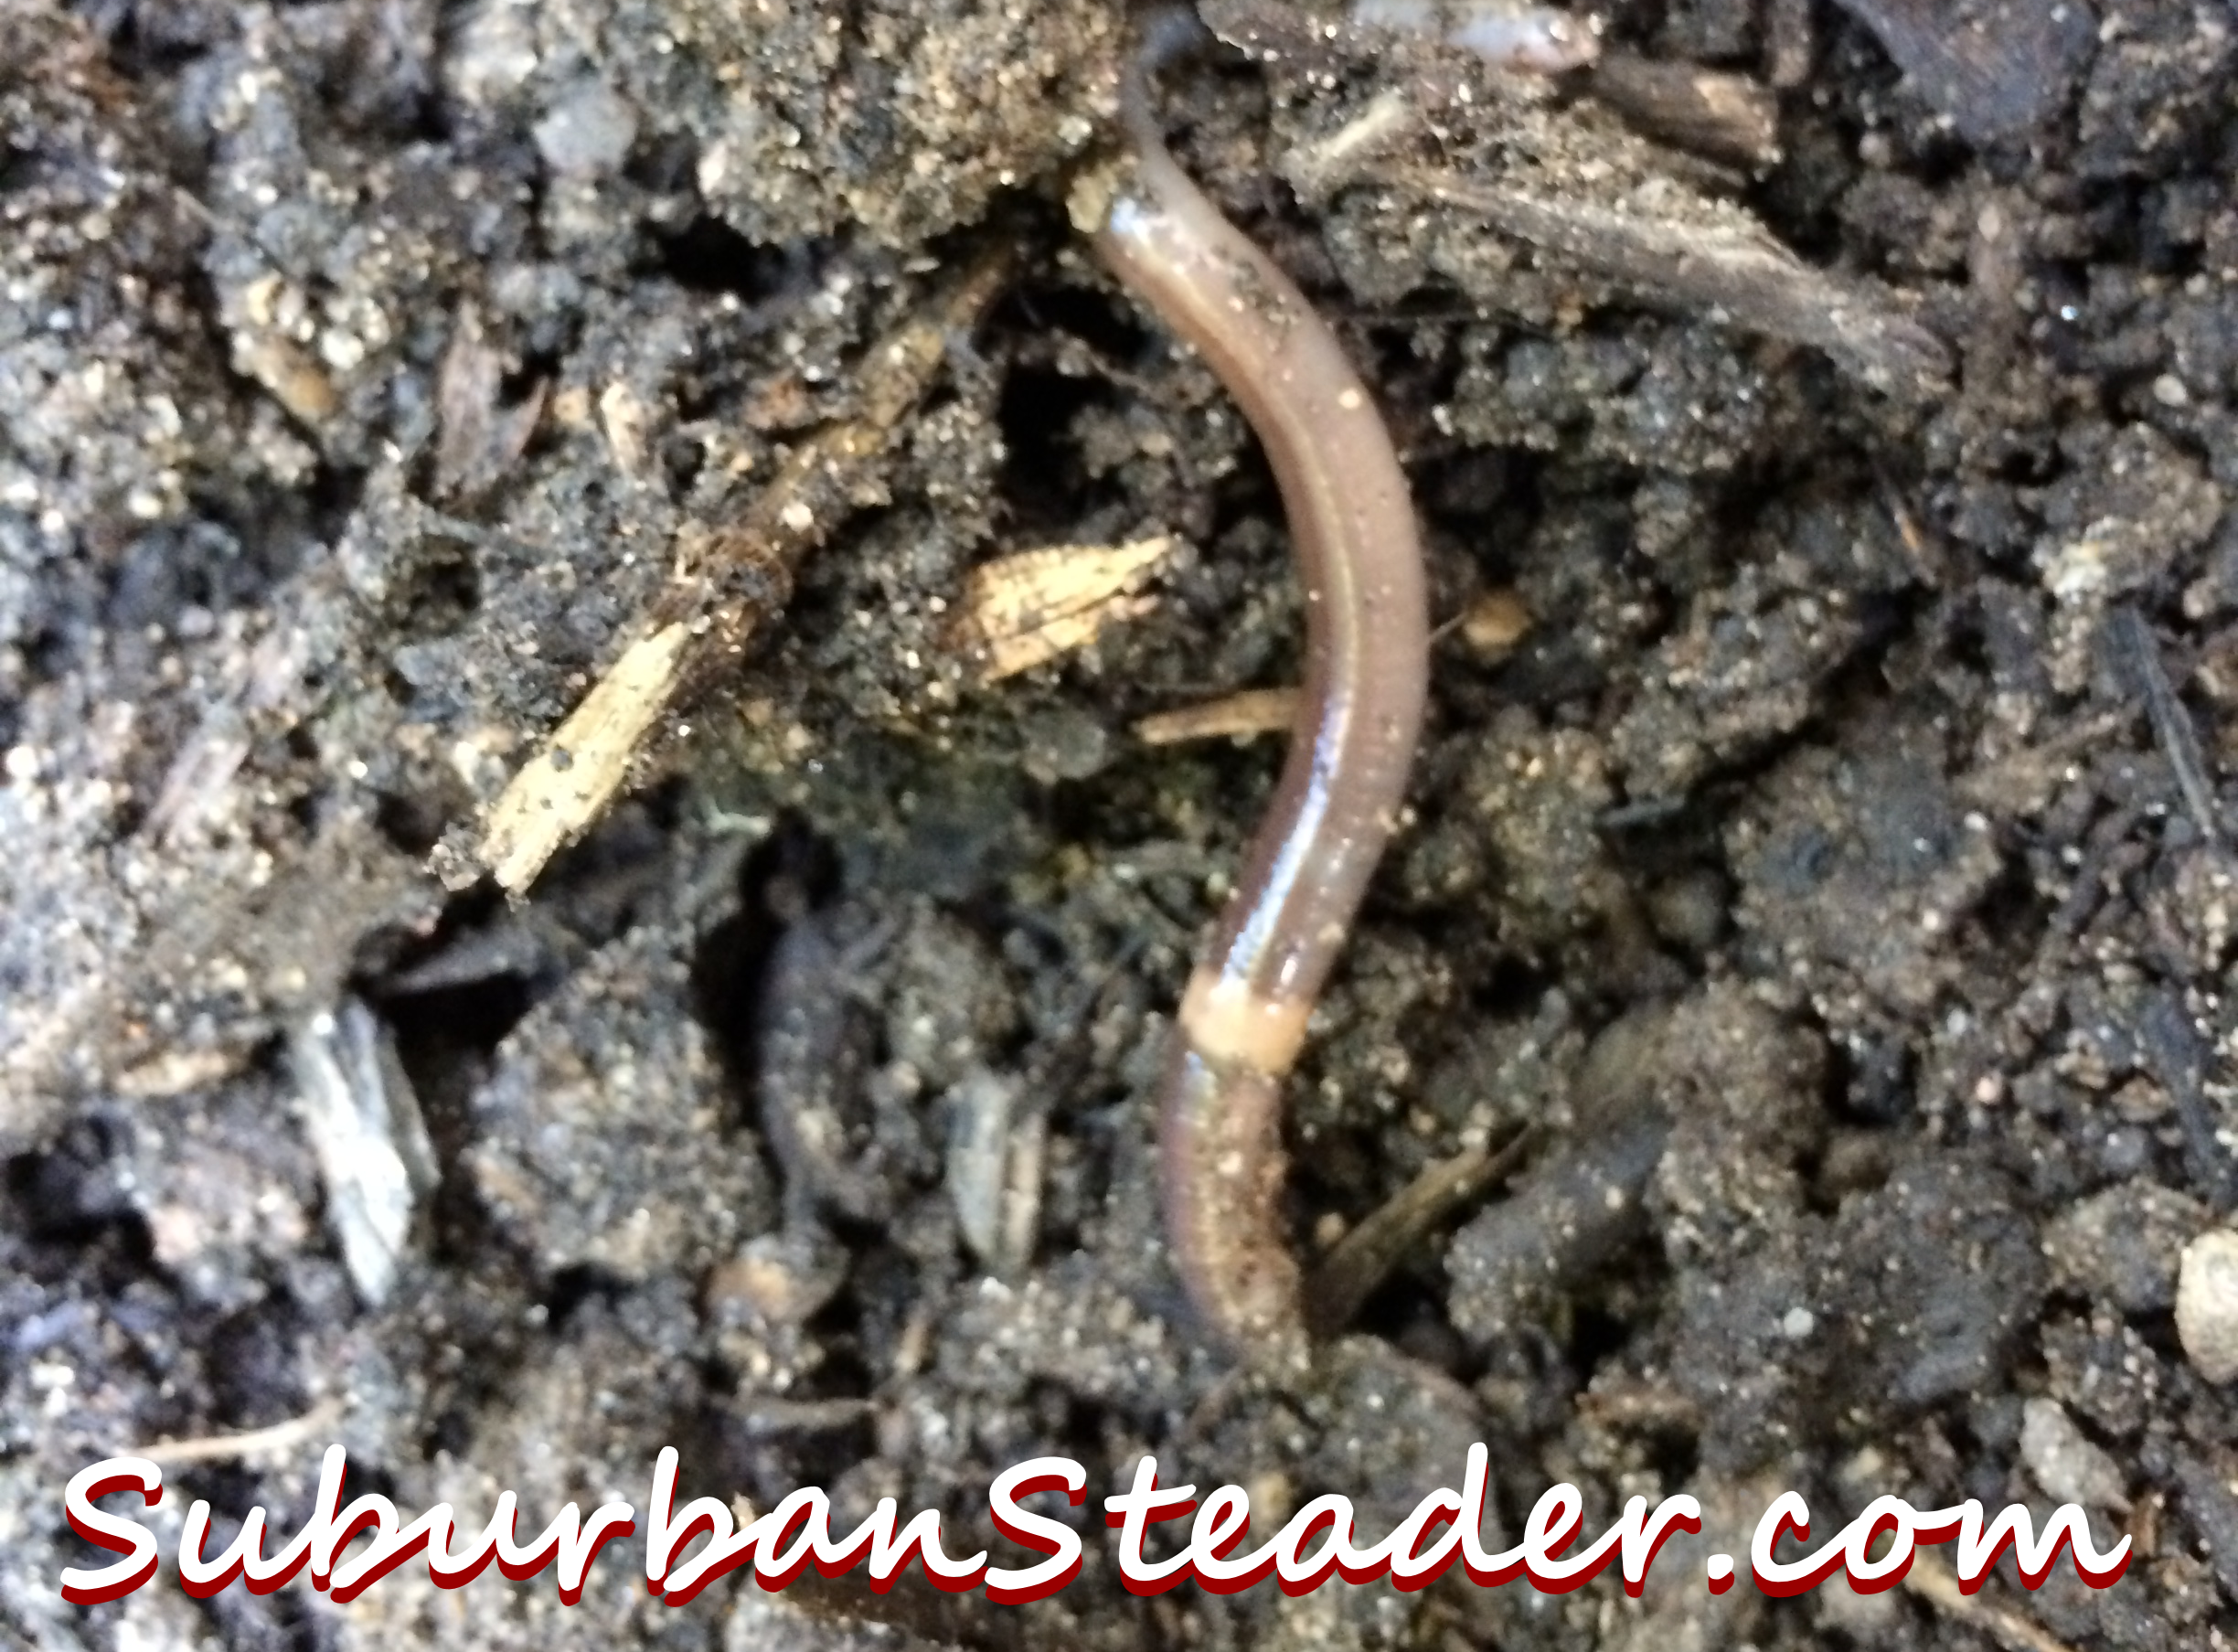
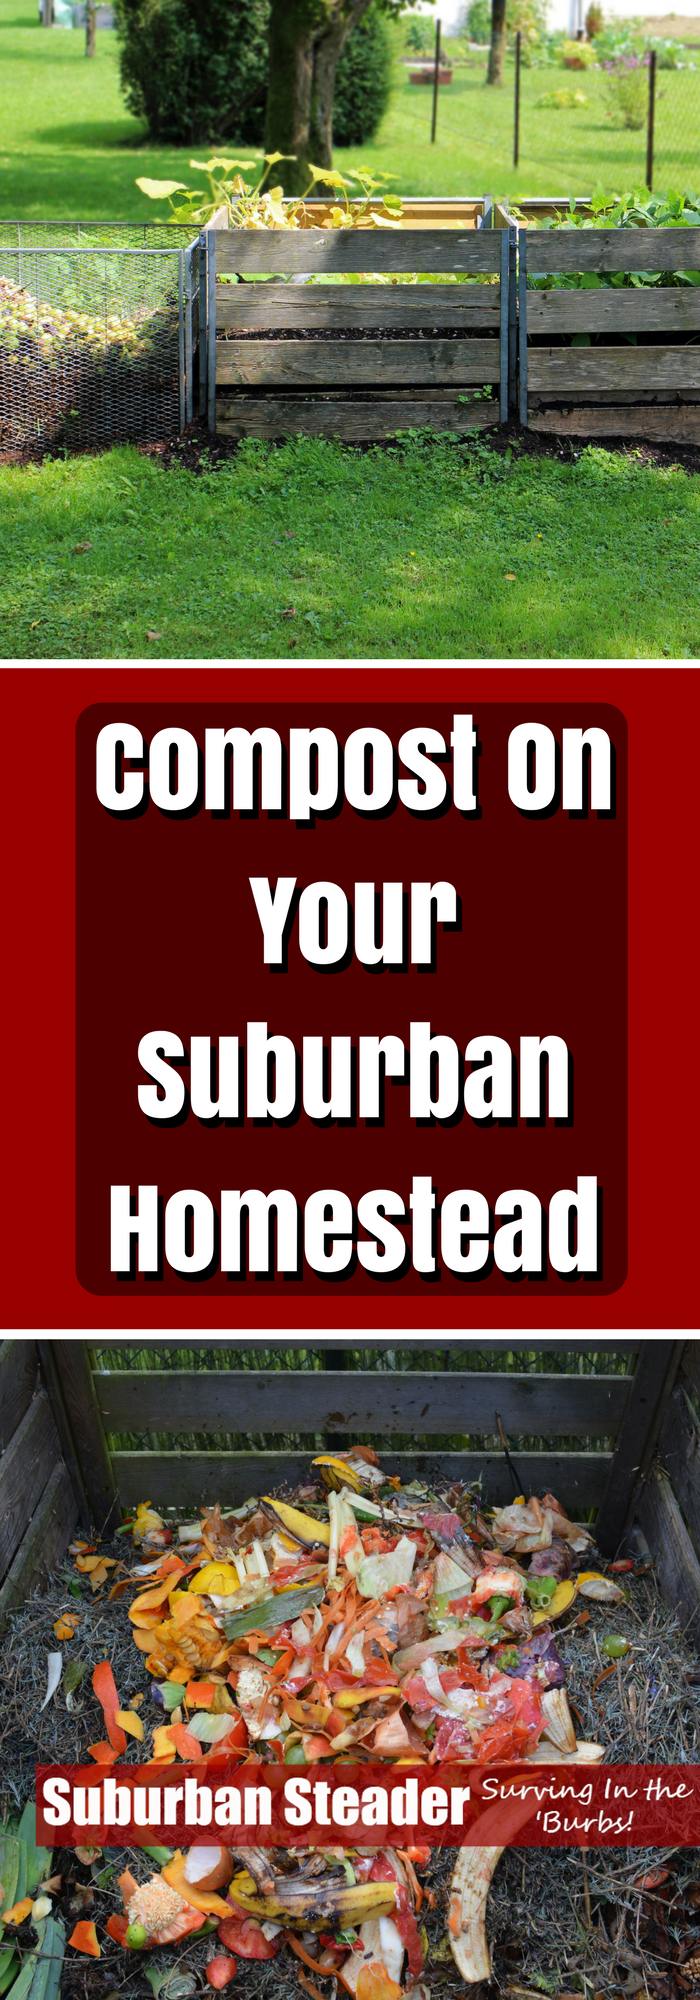
  • Constructing a Simple Compost System
  • How to Compost
  • Cultivate Worm Castings with Vermicomposting

Soil is the lifeblood of a great suburban micro-farm.  This chapter of The Suburban Micro-Farm is great because it walks you through all the different ways to build high-quality soil.  These approaches will create a great base layer for your crops and allow you to achieve success earlier.

Chapter 4: Vegetables On The Farm

This chapter consists of the following parts:

  • The Efficient Micro-Farm
  • Guide to Planting and Growing Vegetables
  • Choosing Crops to Meet Your Needs
  • How to Place Vegetables
  • Extending the Season with Cold Frames

Soil is great, but folks plant gardens and farms to get produce.  This chapter is chock full of information on many different crops you can grow.  It tells you how to grow them, what crops to grow with them to promote successful harvest and how to rotate your crops annually.

Chapter 5: Micro-Farming Fruit

This chapter consists of the following parts:

  • Growing Fruit Trees
  • Growing Berries for Beginners
  • Choosing Fruit for Your Circumstances

So, you’ve got your vegetables squared away, right?  What about fruit?  Fruit is sometimes easier for the suburban micro-farmer because it is typically an annual product.  You only plant it once and receive output (harvest) every year after that.  This chapter is a goldmine of information on where to plant certain fruit, how to harvest it and when to harvest it.  This chapter has really prompted me to plant currants and grapes in my yard.

Chapter 6: Growing Herbs On The Micro-Farm

This chapter consists of the following parts:

  • Kitchen Garden Herbs
  • Herbs in a Pollinator Garden
  • Create an Herb Spiral

If you like to cook then you know how important herbs are to making that special dish really pop.  Herbs are also instrumental in medicinal settings (see Cat Ellis’s book Prepper’s Natural Medicine).  And, on top of those things, they also attract pollinators to your crops.  This chapter provides great guidelines for planting herbs and designing your suburban micro-farm in a way that utilizes your herbs for many different factors.

Part II – Becoming A Micro-Farmer

Chapter 7: Organizing Your Micro-Farm

This chapter consists of the following parts:

  • Make a Garden Sketch
  • Make Seed and Supply Purchases
  • Month-by-Month Micro-Farming
  • Checklists and Monthly Calendars

Good farmers are organized farmers.  Amy has spent a lot of time putting together a companion website to this book (you’ll have to buy the book to find the website address).  The resources on this website help you plan and track the performance of your garden.  I’ve already dug into these and plan on using them this summer.

Chapter 8: Seed Starting & Planning

This chapter consists of the following parts:

  • Starting Seeds Indoors: A Step-by-Step Guide
  • How to Sow Seeds Directly Outdoors
  • How to Transplant Seedlings Outdoors

Seed starting isn’t always as simple as it sounds.  Amy does a great job of explaining seed starting in this chapter of The Suburban Micro-Farm.  She also talks heavily about transplanting and the – to me – always nebulous task of hardening off transplants.

Chapter 9: Maintaining The Garden & Harvesting The Produce

This chapter consists of the following parts:

  • Daily Garden Visits
  • Mulching in the Garden
  • Watering
  • Pest Management
  • Guide to Harvesting Vegetables
  • Cleaning up the Garden for Fall
  • Easy Seeds to Save
  • Storing Seeds

You’ve set up your garden, started your seeds and transplanted them successfully to the garden.  Now, what do you do?  Mulching, water, pest management and harvesting are all tasks that help promote suburban micro-farm success.  Amy spends a good amount of time talking about all of these tasks and also delves into seed saving.  Seed saving is SO important because you can capture seeds from produce that survived in your area and slowly build a seed base for plants that will be more successful in your location.

Part III – Advanced Micro-Farming Techniques

Chapter 10: Edible Landscaping

This chapter consists of the following parts:

  • Why Landscape with Edibles?
  • Things to Consider before Breaking Ground
  • Landscape Design Principles for Visual Appeal
  • Planning Techniques for the Edible Landscape
  • Choosing What to Plant
  • Utilizing the Parking Strip

Amy has taken the next step with her micro-farming and moved onto an edible landscape.  She’s slowly removing the useless lawn on her property and replacing it with plants that are not only beautiful but functional.  Learn how she’s doing it in this chapter!

Chapter 11: Digging Deeper: Permaculture & Micro-Farming

This chapter consists of the following parts:

  • Using Water Wisely
  • Building Plant Guilds
  • Farming the Contour
  • Terracing with Check Logs
  • Managing the Edges
  • Permaculture Plants

Interested in permaculture?  This chapter is, by far, the longest in the book.  It’s also the most information-dense chapter.  Amy basically compressed an entire Permaculture Design Course (PDC) into one chapter.  I absolutely loved this chapter because it’s not only permaculture-centric but it is permaculture-centric to the suburban homeowner mindset.  I would often struggle to see how approaches learned in a PDC could be utilized in a suburban setting.  Amy helps guide us in that direction.

Chapter 12: Making Money On The Suburban Micro-Farm

This chapter consists of the following parts:

  • Perennial Crops
  • Annual Crops with a Long Season
  • Shade Crops
  • The Edible Plant Nursery
  • Cut Flowers
  • Maple Syrup
  • Cottage Food Products
  • Homemade Soap
  • Teaching and Writing
  • Tips for Success

If you follow all the tips, trick and techniques in of The Suburban Micro-Farm, you’ll most likely have more produce than you and your family can handle.  Why not make some money off of it?  Amy walks us through ways to monetize your suburban micro-farm.  Genius ideas here.  Worth the price of the book in and of itself.

Conclusion

Amy ties it all up in the conclusion.  She has additional sections such as Acknowledgements, Bibliography, and Additional Resources (Books and Online).  These sections are incredible as well and allow the reader to continue their self-education in a variety of different places.

Why I Liked The Suburban Micro-Farm

There are a lot of things I liked about this book.  But, most importantly, I think the fact that it’s a hands-on book is what I like most.  All the information here is not theoretical but, rather, it’s proven tactics with suggestions on how to implement them yourselves.  Tactics and strategy in the same book.  Incredible.

Amy’s companion websites and resources – there are at least four Google spreadsheets she’s set up for you – are just incredible.  She could probably sell these as a kit themselves but they are “free” with a purchase of the book.

Finally, I liked the layout of the book.  It grows the reader’s knowledge if read chronologically but also allows for pinpoint referencing of information.  Great approach Amy!

What I Didn’t Like

I hate saying that there’s nothing I didn’t like about a book but there isn’t anything I don’t like about this book.  I think it’s great!  In the first edition, the one thing I didn’t like was was the printing. The first edition was printed in black and white and it was quite obvious that the master copy was in color. The black and white printing did all the pictures and colored text injustice.

Amy fixed this issues in the second edition and I have to say that it made an already great book incredible!  Even if you picked up the first edition, I would suggest getting the second edition.  The addition of color to this printing is just amazing!

Overall Thoughts on The Suburban Micro-Farm

Point blank, this book is a must-have for any suburban homesteader who is even thinking about growing fruit, vegetables or herbs on their land.  Amy Stross underestimates her ability to convey complex information in a simple, straight-forward manner.  Likewise, she has done a great job of putting together a book that is both awesome in its long form as it is a pinpoint resource book.

It is very, very rare that I state emphatically that a book is required for your suburban homesteading library.  This book goes alongside Cat Ellis’s Prepper’s Natural Medicine and Anna Hess’ The Weekend Homesteader as MUST HAVES in your library!

Suburban Micro-Farm
Disclaimer: Amy Stross supplied a copy of The Suburban Micro-Farm for me to review. I can assure my readers that I gave it a fair and honest review.


Introduction To Backyard Aquaponics

The ability to grow plants and raise fish organically without the use of pesticides or fertilizers is accomplished through a method called aquaponics. This system of growing plants and raising fish without the use of soil was discovered by researchers from the University of Virgin Islands while looking for ways through which you can grow plants organically.  And, with just a little sweat equity and a few dollars, you too can have a backyard aquaponics system working for you!

How Does It Work?

Basically, aquaponics works in a win-win situation. What happens is that it combines the traditional aquaculture with hydroponics. In aquaponics, plants feed on the effluents released by aquatic animals.  Those plants, in turn, purify water to keep the fish more comfortable.

Backyard Aquaponics

Between 2006 and 2007, this technique was widely adopted and is now commercially used on many farms to grow plants organically. According to some farmers, aquaponics grows plants 50%-100% faster as compared to inorganic farming. With just a small amount of space, you’re able to deliver ten times more as compared to older methods.

What Is Aquaponics?

Aquaponics is essentially the combination of aquaculture (raising fish) and hydroponics (growing plants). This process takes advantage of the aquatic affluent (fish waste) deposited in water to provide essential nutrients to your plants. When the water is affluent rich, it becomes toxic to the aquatic animals. During this stage, plants absorb and use the nutrients eliminating the high water toxicity for your fish to survive.

Backyard Aquaponics
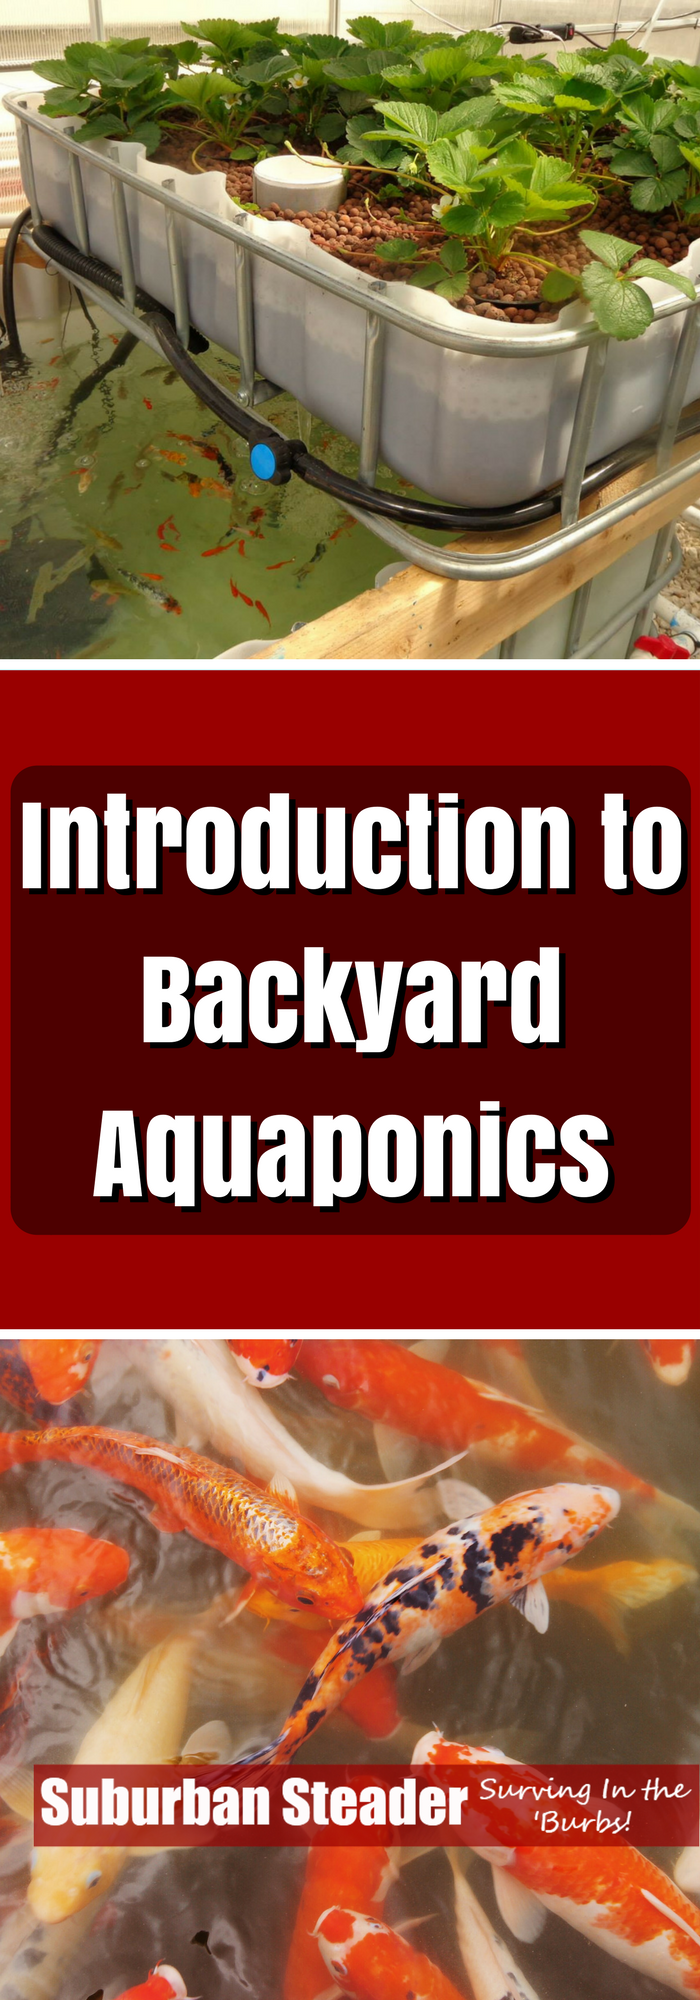
There are so many benefits you’ll enjoy when you make a backyard aquaponic system. Unlike a fish pond where you’ll have to exchange water every now and then, an aquaponic system relies on the relationship between plants and aquatic animals. Freshwater fish release ammonia which is converted to nitrite by a nitrifying bacterium called Nitrosomonas. Another nitrifying bacterium called Nitrobacter converts the nitrite to nitrate which is used by the plants to freshen the water for the fish. This process of converting ammonia to nitrite then to nitrate is referred to as “the nitrogen cycle.”

Types of Aquaponic Systems

There are three major types of Aquaponic systems:

Media Filled Beds

This method is the simplest and is commonly used in most backyard aquaponics systems. It involves filling containers with medium and small clay pebbles then planting seedlings directly into the media.

Fish tank water is then pumped over the media to allow the plants to feed on the excess nutrients. The medium clay pebbles act as biological filters where they help to eliminate toxins giving your fish fresh and clean water in the long run.

There are two major ways which this Aquaponics system can be operated:  continuous water flow method and the flood and drain (also known as ebb and flow) method.

Nutrient Film Technique

This method involves pumping nutrient-rich fish water through PVC pipes. Plants are grown inside cups with small holes at the bottom to allow the roots to reach the water in the PVC gutters.

It’s important to understand that this method is only suitable for leafy green plants with small root systems and not larger plants with bigger, invasive roots.

Deep Water Culture

This method is commonly used in both commercial and backyard aquaponics systems because it’s relatively cheaper to setup and operate. This method uses a foam “raft” which floats on top of the water. Plants are held in holes made in the raft in a way that the roots dangle into the water. For perfect results, fish water can either be pumped on the floating racks or the racks can be placed directly on the fish water.

Benefits of a Backyard Aquaponics System

Setting up a backyard aquaponics system in your garden comes with lots of benefits such as environmental improvement, better health, and higher quality nutrition. This section will review some of the essential benefits which farmers can expect to enjoy.

Saves Space

Unlike other gardening methods, aquaponics system allows you to plant your seedlings close together thus saving on space. Since this method involves submerging plant roots in nutrient-rich water, there is less overcrowding which helps you save on space as compared to other gardening techniques.

No Weeding

Another benefit of backyard aquaponics system is that you don’t have to weed anymore. This method doesn’t encourage the growth of weeds since there is no soil involved. Farmers are able to enjoy the freedom of growing plants at home without weeding.

No Soil Pests

Since Aquaponics doesn’t rely on soil, farmers are relieved the burden of using pesticides to eliminate soil pests. Pesticides destroy the plant slowly over time due to toxins absorbed by the plant.

Plants Grow Faster

Backyard aquaponics system allows plants to access nutrients for 24 hours each day making them grow faster. According to research, vegetables such as lettuce have been proven to grow twice as fast as compared to when planted normally on the soil.

Making Your Own Backyard Aquaponics System

Backyard Aquaponics

There are many ways through which you can make your own backyard aquaponics system. Regardless of the method you choose, always ensure that your system is able to grow plants in a way that confers most of the environmental benefits such as low environmental impacts and water efficiency.

Without wasting time, we will go through a step by step program on how to make a Flood and Drain system.

Flood and drain system

Necessary Equipment and Material

Build Process

  1. Place your fish tank on a flat surface away from direct sun to reduce algae growth.
  2. Place the pump and feed pipe in the fish tank.
  3. Place the grow bed near the fish tank. Fill it with gravel and make sure it’s close to the fill pipe.  Also, make sure the drain pipe from the grow bed feeds directly into the fish tank.
  4. Install the timer on the pump and set it to cycle for 15min on, 45 min off.
  5. Join the pipes and the pump together to connect the fish tank with the grow bed. Also, remember to connect the overflow drain in the grow bed to remove water.
  6. Plant your seedlings into the grow bed and place your fish inside the fish tank.
  7. Test your fish water to determine the level of Ammonium, nitrite, and nitrate. If you notice that the pH level is high or low, you can adjust it accordingly to keep the water neutral.
  8. Turn on the pump to start the cycling process. This involves circulating nutrient-rich water from the fish tank to the grow bed then back to the tank again. After a few days, you’ll notice that your seedlings are growing; a milestone which reveals that your aquaponics system was successfully established.

Conclusion

In summary, there are tons of benefits which farmers enjoy once they set up a backyard aquaponics system. The system is cost efficient and makes backyard gardening more productive and economical. According to research, aquaponic systems use about 1/10th the amount of water used when farming on the ground. This technique helps you produce a tremendous amount of fish and vegetables within a short time in a small area.

backyard aquaponics


Urban Farming: No Farm Farming

Many people graduate from college and just sit year after year wondering what their calling is. If you are looking to make a difference in the world and find that the typical 9-to-5 isn’t making the cut, then perhaps it’s time to take a look at farming, specifically urban farming.

“What if I don’t have land?” you might ask. This article will help you bring farming techniques into fruition in areas where space is limited. Permaculture is a large concept at work here and it can run the gamut of everything from composting to water retention systems. Although you may think that your backyard is too small to enact some of the main principles, think again. All of these things can bring you one step closer to farming in your backyard.

Water Harvesting

You may not be building the water terraces of ancient China or the aqueducts of old Peru, but you can still change the dynamic landscape of your own backyard to save water. Consider where you need to water and where rain gathers. If you can divert this natural force and slow it’s descent to the sewer you’ll be better off.

First, let’s tackle the backyard. Taking excess dirt and creating a slope that funnels water to the center of the garden is the best way to take advantage of soil architecture and save rainwater, as well as water from your sprinkler. 

Roof runoff is also worth saving no matter how rare rainfall is in your area. There are a few things to keep in mind when setting up a water cache system like this.

  • Water Quality: Water must be filtered and should be pollutant free. Keep in mind that zinc-aluminum roofing can be dangerous to your health.
  • Do not let your gutters become blocked with leaves. Leaf guard can be expensive, while homemade alternatives are still effective.
  • Regular maintenance is a must. You’ll want to make sure that water is sealed at appropriate times, to protect from development of mosquitoes in warmer months.

Companion Planting

Growing plants that are native to the same continent and cultures together will improve crops survivability. Because these plants have evolved in the same place for many generations, they require the same protection, and in some instances provide shade, nutrients, and ground cover.

You might find your crops being under siege from spider mites or other pests. This guide will illustrate just how to face those problems in an organic way, by using companion plants.

Composting

Composting is central to the farming experience. While we won’t delve completely into the wide world of composting here, there are a few things to remember while at home in the urban setting.

  • Make sure to seal compost bins to avoid confrontation with pets, pests, and neighborly noses.
  • Red Worms are your best friend
  • Save coffee grounds or ask for some from a local business
  • Find a local composting co-op if you don’t have room at home.

Keep in mind that your goal is to return nutrients to the soil as food for crops. You don’t want your backyard turning into a miniature dust bowl after several seasons.

Graywater

This is a topic that can take some getting used to, but with the proper installation you can use the forms of water in your household that are not exposed to human waste to better hydrate the garden. I’ve seen setups where the sink was disconnected and water was free to run into a bucket for later distribution. This comes with its problems of course and is not recommended. But there are designs aplenty for whatever age your home may be. Here are some of the most prominent benefits:

  • More water for use, and less strain on wells or drought stricken areas
  • Less strain on failing septic tank
  • Less energy and chemical use
  • Plants benefit foremost and after water is returned to it’s origin (groundwater) faster
  • Increased awareness of and sensitivity to natural cycles

Poultry & Eggs

Yard pending, you can find a way to install a small to a medium chicken coop or convert a pre-existing shed. The chicken housing must meet several requirements, not only to meet city ordinance but also for the chickens themselves to be happy and fruitful:

  • Chicken feeding is a regular job and requires a solid schedule. An automatic feeder may lessen the burden.
  • Fencing around the coop can be important if you have nosy pets or live in an area rife with predators.
  • Don’t forget the light! Chickens only lay eggs based on daylight cycles. Some lights will also affect the temperature of the coop, which is another important part of keeping chickens healthy and alive.
  • Make sure you have access to the inside so you may clean regularly.

Whether the goal you have in mind is for eggs (quite sustainable) or for poultry, you should find that the coop is an excellent addition to the home, and is one step closer to making you an actual farmer. Treat your chickens well and a healthy product will come along with it.

Position of the Sun         

If you aren’t paying attention this could spell disaster for your first year, mostly because you won’t have a second year. Without proper daylight, your crop will never properly flourish, and for some locations, the urbanite may have to do some proper planning. Before making any cuts on the tree linings of the property, make a chart that shows where the sun line falls on your property. In some cases, you’ll have full coverage, but more than likely you’ll have a tree or two in the way. Note the time of year as well, as the sun will shift depending on the season.

After trimming, consider burying the remnants of your tree trimmings to create a Hugelkultur bed. This is a form of composting that uses trees and tree parts to save moisture, contribute nutrients, and reinvigorate the soil. Gather the tree parts and bury them with a layer of nutrient dense material and cover with topsoil and my personal preference of straw.

Urban Farming For All…

This article is only the tip of the iceberg.  Use the following resources to transform your backyard into a farmer’s market contributor, and turn that day job into that of an urban farmer. If all goes well, maybe you’ll make that return back to college for an agricultural education. For now, supplement your income with fresh fruit, vegetables, and stock!

References and Resources for Further Education

Urban Farming


7 Prepping Skills Your Kids Can Learn Today

Prepping with kids is never easy.  And, as a suburban homesteader, you probably have a few running around your place.  But, just because it’s difficult doesn’t mean that you can’t do it.  Kids are amazingly resilient and are also sponges for knowledge.  If you can introduce them to prepping skills wrapped in fun activities, you’re well on your way to making your kids more self-sufficient.

With that thought in mind, here are seven prepping skills your kids can learn today:

1. Basic Construction & Repair

Every suburban homesteader and prepper does work around the house. You could be building a new garden bed, fixing a leaking pipe, installing an appliance or doing major landscaping.

Whatever it is, you can get your kids involved.  Have them hold tools for you and let them help – swing a hammer, twist a wrench, thread a screw, whatever.

My kids love getting involved and, while it slows down the job, the sense of accomplishment on their face when it’s done is worth it.

The bonus is that they’re learning prepper skills that will never leave them.  My girls will be able to do all the plumbing in their house when I get done with them.  They’re already better with a hammer than some of my friends.

7 Prepping Skills Your Kids Can Learn Today2. Hiking

Getting your kids outdoors is key to teaching them just about any prepping skill or homesteading lifestyle.

A great way to achieve this goal is to take them on hikes.  They don’t need to be huge hikes.  For instance, I’m writing this in 2015 and my girls are five and a half years old.  We go on a regular hike that takes us about a half to three-quarters of a mile into the woods.  I’ve made a ‘camp’ (a few log benches in a semi-hidden ridge) that we go to.

We’ll bring a lunch and, in the colder months, make some hot chocolate.  They’re free to play in the woods and explore.  Everyone enjoys themselves but, most importantly, it’s an activity that is fostering a love for the outdoors in my kids.  We’re also learning about the woods and I take the time to introduce bushcraft skills that are age appropriate.

3. Gardening

What kid doesn’t like getting dirty?  And what suburban homesteader or prepper worth their salt doesn’t have a garden?  Sounds like a match made in heaven to me.

Give the kids a section of the garden that is theirs.  They can plant whatever they want in it.  Let them tend to it, weed it, water it, etc.  Don’t make it a chore but rather a learning experience.

My kids love watching the herbs grow because they’re fast.  They’re not as interested in the slower growing plants so keep that in mind as well.  Fast results will keep them interested.

4. Composting

Kids love getting dirty, but they also hate taking out the trash.  Especially stinky trash.  But my kids love bringing table scraps to the compost pile.  They’ll bring out the leftovers from dinner and have me turn the pile.  One of them will even pull the big worms out!  We talk a little about their day and about what’s going on in the compost pile.  It’s win, win for all involved.  Compost is easy to make.  If you don’t live in an area where you can compost, you can accomplish pretty much the same thing with a worm bin.

7 Prepping Skills Your Kids Can Learn Today5. Fire Starting

Fire and knives are the two things I see most parents freak out about. Likewise, their two of the most important prepping skills you can learn.

The fears these parents have are not without merit – both activities are quite dangerous if not properly managed. That being said, even five and a half-year-olds are old enough to understand that they only do this kind of thing with a parent around.

If you walk them through the phases of making a fire – collecting kindling, tinder and fuel wood, build a fire bundle, etc – and make it a game, they’ll have a blast.

Plus, wait until you see the excitement on a little kid’s face when you create a fire from a fresnel lens.  I guarantee it’ll be worth the work and patience.

6. Camping

Get them outside! Camping is an exciting adventure for everyone.  It allows the kids to pretend they’re on some magic treasure hunt or with a group of warriors heading out on a grand adventure.

Whatever the scenario, camping always seems to get kids imaginations going.  You can also build in some other skills here including hiking, fire starting, first aid and cooking.

Camping is an awesome, wholesome family activity that will bring you years of enjoyment and allow you to introduce your kids to numerous prepping skills.

7. Why We’re Prepared

Most of all, teach your kids why we prepare.

You don’t need to tell them about crazy politicians, EMPs or zombie apocalypses.  That’s scary stuff that kids don’t need to hear.

You can concentrate on the fact that sometimes bad things happen – storms cause power outages, cars break down, people get hurt – and we need to be prepared to handle it. A strong mindset is probably the best prepper skill they can get their hands on.

There’s a great book called Jake and Miller’s Big Adventure: A Prepper’s Book For Kids that my kids love.  It’s an awesome story about a boy, his dog and how they prepare for a (you guessed it) big adventure.  Highly recommended reading!

Conclusion

These are seven ways to get your kids into the prepping and homesteading mindset.  Are they going to be Rambo-esque survivalists?  No way (do you really want them – or you – to?).  Will they learn to enjoy the outdoors, think critically and evaluate situations for possible outcomes? Absolutely.

And that’s what it’s all about – teaching your kids to think for themselves and more towards a more self-sufficient mindset.

7 Prepping Skills Your Kids Can Learn Today

7 Prepping Skills Your Kids Can Learn Today


21 Prepper Skills You Can Improve This Weekend

I’m not sure what it’s going to be like by you this weekend but here, on Long Island, it’s the middle of winter.  We’re expecting a cold, raw weekend with some snow possibly coming our way.  It’s not really going to be outdoors weather, although learning how to survive in this kind of weather wouldn’t be a bad idea.  But, with this kind of weekend in mind, I got to thinking about how I could improve as a prepper.  I came up with this list of prepper skills that you (and I) could explore and improve over a weekend.  Make me one promise – don’t just read, do!

1. Cook Something

Cooking is one of the most important survival skills and, in my opinion, is one of the most important prepper skills you can master.  You all know that food is part of the Rule of 3’s – 3 minutes without air, 3 days without water, 3 weeks without food – but what you probably also realize is that food can be more than just energy for people.  It can be a comforting item, making those stressful situations a little better.  So learn how to cook.  I’ve got a few recipes on here that you can try including:

2. Go Shooting

Want to blow off some steam this weekend and have a good time doing it?  Then hit the range!  You’re sure to have a good time no matter if you’re shooting a handgun, zeroing in your rifle or popping clays with your shotgun.  Being that ammo is expensive, you could also improve your prepper skills by doing some tactical training at home.  It’s free and could be quite beneficial to you if bad times come knocking.

3. Improve Your DIY Skills

Preppers and suburban homesteaders meet at the crux of DIY.  Both sides have an innate ability to fix whatever is broken or create something out of random odds and ends.  Undertaking a project like the bullet casing earbuds I wrote about recently will improve your abilities and spark your creative nature.  You’ll start looking at common material around the house and figuring how your new-found prepper skills can use it to make something useful.

4. Start A Fire

No matter who you ask, the ability to start a fire is one of the top prepper skills – or survival skills in general – that everyone should have.  Spends some time learning how to start fires with all of these fire starters this weekend:

5. Get Your Preps Organized

Preparedness Planner Product ReviewBeing organized now will help you avoid running around like a maniac with all hell breaks loose.  I know, you’re thinking “Really? Being organized is one of the prepper skills you’re suggesting?”  Yup, I am absolutely advocating getting organized now.  There’s multiple reason to do so including having a much better understanding of where your weakness are and how you can improve your preps.  I recommend using this planner to get your preps in order.

6. Learn The Art Of Canning

As any prepper knows, food preservation is one of the most important prepper skills you can have.  Learning how to can different kinds of food will help you build your preps up and also save you money.  I’ve actually seen canning save money in multiple ways – people are putting food away to be eaten at a later time which saves money and they usually buy food in bulk when they are canning which reduces the overall food bill when you look at it on a per meal basis.  Plus, canning is just a great old-school skill to have in your repertoire.

7. Dutch Oven Cooking

So, you want your prepper skills to be a little more rustic, do you?  Why not try dutch oven cooking this weekend?  Cooking in a dutch oven is a great skill to have if the power goes out or if you’re camping.  Plus, there is just something so much tastier (to me, anyways) about food cooked in or on cast iron than food cook with regular kitchen equipment.  Get outside, stoke the coals and learn how to make food like your pioneering ancestors used to!

8. Start A Compost Pile

Picture your garden like a bank.  The crops are your return on investment and the soil is your principle.  How do you increase your principle?  You increase the value of the soil. And you do that by adding quality compost to the garden.  Building a compost pile is one of the prepper skills that I believe every prepper – from suburban homesteader to ultra hardcore survivalist – should have in their back pocket.  It’s super easy to do and can return huge profit to you.

9. Get Your Finances In Order

You shouldn’t be prepping if you are in debt.  In fact, what use is there in prepping if you are building up your debt.  Spend the weekend getting your finances in order to achieve financial independence.  You’ll take stress off yourself, your marriage and your career.  Not to mention, you’ll be able to buy some cooler preps now that you have more disposable money because you’re not paying those monthly bills!

10. Build A Black Out Box

This one is so simple that you should be ashamed if you haven’t done it already.  The most common event you are going to need to prep for is a power outage.  They occur more often than hurricanes, snowstorms, tornadoes or zombie apocalypses.  And building a black out box is so easy.  Spend a few hours with the kids this weekend and knock it out.  You’ll thank me later.

11. Outfit Your Automobile EDC

You spend a lot of your life in your car, whether its driving to and from work and taxiing the kids around to whatever activity they have next.  Are you prepared for an emergency if you got caught in your car?  Not sure?  Then maybe you should take a few minutes looking into your automobile’s EDC this weekend and making sure you can handle what kind of travel-trouble may come your way.

12. Get Your HAM License

Communication is one of those prepper skills that everyone talks about but very few people practice.  I’ll be the first to admit that communication is one of, if not the, weakest area of prepping for our family.  A good way to improve this skill is to get your HAM license.  Again, I can’t speak from personal experience, but everyone says it’s a fairly easy test.  They all recommend using a study guide prior to taking the test.

13. Read A Book

Want to brush up on some prepper skills, get lost in a good story or learn about the biology of your garden?  Then read a book.  Reading books is a great way to escape the world for a while and they also provide a wealth of knowledge.  You can go with a great fictional story like Glen Tate’s 299 Days series or jump into something more non-fiction like Jim Cobb’s “Prepper’s Long-Term Survival Guide.”  Either way, you won’t waste your time and might even learn something.

14. Go Hiking

Hiking as a prepper skill?  Believe it or not, yes.  Going out hiking puts you in the outdoors.  You get used to walking around with a pack on (ever actually spent time lugging your BOB around?), you learn what it’s like to be in the woods and you get some exercise.  All of those items are beneficial to the prepper.  Just make sure you’ve got sturdy footwear when you head out.

15. Build A Worm Bin

Remember how I said compost how you increase the principle in your garden?  Well worm castings and worm tea help as well.  It is super easy to build a worm bin and the return on investment is terrific!  For maybe an hours worth of work, you’ll be able to get pounds and pounds of great organic matter for your garden not to mention the awesome ‘worm tea’ that you can use to fertilize your fruits and vegetables.

Homemade Bread - 21 Prepper Skills You Can Improve This Weekend16. Bake Fresh Bread

My buddy Mike over at The Backyard Pioneer got me into baking bread at home.  I cannot begin to describe how comforting it is to smell bread baking in the oven.  And the taste! Oh, the taste!  You won’t get this kind of taste out of store-bought bread.  Baking bread probably isn’t tops on the list of required prepper skills but there is something so very

17. Perform A Site Survey

Still not sure what to do with your suburban homestead?  How about performing a site survey this weekend?  You can knock it out in a few hours and it will give you a great idea of your land, what you can and cannot do on it and where to plant different items.  It also provides a map of your property for any future developments you want to do.

18. Outfit Your Personal EDC

Prepping is all about being prepared and the way you guarantee you’re prepared when you’re just walking around is to be fully outfitted in your Every Day Carry (EDC).  You should take some time this weekend to think about your EDC methodology consider what you’ll put in your Tier 1 and Tier 2 kits.  Regardless of where they fit into your EDC kits, I recommend the following individual items having a home in your EDC:

19. Learn About Your Garden Zones

Learning about where you live is just as important as a skill for gardeners and homesteaders as understanding how your crops grow.  Prepper skills aren’t always hard skills; sometimes it’s about educating yourself.  Learning which USDA zone you live in will help you better understand which crops will grow best and when your first and last frost are.

20. Sharpen Your Knives And Tools

A sharp knife is a safe knife.  I can personally tell you that I have had more accidents with a dull tool than a sharp tool – to the point where I almost cut my fingertip off once.  Spending a weekend sharpening your knives and tools would be a great way to improve your prepper skills.  Not sure how to sharpen something? Check out this instructional video from Patrick at MTKnives.net.

21. Plan Your Spring Garden

There is absolutely no better way to shake the bone chill of winter on a cold, snowy night than to flip through seed catalogs while you plan your spring garden.  Planning a garden is both exciting and therapeutic.  You can explore all different kinds of produce that you might want to grow and also relax knowing that you won’t have a push in the spring to get your seeds on order and your planting all planned out.


So there you have it – 21 great ways you can improve your prepper skills this weekend.  Most of these tasks are free or fairly low in cost.  All of them will make you a better suburban homesteader and a better prepper.

What are you going to try?  Let us know in the comments below.

21 Prepper Skills You Can Improve This Weekend

21 Prepper Skills You Can Improve This Weekend


6 Skills Every Suburban Homesteader Needs

Suburban homesteader.  What comes to mind when you hear that term?  Personally, I think of person who lives in the typical American suburbs, they’re probably married with a few kids.  Maybe a dog.  Their land isn’t huge, but it’s being transformed into something that’s functional and they’re very proud of that fact.  The household quite possibly runs on two incomes and free-time is scarce commodity given all the social obligations they have.  Does this description sound like you?  Even if there are a few differences with your situation, you can relate to it, right?  Then you’re a suburban homesteader.

We’ve identified you as a suburban homesteader.  Awesome!  But what now?  What do you need to do to make this life work?  Well, as luck would have it, I’ve laid out six skills you need to improve your abilities and become the suburban homesteader you always wanted to be:

1. Monthly Financial Tracking

I’ve spoken before about how important financial independence is to the suburban homesteader.  Those guidelines still hold true.  I want to see you free from the shackles of debt.  Even more so, I want you to track your finances and know what your incomes and expenses are.  Treating your suburban homestead like a business by looking at the financials of your home every month will easily let you see the areas that are going to become problems before they do.  Are you spending too much money on dining out? Has your income dipped in the last few months? Are you spending more on a certain area of life than you were before? Why?

All these answers are answered in the monthly financial review.  Suburban homesteaders typically are folks who rely on two incomes and have a vast array of family activities in addition to the homestead which makes it easier to fall into debt.  Keeping track of your finances on a monthly basis will help you keep your debt from rising and allow you to track the costs of all these activities.

2. Gardening

Most people think of gardens or farms when they hear the word homesteading.  You more than likely will not have room for a farm in suburban homesteading so you need to concentrate on gardening.  The simple act of starting a garden can do so many things for you.  First and foremost, you will provide food for your family at reduced cost to what you would pay at the supermarket.  Second, the food you will be providing will be fresher and healthier than what you are buying.  Even if you buy GMO-free organic vegetables and fruits, they will not taste as fresh and vibrant as something you pull out of the ground or harvest moments before eating.  Third, and probably most important, you’ll be developing a functional skill that will make you more self-sufficient.  And, to top it all off, gardening is a great family activity that everyone can take part in.

Get your garden going today!

3. Composting

The ability to produce your own compost is paramount to a healthy garden.  Your soil’s health is an investment in your garden and, in turn, an investment in your family’s health.  And, truth be told, composting is not that hard.  Take your table scraps, yard waste and whatever other organic matter you can find and throw it in a pile.  Keep turning it every so often as you continue to add to it.  Before long, you’ll have thick, dark compost that your vegetables will love you for.  We have been feeding our compost pile here on the Suburban Steader Homestead for about a year and we probably have 2-3 cubic yards of compost at this point.  It can be done and is easy to do.  Don’t worry about perfecting the balance of greens and browns.  Just go at it and you’ll learn what works best!

4. Handyman Capability

By definition, you live in the suburbs if you’re a suburban homesteader.  And that means ‘fix-it’ folks are very prevalent.  Plumbers, electricians, contractors, gardeners, mechanics and appliance repairmen are all willing to take your hard-earned money.  Most of these folks are quite skilled at what they do and will probably do the job quicker than you.  But, will they do it better than you?  The answer is probably not.  You can can find out how to fix just about anything on YouTube if you’re willing to spend a little time learning.  You might need some new tools and extra material for when you mess up the first time, but you can develop yourself into a pretty proficient handyman if you want to.

I don’t want you to get me wrong here – being the son of a plumber, I can absolutely tell you there are times when you should call in the professionals.  But most of the fixes around your house can be completed with a little learning, trial, failure and elbow grease.  There’s so many benefits to improving your handyman skills: saving money, developing a talent and having the confidence to know that you can conquer almost any problem your home throws at you!

5. Project Management Skills

I can already hear the groans on this one.  First, I want you to stop thinking about the folks at work who are running around with Gantt charts and work breakdown structures (FYI, I am a project manager at work, so I am one of those people).  When I talk about project management skills around the suburban homestead, I’m talking more about thinking through a project and trying to corral it a bit before jumping in full force.  Let’s take for instance a fairly small project of building a garden box.  The project management skills you’d want to use here include the following:

  1. Material Cost Estimate: Think about all the materials you’re going to use including wood, fasteners, fill material (soil, compost, etc) and any new tools you need for the job.  Can you afford this project right now (go back to the first skill we talked about)?
  2. Project Duration Estimate: Is this a project you can finish on a Saturday?  Is it a two-day job?  With that information, you can then look at your calendar and figure out when a good time to start it would be.  Maybe your kids have a soccer tournament this weekend, but you’re free next weekend.  Plan accordingly.
  3. What’s My Return On Investment (ROI)?: Why are you building this garden box? Do you need the extra space? Is the money your going to spend on it, not to mention your time, going to be compensated by the final product?

None of these things are terribly difficult to think about but it’s important that the suburban homesteader (you!) is spending their time and money as wisely as possible.

Oh, and just so you know, I have used a Gantt chart for projects around the house ranging from remodelling to cooking Thanksgiving dinner – and they all went off flawlessly.  So, maybe it isn’t a bad skill to work on as well…

6. Determination and Self-Motivation

These are the least tangible but, arguably, most important skills a suburban homesteader needs to succeed.  The reality of life on a suburban homestead is that things are not going to always follow plan.  Money is going to get tight at times, the family pet is going to get sick, Johnny or Jane is going to break their arm, Mom or Dad is going to get sick, the boiler is going to bust, etc.  Life is going to happen.  Having a determination and self-motivation to keep going despite these setbacks is the most important skill a suburban homesteader can develop for success. So, to invoke a few over-played clichés, keep your head up and keep your eyes on the prize.  Know what your goal is and shoot higher.  You’re bound to flounder a bit, but by aiming higher you’ll increase your odds or achieving all that you wanted to achieve.

Become The Suburban Homesteader You Always Wanted To Be

So there you have it – 6 skills every suburban homesteader needs to succeed at this game.  Financial tracking, gardening, composting, handyman skills, project management, determination and self-motivation.  You’ll be a better suburban homesteader and a better person if you spend the time to develop and hone these skills .

6 Skills Every Suburban Homesteader Needs


How To Build A Worm Bin

How would you describe the typical suburban homesteader family?  More than likely you’re looking at two parents, a few kids, maybe a dog or a cat, two full-time jobs, soccer practice, ballet recitals…the works!  With that kind of schedule, how are you going to fit in managing livestock on your suburban homestead?  I’ve got the answer for you – worms!  And to raise worms, you’re gonna need a worm bed!

In today’s post, we’re going to explain why you’d want to raise worms and how to build a worm bin.  This information is very similar to what you’d find in Anna Hess’ great book entitled The Weekend Homesteader.  If you don’t already have a copy, I highly recommend you pick one up.  Every suburban homesteader should have one!

Why Worms?

Raising worms is all about the quality of the finished product, not necessarily the quantity.  Anna Hess explains it best:

…your worm bin isn’t going to produce gobs of compost…an under-the-sink worm bin will churn out enough nutrients for a potted lemon tree

But, remember that, despite how much (or little) you get in terms of worm output, the quality is super high.  Worm casting a very high in micronutrients and will help your food grow better than just about any other compost available.

Remember that commercial that used to say “A little dab’ll do ya”?  Well, that’s worm castings and tea in a nutshell.  Adding a small amount will show tremendous results to your garden.  That fact alone makes growing worms a worthwhile endeavor for the suburban homesteader.

Gathering Your Supplies

There’s nothing particular outrageous required to make a worm bin.  You’ll need the following:

Plastic Storage Bins

The Plastic Storage bins should be somewhere in the 8-10 gallon range and can usually be found for around $5 a piece.  Make sure both of the ones you are using are the same size.

Sheet of Cardboard

The sheet of cardboard needs to be big enough to cover the top of one of the bins.

Bedding

Worms love shredded newspaper for bedding.  If you have a shredder that creates strips, you’re all set.  The cross-shredders cut the paper into pieces that are too small.  In the absence of shredded newspaper, you can use hand-shredded paper, torn-up cardboard or egg cartons, fallen leaves, straw, coconut coir and peat moss.  Each of these have their downfalls, mostly that they’ll mat down in the bin too much when they get wet.

Worms

Let me say this very simple – we’re not raising earthworms.  Compost worms are known as red wrigglers, redworms or Eisenia fetida.  You might be able to find these guys living in horse manure, but you’re more than likely going to have to purchase them.  You can find some on Amazon.com or at Vermicomposters.com.  You’ll want about 2 lbs of worms for your bin, but could start with 1 lbs and let them grow to fill the space.

Soil

Nothing special here – a few scoops from your garden thrown into the bin to help the worms grind up their food.

Making The Worm Bin

This process is incredibly easy and even those of you who are mechanically challenged can do this project.  Here we go:

  1. Soak your bedding in water for a few hours.  It needs to be soaked, but not dripping.
  2. While the bedding is soaking, use the drill and drill bit to put about 10 holes in the cover and about 8-10 holes in each wall of one of the containers.  The bottom of the container should have about 20 holes.  You can use the ruler and marker, like I would, to put the holes in a nice, equally space pattern or simply do it by eye.  Either way, you want a fairly even distribution of holes across each face.
  3. Place the bin with the holes inside the bin without any holes.
  4. Place the saturated bedding in the bin with the holes and add your soil.  Mix well.
  5. Use the scissors to cut the cardboard so it sits flush with the top of the bedding.  This addition will keep the worms dark and moist.
  6. Pour the worms in (including any bedding they came with) and replace the cardboard.
  7. Place the plastic lid on top and your done!

Caring For Your Worms

Much like any livestock, worms do take a little bit of work to care for.  But, unlike most livestock, they’re not going to require daily attention.

Feeding

You’ll want to let the worms settle for a few days after you finish building the worm bin.  At that point, you can add food scraps on a schedule that works for you – daily, weekly, whatever.  Just make sure you are placing the scraps in different areas of the bin to promote the worms moving around.  You can feed them just about anything you eat, although you’ll want to avoid citrus peels, bread, meat and oil.  Citrus can be toxic in larger quantities.  Likewise, bread, meat and oil will increase your chances of a pungent smell.  Make sure you add a handful of fresh bedding eat time you feed them to cover up the scraps and keep the chance of smell and fruit flies down.

Overfeeding

Overfeeding is the biggest cause of worm bin failure.  On a daily basis, a pound of worms can process roughly one-half pound of food scraps.  That means your two-pound of worms can handle about seven pounds of food scraps per week.  Anything above that should make its way to your compost pile.  You do have a compost pile, right?

Bedding

The only care you need to give your worms besides feeding them is keeping their bedding moist, but not sopping wet.  Likewise, you might find your bin is too dry.  Either way, the way to tell something is wrong in your worm bin is to see how many worms are escaping to the lower bin.  A few worms showing up there every week is normal.  Anything more than that and you’ll need to investigate your worm bin’s conditions and see if you need to add moisture or dry bedding to reduce moisture.

As mentioned previously, stink and fruit flies can also be a problem.  But, in the end, almost every worm bin problem can be treated by adding new layers of bedding (moist or dry, depending on your problem) and never having food scraps above the bedding.  Reducing or stopping feeding for a few weeks during this process also helps.

Harvesting Tea and Castings

Harvesting worm bin tea is super easy.  Simply remove the inner container and pour the worm bin tea from the outer container into a third container.  Replace the inner container and you’re done.  Now you can apply the worm bin tea to your favorite plants for a quick boost of fertilizer.

It’s time to harvest the castings when the contents of the inner container begin to look more like compost and less like bedding and food scraps.  Get a third container, drill holes in it like described above, place some fresh bedding and food scraps in it and then place this new container on top of the original inner container.  Place the cardboard and lid on top of this new, third container.  The worms will work their way into the new bin over a week or two.

When applying the casting to your garden, remember the following:

  • Your soil should be made of no more than 20% castings
  • Casting are best used in your vegetable garden
  • Castings should be used when fresh and damp

Conclusion

Building a worm bin is an easy task that will result in big returns on your suburban homestead.  You’ll have a recycling center right in your house, as well as a compost creator and a fertilization machine.  Your return on investment is terrific with this project so get after it!

Let us know in the comments how this worked out for you!


How To Build A Worm Bin

photo credit: AxsDeny via photopin cc

How To Build A Worm Bin


Compost On Your Suburban Homestead

What comes to mind when you hear the word compost? Do you think of some stinky pile where food scraps get thrown and flies live? If that’s what comes to mind then you need to know something – you’re doing it wrong! Compost is a decidedly simple yet effective process that anyone on a small suburban lot can partake in.  You’ll see incredible benefits in your garden once you take the plunge into making good compost.

Compost Science

The ‘art’ of making compost is actually quite easy – it’s less art and science and more…well, just doing. You need to make sure you have the right ingredients and keep them moist (not wet). You also need to make sure you’re turning it often to keep the heat up inside the pile. And, while it’s a very forgiving process, it’s also good to have an understanding of what goes into compost.

Temperature

Temperature can be a fickle creature in the world of compost. On one hand, an elevated temperature can help you. Keeping the compost at a minimum of 104°F for five days (hitting 131°F for five hours during that time) will make sure that all the weed seeds and pathogens in your compost are killed. Likewise, if you get too hot it’s not good either. For example, if you hit 160°F, all the microorganisms – basically bacteria and fungi – that make the compost action happen will die.

Heat is caused in the compost pile when the microorganisms begin to decompose the plant material you’ve included. You are most likely not going to have to cool down your compost pile (it’s pretty hard to get it that hot). But, if you do see smoke on your compost pile, all you have to do is add water to cool it down. Adding a mixture of high carbon ingredients (dead leaves are great) after the water is a good idea.

Browns and Greens

If you remember the post about Mulch and Your Suburban Homestead, you’ll remember how we talked about the C:N ratio. This ratio is commonly thought of as the ratio of browns to greens. The table below gives you a few examples of browns and greens:

Browns Greens
Autumn Leaves Grass Clippings
Wood Chips Fruit/Veggie Scraps
Sawdust Coffee Grounds
Shredded Paper Manure


The easy way to remember which is which is to remember that greens are typically moist and colorful (with the exception of coffee grounds and manure – both of which are moist).  Everything else is browns.

You want to start your pile at a rough C:N ratio of 30:1 meaning your browns are 30x more prevalent than your greens.  This scenario will whittle down to roughly 10:1 or 15:1 as the decomposition occurs.

An ammonia type smell coming from your compost pile means you have too many greens.  Likewise, if you don’t see a lot of decomposition action going on, you’re probably too high on the browns.

If you’re the analytical type, check out this compost calculator to see how well you are doing.

Compost On Your Suburban HomesteadParticle Size and Shape

Believe it or not, size and shape greatly influence your compost.  As a rule of thumb, the smaller the better.  The microorganism can more easily digest small pieces.  A good example of this phenomenon is an apple.  We put a whole apple in our compost pile and then chopped one into small pieces and placed it in there as well.  After a certain amount of time, the small pieces were barely recognizable and the whole apple was more or less intact.

Remember that shape is equally important.  If you have material that is so small that it can mat together when wet – whole sheets of paper, full lettuce leaves, or very finely ground up food – the air and water will not be able to get in and help the microorganisms work their magic.

Aeration

As I eluded to above, air is critical to the decomposition process in a compost pile.  Much like humans, microorganisms take in oxygen and expel carbon dioxide.  If these little guys can get oxygen, they’ll eventually be smothered and replaced with anaerobic microorganisms (anaerobic = no oxygen).  These guys stink (literally) and don’t decompose your compost nearly as well as their aerobic counterparts.

So how do you aerate your compost pile?  Easy – keep it open to the air and turn it often.

Moisture

Again, the microorganisms are like you and I in that they also need moisture to live.  But, much like temperature, moisture can be a fickle situation.  Too little moisture and your microorganisms will perish.  Too much and they’ll drowned; being replaced by their anaerobic counterparts.

You can tell if your compost pile is sufficiently moist by grabbing a handful of the compost.  If it feels like a wrung-out sponge when you squeeze it, it’s good.  For the most part, you won’t have to worry about this problem as your greens and rainfall will give the pile enough moisture.

Turning

Turning is one of those things that people have differing opinions on.  Some folks say that nature does this kind of process without turning a forest floor.  And they’re completely correct.  But those people are usually more patient and willing to wait a year or more for a compost pile to be ready.

Those of us who are a bit more impatient will turn the pile on occasion.  Turning the pile provides a few benefits to the compost pile.  First, the temperature at the middle of the pile is always going to be greatest so turning it allows for a more thorough compost.  Second, turning the compost pile helps aerate it and break up clumps that may shed water.

We here at the Suburban Steader Homestead turn our pile because we believe it provides a better quality compost in a shorter time.

Compost On Your Suburban HomesteadCompost Bins

Good news – science class is over!  Now we’re getting into the hands-on part of this post.

The question also becomes: What should I make my compost in?

My answer is usually a simple Nothing.

To be perfectly frank, the compost pile on the Suburban Steader Homestead is just a pile on the ground.  We add our table scraps, scrapped paper, straw, etc to it and turn it on occasion.  We’ll water it during especially dry spells but those are far and few between considering where we live.

But, you may not want to have a compost pile just laying on your property somewhere so let’s talk about what you can do:

Pallet Compost Bin

This concept is very simple.  Make a four-sided area out of wooden pallets and put some hinges on it so you can open up one pallet.  Now make another one next to it in the same manner.  Once one bin is full, use a pitchfork to move it to the second bin.  This movement will aerate the compost pile for ‘finishing’ in the second bin.  You can now start a new pile in the first bin.  By the time you’ve filled the first bin again, the second bin material should be ready to use.

Compost Tumblers

You can either buy these at your local big box store or make one out of a plastic 55-gallon drum (with a cover) and a pipe.  Put the pipe through the barrel length-wise so the barrel can spin around it and support the pipe with a wooden frame.  Now all you have to do is cut and opening in the barrel – make sure you can close it again – that you can both add material and retrieve your compost from.  Now all you have to do is add material and give it a spin.  These aerate your compost quite well and generally produce quality compost at a faster rate.  The problem is that the amount you produce is significantly smaller than what you can with a pallet bin or pile situation.

Using Compost In Your Garden

Using compost in your garden is soooo simple.  Follow these three rules:

  1. Pull back mulch
  2. Apply compost
  3. Reapply mulch

That’s it.  Following these simple will help build up the health of your soil.  The sponge-like capability of the compost will retain moisture in the garden, the nutrients will attract earthworms which will work the compost deeper into your garden.  Pretty soon your soil will be darker and richer with a higher level of microorganisms.

Wrap Up

Compost is a wonderfully easy and inexpensive tool that every suburban homesteader should have in their toolbox.  While there’s a plethora of science behind, the premise is pretty simple.  Throw some browns and greens together, add moisture and oxygen, turn it occasionally and get out of the way.  Nature will do the rest of the work.

You’ll see incredible benefits in your garden and you’ll enjoy knowing that your soil is getting more and more fertile which means you can grow better and better produce.  Everyone wins!

Additional Resources

Please let us know any tips you have for making compost in the comments or on our Facebook Page.

Compost On Your Suburban Homestead

Compost On Your Suburban Homestead


Teamwork On The Suburban Homestead

When you hear the word homesteading, even suburban homesteading, I’m sure one of the your first thoughts is of complete self-sufficiency. You dream of being able to completely provide for your family in all aspects of life, right? Unfortunately, that’s just not realistic. You can’t do everything yourself, whether you’re on 40-acres or a little quarter acre suburban homestead.

You’ll need to rely on teamwork to get it all done.

Teamwork On Different Levels

Anna Hess tells a great story in her book The Weekend Homesteader about how a lack of teamwork nearly wrecked her farm. She tried to do it all herself and found out the hard way that she couldn’t. In the end, she found that teamwork not only helped her get farm up and running, but it also introduced her to her husband.

I’m not going to guarantee that teamwork around your suburban homestead is going to find you a spouse, but it will allow you to grow your network and skill set, as well as take some of the burden off your hands.

After Anna tells her little story about how teamwork, she goes on to describe the different kind of skills and traits that teamwork can help build within your community. Some of the more important ones to suburban homesteading are described below:

Strength and Stamina

I have no intention of starting a battle of the sexes here, but we can all admit that men and women have far different levels (and types) of strength. Personal experience has shown that men tend to be stronger in the upper body and women have more stamina for tasks like shovelling. Having a group of people with different levels of strength and stamina, regardless of gender, is always good to have when doing work around the suburban homestead.

Patience

I know this particular trait is something that I am short on. Having a wife who is patient and able to handle situations where either we’re having difficulty getting a task done or we have a repetitive task certainly helps.

Record-Keeping

We keep records of just about everything on our little suburban homestead – what plants were planted where, how much of each crop we harvested, where we bought certain supplies and how much they cost, etc. Having someone with meticulous attention to detail is a great addition to the teamwork aspect of suburban homesteading.

Building Skills

You’re invariably going to build something on your suburban homestead. There’s not way around it – whether it’s a new shed, raised bed, chicken tractor, or water collection system. Having someone on your team who can think in this manner is extremely helpful.

Teamwork On the Suburban Steader Homestead

As I’ve mentioned in the past, we have a little quarter acre lot on Long Island, NY. It’s nothing special and, from the outside, doesn’t look much different than your typical suburban plot. But, we do live a little differently and need to rely on teamwork to get it all done. Here’s how we do it:

Immediate Family

My wife and twin girls are the main support system on our homestead. I wouldn’t get half the work done without their teamwork. My wife is great at harvesting veggies and ‘master planning’ how we lay things out on our land so they are both functional and aesthetically pleasing. That’s not to mention her amazing skills in the kitchen!

My twin five-year-old daughters are an awesome help as well. They help me plant, harvest and compost. They love seeing the worms in the compost pile! As time goes on, they’ll acquire more skills and more responsibilities. For now, they’re learning more than they’re doing…and that’s part of the teamwork aspect as well.

My role is multifaceted. I’m kind of the manager of the homestead (don’t tell my wife I said that!). I manage when we’re going to plant and how to harvest. I’m also responsible for a lot of high-intensity physical labor aspects such as rotating the compost, building/fixing items around the homestead and most of the heavy duty yard work.

In addition to the immediate family, we harness the knowledge of extended family members when needed.  Two that come to mind are my father and brother.  My father is a plumber with a great mind for construction.  He has helped me do a ton of work on the house and in the yard.  My brother has a degree in plant and soil science and is my first call when I run into issue in both the garden and the yard.

It’s a wonderful blend between the four of us and our extended family.  The work is hard and, usually, we have fun doing it all.

Outside Resources

We have a lot of outside resources to help us with the homestead, some of whom don’t even know they’re part of our team. They include:

Security

I’ve hooked up with a great group of guys who I go to the range with on a fairly regular basis. While we always have a good time, we also spend a good amount of time working on our skills from a home defense perspective. The teamwork aspect of training – and making it fun – keeps me coming back for more.

Knowledge Base

I spend a good amount of time communicating with people online at places like The Survival Podcast Forums, When SHTF Forums, PermaEthos Forums and a private Facebook group for Preparedness & Homesteading bloggers. The people I meet in these places provide a great wealth of information for all aspects of suburban homesteading. Terrific teamwork mentality!

The Backyard PioneerLocal Support

I also have a good local support system in addition to all my ‘virtual friends.’ Most notable out of these folks is Mike over at The Backyard Pioneer. We regularly meet-up to discuss projects, bounce ideas off each other and discuss the challenges we are each facing. Sometimes just having an external sounding board and hearing that they’re facing similar challenges is enough to keep you going. In addition to our semi-regular meetings, Mike and I also lend a hand to each other whenever we can. And, being that we have families roughly the same age, we’re trying to get together more as a large group. I’m sure it’ll be good for our kids to hang out…and our wives can commiserate about their crazy husbands!

Wrap Up

Teamwork is a key part to the suburban homesteading lifestyle. As much as you’d like to think you can, you cannot do it all yourself. You need some help and the sooner you start working on building your team, the happier you’ll be. Remember that, as a suburban homesteader, you’re even more exposed to the community lifestyle. Why not try to build on that exposure and develop a group around you that can help you achieve your goals?

Please let us know any teamwork-related tips or question you have in the comments or on our Facebook Page.

Teamwork On The Suburban Homestead

photo credit: USDAgov via Compfight cc

Teamwork On The Suburban Homestead


Kill Mulch – Finally Getting Your Hands Dirty!

Finally! A part of Project TWH that actually involves something other than planning!

Let’s get your hands dirty!

Kill mulch, at its simplest, is a way to use the existing organic matter on the ground as nutrients for your new crops. The process basically kills (hence the name) all the living plants, grass, weeds, etc and spreads their nutrients into the soil through decomposition.

In this quick article, I’ll explain what kill mulch is, how it works and how to get it going on your suburban homestead. As always, I’ll take direction from Anna Hess in her book The Weekend Homesteader as well as throw in my two cents where appropriate.

What Is Kill Mulch?

I know I said kill mulch is a way of using existing organic matter as nutrients for your new crops. And that statement is a 100% true…it’s also quite vague.

You’re probably thinking “OK, so I’m using something that is/was growing on my land to provide nutrients for something new that’s going to grow on my land. Cool. But how?

Great question – the premise behind kill mulch is that it blocks the light from reaching grass and weeds, therefore killing them. The plants then die and rot in place producing a nutrient dense soil for future plantings.

How to Build Kill Mulch

Kill mulch – sometimes referred to as sheet mulch or lasagna mulch – is achieved by layering various substances.

You want to start with a compost. One that may contain weed seeds is permitted here. Next is a thick layer of light blocker – one layer of corrugated cardboard or a layer of twelve (minimum) newspaper sheets will do the trick.

Next, add a thick layer of weed-free compost. It is important that this layer is both thick and weed free. Remember that your plants’ will keep their roots in this layer for the first month or two until the cardboard or newspaper is broken down.

Finally, finish off the kill mulch with a layer of mulch – grass clippings or straw are perfect.

Why You Should Use Kill Mulch

Kill mulch’s biggest benefit is that it is a no-till approach. Aside from the labor involved in tilling a garden, tilling also has many drawbacks:

  • Erosion – Tilled soil can blow or wash away easily causing you to lose soil and reducing your garden’s fertility.
  • Loss of Soil Microorganisms – Bacteria and fungi are your friends! These wonderful items are important for plant growth and typically reside in the top three inches of soil. Tilling will destroy fungi-networks and move bacteria and fungi into different depths of the soil.
  • Increased Weeds – While a freshly tilled garden looks great at first, what you’re not seeing is the weed seeds that have moved to the top and are ready to sprout!
  • Soil Compaction – After that fluffy soil sees rain, it’ll compact down tight. Roots, seedlings and water will all have a tough time penetrating it at this point.

Wrap-Up On Kill Mulch

There’s the down and dirty on kill mulch. It’s a very effective process and, if done correctly, will result in some of the most fertile soil you can produce.

I used this approach, along with a woody bed/hugelkultur approach, on my new garden bed.

I laid down a little bit of compost and then dropped in layers and layers of newspaper to block the light getting to the grass underneath. The paper was then soaked endlessly – I left a hose on it for a couple of hours and allowed it to stay outside during rainstorms for a few weeks.

After that, I placed a thick (probably 6-10 inches) layer of wood down before filling the rest of the box with topsoil (I didn’t have enough compost). It will be interesting to see how the soil does in this area.

Please let us know any tips you have for building kill mulch in the comments or on our Facebook Page.

photo credit: London Permaculture via photopin cc

Kill Mulch