1

Suburban Micro-Farm (Book Review)

What is the first thing that a suburban homesteader does?  I’m sure you guessed correctly – they start a garden.  It’s probably the easiest thing to do to start a self-reliant lifestyle because of many reasons. There’s a low barrier to entry – you just need some dirt and a few seeds – and it’s also more socially acceptable than storing large quantities of food, water and/or ammunition. Amy Stross of TenthAcreFarm.com fame has realized this fact.  She also knows that starting a micro-farm on her suburban plot has started her walk to self-reliance.  She’s taken all she’s learned during her years of micro-farming (read: large-scale gardening) and put it together in one of the most well-written, easy to read books on the topic that I’ve ever read.  Read on to find out why you need The Suburban Micro-Farm in your suburban homesteading library today!

Book Set-Up

Amy put her heart and soul into this book and it’s quite obvious.  She takes a very intelligent approach to the layout of the book.  It is broken down into three parts – Getting To Know the Micro-Farm, Becoming A Micro-Farmer and Advanced Micro-Farming Techniques.  Each part has sub-chapters and each chapter has subsections.  This intensive breakdown allows you to use this book as a reference book and quickly get to the area that you need immediate information on.

Likewise, the book is written in such a way that you can read it from beginning to end (I did) and build upon the sections you’ve already read.

The parts and chapters of this book are as follows:

Introduction

The Introduction is just that – an introduction to the book and a general layout of what Amy plans on teaching us and how the book is laid out.

Part I – Getting To Know The Micro-Farm

Chapter 1 – Suburbia: Civilization’s Opportunity

This chapter consists of the following parts:

  • The Suburban Problem
  • Suburban Micro-Farming Myths
  • The Suburban Micro-Farm Solution

Chapter 1 is a very interesting chapter because you get to hear a lot about Amy’s journey through suburban gardening to suburban farming.  You hear – at a high level – about some of her pitfalls and the errors she made.  You also get to explore some of the myths associated with farming/gardening in the suburbs and what the truth really is.

Chapter 2 – Managing Expectations

This chapter consists of the following parts:

  • Prevent Garden Overwhelm Syndrome
  • Life Hacks for the Busy Micro-Farmer
  • When It’s Not Enough
  • Overcoming Brown Thumbs
  • Setting Up Your Neighborhood for Success

Many suburban gardeners and farmers are discouraged when they don’t have immediate success.  Amy walks you through some life hacks to see better results early and get a few quick wins.  You’ll build on these wins and get comfortable as a suburban farmer.  The biggest tip I took out of this section was to spend fifteen minutes every day (every.single.day) in the garden.  This approach will make sure that you see what’s going on and don’t let things go too far and become a bigger problem.

Chapter 3: Developing Healthy Soil

This chapter consists of the following parts:

  • Building Soil Health and Fertility
  • Guide to Organic Soil Amendments
  • No-Till Micro-Farming
  • Constructing a Simple Compost System
  • How to Compost
  • Cultivate Worm Castings with Vermicomposting

Soil is the lifeblood of a great suburban micro-farm.  This chapter of The Suburban Micro-Farm is great because it walks you through all the different ways to build high-quality soil.  These approaches will create a great base layer for your crops and allow you to achieve success earlier.

Chapter 4: Vegetables On The Farm

This chapter consists of the following parts:

  • The Efficient Micro-Farm
  • Guide to Planting and Growing Vegetables
  • Choosing Crops to Meet Your Needs
  • How to Place Vegetables
  • Extending the Season with Cold Frames

Soil is great, but folks plant gardens and farms to get produce.  This chapter is chock full of information on many different crops you can grow.  It tells you how to grow them, what crops to grow with them to promote successful harvest and how to rotate your crops annually.

Chapter 5: Micro-Farming Fruit

This chapter consists of the following parts:

  • Growing Fruit Trees
  • Growing Berries for Beginners
  • Choosing Fruit for Your Circumstances

So, you’ve got your vegetables squared away, right?  What about fruit?  Fruit is sometimes easier for the suburban micro-farmer because it is typically an annual product.  You only plant it once and receive output (harvest) every year after that.  This chapter is a goldmine of information on where to plant certain fruit, how to harvest it and when to harvest it.  This chapter has really prompted me to plant currants and grapes in my yard.

Chapter 6: Growing Herbs On The Micro-Farm

This chapter consists of the following parts:

  • Kitchen Garden Herbs
  • Herbs in a Pollinator Garden
  • Create an Herb Spiral

If you like to cook then you know how important herbs are to making that special dish really pop.  Herbs are also instrumental in medicinal settings (see Cat Ellis’s book Prepper’s Natural Medicine).  And, on top of those things, they also attract pollinators to your crops.  This chapter provides great guidelines for planting herbs and designing your suburban micro-farm in a way that utilizes your herbs for many different factors.

Part II – Becoming A Micro-Farmer

Chapter 7: Organizing Your Micro-Farm

This chapter consists of the following parts:

  • Make a Garden Sketch
  • Make Seed and Supply Purchases
  • Month-by-Month Micro-Farming
  • Checklists and Monthly Calendars

Good farmers are organized farmers.  Amy has spent a lot of time putting together a companion website to this book (you’ll have to buy the book to find the website address).  The resources on this website help you plan and track the performance of your garden.  I’ve already dug into these and plan on using them this summer.

Chapter 8: Seed Starting & Planning

This chapter consists of the following parts:

  • Starting Seeds Indoors: A Step-by-Step Guide
  • How to Sow Seeds Directly Outdoors
  • How to Transplant Seedlings Outdoors

Seed starting isn’t always as simple as it sounds.  Amy does a great job of explaining seed starting in this chapter of The Suburban Micro-Farm.  She also talks heavily about transplanting and the – to me – always nebulous task of hardening off transplants.

Chapter 9: Maintaining The Garden & Harvesting The Produce

This chapter consists of the following parts:

  • Daily Garden Visits
  • Mulching in the Garden
  • Watering
  • Pest Management
  • Guide to Harvesting Vegetables
  • Cleaning up the Garden for Fall
  • Easy Seeds to Save
  • Storing Seeds

You’ve set up your garden, started your seeds and transplanted them successfully to the garden.  Now, what do you do?  Mulching, water, pest management and harvesting are all tasks that help promote suburban micro-farm success.  Amy spends a good amount of time talking about all of these tasks and also delves into seed saving.  Seed saving is SO important because you can capture seeds from produce that survived in your area and slowly build a seed base for plants that will be more successful in your location.

Part III – Advanced Micro-Farming Techniques

Chapter 10: Edible Landscaping

This chapter consists of the following parts:

  • Why Landscape with Edibles?
  • Things to Consider before Breaking Ground
  • Landscape Design Principles for Visual Appeal
  • Planning Techniques for the Edible Landscape
  • Choosing What to Plant
  • Utilizing the Parking Strip

Amy has taken the next step with her micro-farming and moved onto an edible landscape.  She’s slowly removing the useless lawn on her property and replacing it with plants that are not only beautiful but functional.  Learn how she’s doing it in this chapter!

Chapter 11: Digging Deeper: Permaculture & Micro-Farming

This chapter consists of the following parts:

  • Using Water Wisely
  • Building Plant Guilds
  • Farming the Contour
  • Terracing with Check Logs
  • Managing the Edges
  • Permaculture Plants

Interested in permaculture?  This chapter is, by far, the longest in the book.  It’s also the most information-dense chapter.  Amy basically compressed an entire Permaculture Design Course (PDC) into one chapter.  I absolutely loved this chapter because it’s not only permaculture-centric but it is permaculture-centric to the suburban homeowner mindset.  I would often struggle to see how approaches learned in a PDC could be utilized in a suburban setting.  Amy helps guide us in that direction.

Chapter 12: Making Money On The Suburban Micro-Farm

This chapter consists of the following parts:

  • Perennial Crops
  • Annual Crops with a Long Season
  • Shade Crops
  • The Edible Plant Nursery
  • Cut Flowers
  • Maple Syrup
  • Cottage Food Products
  • Homemade Soap
  • Teaching and Writing
  • Tips for Success

If you follow all the tips, trick and techniques in of The Suburban Micro-Farm, you’ll most likely have more produce than you and your family can handle.  Why not make some money off of it?  Amy walks us through ways to monetize your suburban micro-farm.  Genius ideas here.  Worth the price of the book in and of itself.

Conclusion

Amy ties it all up in the conclusion.  She has additional sections such as Acknowledgements, Bibliography, and Additional Resources (Books and Online).  These sections are incredible as well and allow the reader to continue their self-education in a variety of different places.

Why I Liked The Suburban Micro-Farm

There are a lot of things I liked about this book.  But, most importantly, I think the fact that it’s a hands-on book is what I like most.  All the information here is not theoretical but, rather, it’s proven tactics with suggestions on how to implement them yourselves.  Tactics and strategy in the same book.  Incredible.

Amy’s companion websites and resources – there are at least four Google spreadsheets she’s set up for you – are just incredible.  She could probably sell these as a kit themselves but they are “free” with a purchase of the book.

Finally, I liked the layout of the book.  It grows the reader’s knowledge if read chronologically but also allows for pinpoint referencing of information.  Great approach Amy!

What I Didn’t Like

I hate saying that there’s nothing I didn’t like about a book but there isn’t anything I don’t like about this book.  I think it’s great!  In the first edition, the one thing I didn’t like was was the printing. The first edition was printed in black and white and it was quite obvious that the master copy was in color. The black and white printing did all the pictures and colored text injustice.

Amy fixed this issues in the second edition and I have to say that it made an already great book incredible!  Even if you picked up the first edition, I would suggest getting the second edition.  The addition of color to this printing is just amazing!

Overall Thoughts on The Suburban Micro-Farm

Point blank, this book is a must-have for any suburban homesteader who is even thinking about growing fruit, vegetables or herbs on their land.  Amy Stross underestimates her ability to convey complex information in a simple, straight-forward manner.  Likewise, she has done a great job of putting together a book that is both awesome in its long form as it is a pinpoint resource book.

It is very, very rare that I state emphatically that a book is required for your suburban homesteading library.  This book goes alongside Cat Ellis’s Prepper’s Natural Medicine and Anna Hess’ The Weekend Homesteader as MUST HAVES in your library!

Suburban Micro-Farm
Disclaimer: Amy Stross supplied a copy of The Suburban Micro-Farm for me to review. I can assure my readers that I gave it a fair and honest review.
Bannock Backpacking Food Review

The more I get into backpacking, the more I see the similarities to prepping.  There’s a need to be prepared for what may come, to plan for what you think might happen and to be self-sufficient.  Part of that self-sufficiency is making sure you have adequate food reserves.  That’s why I was more than happy to give Bannock Backpacking Food a chance when they approached me about doing a review.

Bannock Backpacking Food – Initial Impressions

Bannock (a line produced by Legacy Food Storage) approached me at a very opportune time.  I was planning a small section hike of the Appalachian Trail (AT) and was in the middle of figuring out all my gear and food.  Seemed like a perfect opportunity to give this new brand a try.

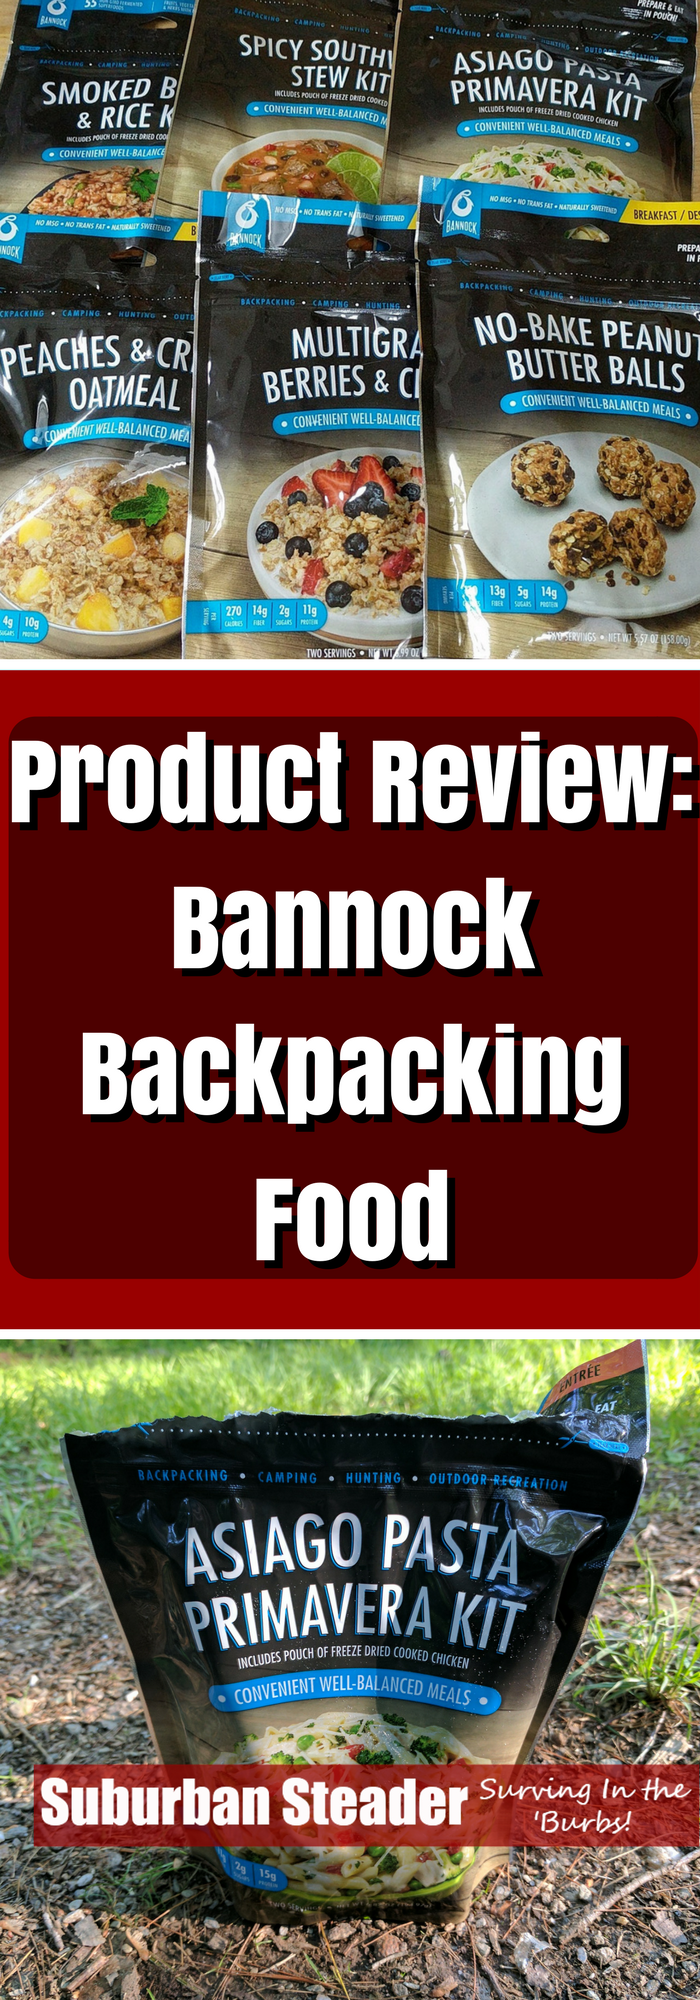
Bannock sent me the following items:

  • Multigrain Berries & Cream
  • Peaches & Cream Oatmeal
  • Asiago Pasta Primavera Kit
  • Smoked Bean & Rice Kit
  • Spicy Southwest Stew Kit
  • No-Bake Peanut Butter Balls

Bannock Backpacking Food Product Review

Natural Ingredients

The initial thing I noticed about all of these items was the ingredients.  Their ingredients seemed much more natural than what I’m used to with my typical Mountain House backpacking food.  Some of the packages were even marked non-GMO which is always nice.  The typical backpacking food I get is definitely not that ‘natural.’

Calories Per Ounce

The next test was the most important to me from a backpacking perspective.  There’s an old saying in backpacking circles that goes something like this:

Ounces Equal Pounds And Pounds Equal Pain

Backpackers, for the most part, want to carry as little weight as possible.  Food and water are areas where we try to cut our weight as much as possible.  A gallon of water weighs just over 8lbs and we can’t do anything to change that.  We can reduce our food weight by carrying dehydrated food though.  We also want to make sure we have sufficient calorie replacement since we’re exerting ourselves all day.

This tradeoff comes down to a calorie per ounce value.  Typically, I shoot for food that gives me at least 100 calories for an ounce of weight (packaging included).  Ideally, I want foods that are 125 cals/oz.  The items Bannock provided me had the following calories per ounce values:

  • Multigrain Berries & Cream (88.8 cals/oz)
  • Peaches & Cream Oatmeal (92.9 cals/oz)
  • Asiago Pasta Primavera Kit (85.9 cals/oz)
  • Smoked Bean & Rice Kit (86.4 cals/oz)
  • Spicy Southwest Stew Kit (80.6 cals/oz)
  • No-Bake Peanut Butter Balls (52.8 cals/oz)

Let’s compare that to some of theMountain House items I typically use:

  • MH Biscuits & Gravy (101.6 cals/oz)
  • MH Breakfast Skillet (122.8 cals/oz)
  • MH Beef Stroganoff (104.2 cals/oz)
  • MH Beef Stew (99.1 cals/oz)

As you can see, theMountain House items perform better in this area than the Bannock.  Unfortunately, none of the Bannock items get close to the 100 cals/oz threshold.

But How Did They Taste?

OK, so I’ll be carrying more weight for the same caloric intake.  Not the end of the world.  How do these things taste?

I have to say that I was pleasantly surprised here.  I took the Asiago Pasta Primavera Kit on my trip and really enjoyed it.  It tasted more “home-cooked” than any backpacking food I’ve tasted to date.  I found that the cooking times needed a little longer to get the chicken to the right consistency, but that was probably more me rushing dinner because I was so hungry.  The veggies tasted very fresh and the chicken tasted like chicken, not like some processed meat.

Bannock Backpacking Food Product Review

I’ve since tried the Smoked Bean & Rice Kit as well as the Spicy Southwest Stew Kit and had similar results.  I’m not a big fruit fan so I had the kids try the breakfast packages (Multigrain Berries & Cream and the Peaches & Cream Oatmeal).  They didn’t particularly care for the creaminess (we don’t usually do cream in our oatmeal), but they loved the fruit and said it tasted almost like the real thing.  I have to say that it smelled pretty good!

Everyone in the family like the No-Bake Peanut Butter Balls.

Would I Recommend Them?

We’ve looked at pros – they taste great and the ingredients are items I recognize – and the cons – they’re heavier than most backpacking food.

This question is really two-fold:

  1. Do I recommend you use them?
  2. Will I carry them in the future?

The answer to the first question is yes, I do recommend them.  The combination of natural ingredients and great taste make them easy to recommend.  There’s nothing like eating a hearty meal at the end of the day and Bannock delivers on that aspect.

The answer to the second question, unfortunately, is that I will not be carrying these going forward.  I am very weight conscious when I go backpacking.  The low calorie per ounce of each unit makes these items something I’d rather not carry.

I think Bannock has the ability to reduce the packaging size and bring both the volume and calorie per ounce of these items down into a range that is competitive with the more well-known backpacking food brands.  If they can do that, I’ll surely reconsider my decision.

I’d also like to see them offer some more flavors, but I’m sure that’s just a matter of growing the business a bit.


What did you think of this review? Have you tried Bannock Backpacking Foods? Let me know your thoughts and experience in the comments below!

Bannock Backpacking Food Product Review


Your Own 72Hr Kit Plan Ebook (Product Review)

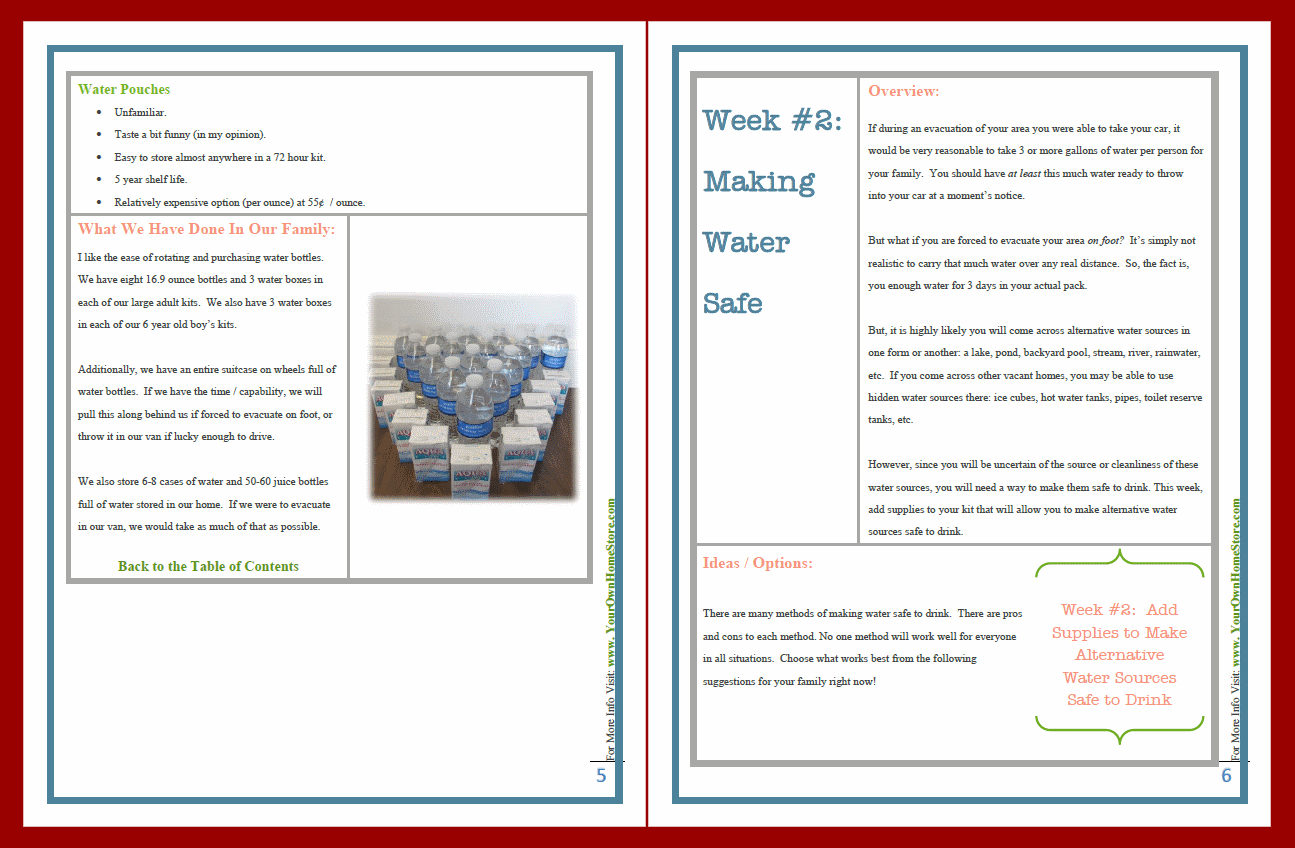
In the past, I’ve posted articles on how to pack a bugout bag, but I’ve never fully addressed exactly what to put in a bug out bag or, as it’s also known, a 72hr kit.  Fortunately, for both of us, Misty Marsh from Simple Family Preparedness has taken the time to write a “by the numbers” ebook on how to properly build a 72hr kit.  Her ebook entitled “Your Own 72Hr Kit Plan” will explicitly state her expertise on the topic and give you a step-by-step guide on building your own 72hr kit.

How Is “Your Own 72Hr Kit Plan” Laid Out?

Misty understands that building a 72hr kit can be one of the most daunting tasks of becoming prepared.  She also understands that families tend to be financially stretched at points and building 72hr kits can cause the financials goals of the family to be put in jeopardy.  Both of those reasons led her to a twenty-six-week approach of building a kit and also financing it.

Her approach is designed on a once-a-week addition to the 72hr kit.  You’ll start with water, move onto food, them clothes and shelter, first aid, light, communication, tools and then move into more specialty areas such as entertainment, pets, and items specific to babies and young kids.  In the end, Misty talks about organizing and packing your 72hr kit.

The process is very methodical and builds upon itself.  This approach is intelligent and simple at the same time.

What I Liked About “Your Own 72Hr Kit Plan”

Plain and simple, I loved the simplicity of Misty’s approach.  Her approach is well thought out and, as a user, you can feel – and see – your kit grow over the course of weeks.  Misty also provides budget solutions for all of the tips in the book.  Not only that, but she provides budget levels for each option.  What does “budget level” mean?  Let’s take a look at Week #9 where she talks about warmth.  In that section, she talks about the following solutions:

Small Budget

Medium Budget

Larger Budget

Not only does she offer up these budget solutions for building your 72hr kit, but she also speaks to what her family did and why.

Misty also addresses those of you who have a kit setup for everyone in your family.  She suggests using this book as a test of your current system.  You can review and retool your gear based on the information provided in her ebook.

Your Own 72 Hour Kit Plan (Product Review)What I Didn’t Like About “Your Own 72Hr Kit Plan”
My most basic complaint about “Your Own 72Hr Kit Plan” is the same thing I like about it – the twenty-six-week approach that Misty suggests.

Wait, how can you both like and dislike something.  Well, let me explain.

Misty suggests a very methodical, well thought out approach to building a 72hr kit.  I fully support that with the single caveat that it means you’ll not have any kind of 72hr kit for over half a year!  You’ll be at the mercy of your environment for over six months.  I would suggest getting something together ASAP and then following Misty’s suggestions to rebuild and revamp your quickly thrown together 72hr kit. If (God forbid) something happened in the interim, you’ll have something you can grab-and-go with.

Overall Thoughts

Overall, I highly recommend Misty Marsh’s “Your Own 72Hr Kit Plan” ebook.  It’s a fundamentally sound, financially-minded approach to developing 72hr kits for you and your family members.  You can’t really beat the approach she takes and, in doing so, you’ll save money and become more prepared.  That’s win-win in my book!

Your Own 72 Hour Kit Plan (Product Review)


Prepper’s Survival Medicine Handbook (Book Review)

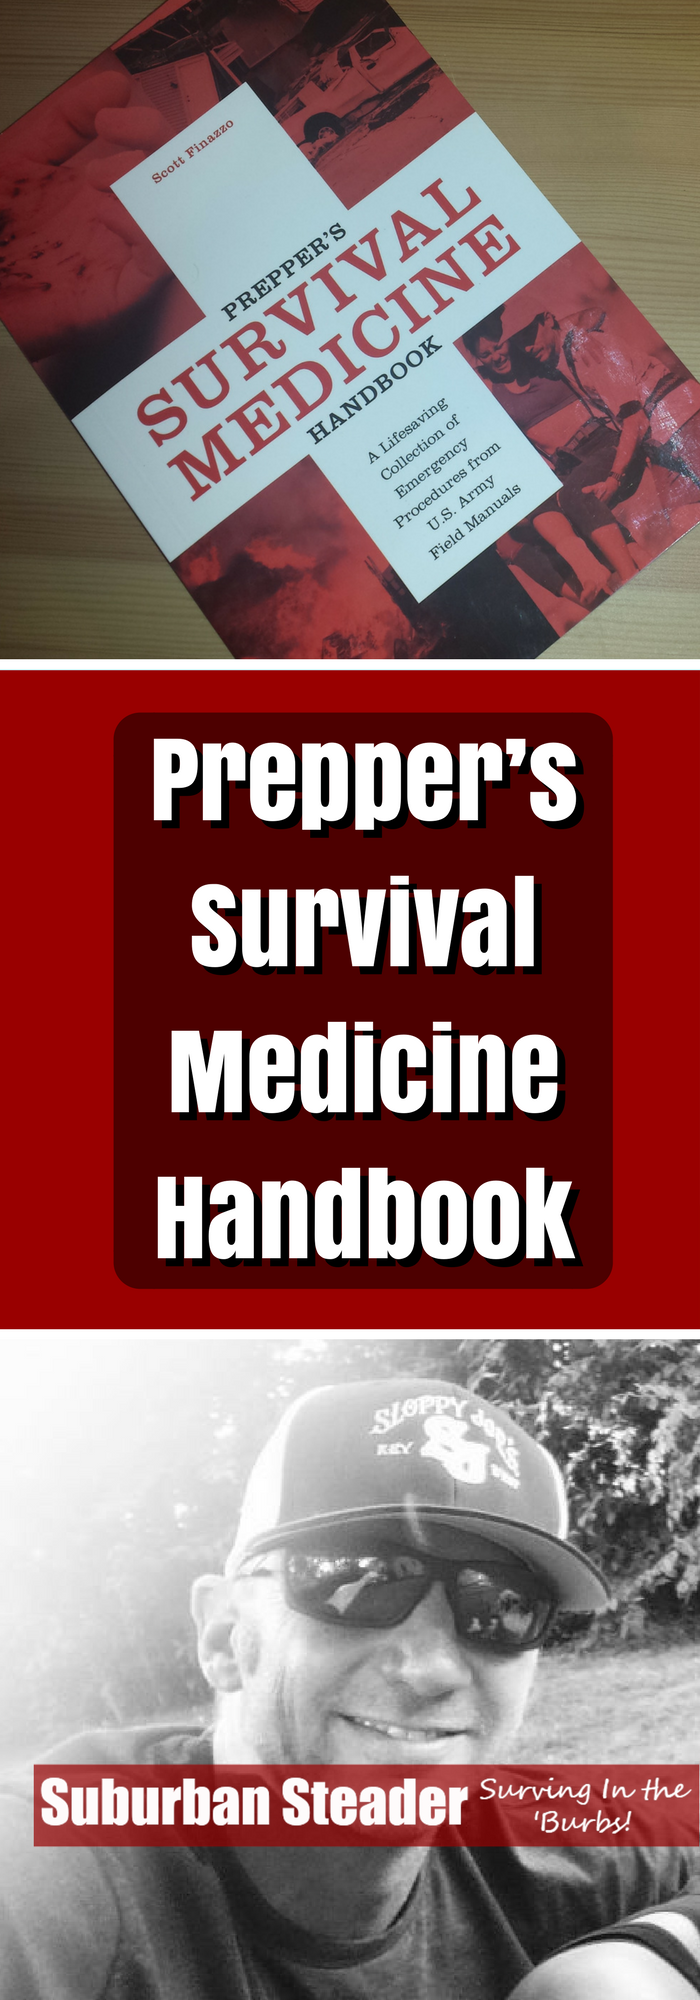
You’re a suburban homesteader.  You know how to raise your own food, protect your land, hunt for your protein, fix just about everything around your home and work with your neighbors to make your world that much better.  But, do you know how to deal with any acute medical emergencies that show up?  Scott Finazzo’s book Prepper’s Survival Medicine Handbook will help you not only identify medical issues, but also treat them to the point where you can get them to higher-end medical care.

Book Set-Up

Survival medicine is a broad topic as you might image.  Scott Finazzo breaks down this immense topic into sixteen segments that, while still large, make the overall topic a bit more digestible.  This breakdown allows for quicker reference which will be important when seconds count.

The chapters of this book are as follows:

Introduction

The Introduction is just that – an introduction to the book and a general reasoning behind why Scott wrote this book.  His time as a firefighter and the research he did into military medical response are leveraged heavily in the advice provided in the following chapters.

Chapter 1 – Basic Procedures

Sometimes the best place to start is the beginning.  This chapter speaks highly of understanding your situation, working towards a positive outcome and being prepared to take care of things when they go south.  Gear – protective clothing, first aid supplies, and the like – is discussed as are certifications and classes that individuals may want to take part in.  I was especially interested in the section on smartphone apps that may be helpful.

Chapter 2 – Controlling Blood Loss

This chapter is the first in a long line of “meat and potato” chapters with actionable advice.  As you might imagine, topics such as direct pressure, elevation, tourniquets and clotting agents are addressed.

Chapter 3 – Trauma

Trauma is a big word and encompasses a few major different types of injuries.  Scott uses this chapter in Prepper’s Survival Medicine Handbook to discuss such topics as blunt force trauma, falls, gunshots and stabbings/impalements.

Chapter 4 – Shock

Shock is probably the most overlooked medical situation when a situation goes sideways.  Events such as gunshots or head injuries are quite apparent visually.  Shock can sometimes sneak up on you.  Scott outlines the four stages of shock and how to best treat them.

Chapter 5 – Fractures

Imagine being in the middle of a fifty-mile multi-day hike with a buddy when he slips and breaks his leg.  Would you know how to treat it properly so that he’s both comfortable and not enduring further injury?  This chapter will teach you how.

Chapter 6 – Burns

Burns can range from that sunburn after a little too long at the beach to full blown third-degree burns which result from prolonged exposure to flames.  Scott uses this chapter of Prepper’s Survival Medicine Handbook to dive into each type of burn and explain how to treat it.

Chapter 7 – Heat-Related Emergencies

Heat-related emergencies include dehydration, heat exhaustion, cramps and heat stroke.  They can be just as dangerous and cold-related emergencies and, sometimes, harder to treat.  Scott’s advice could help you save the day after long exposure to sunny, warm days.

Chapter 8 – Cold-Related Emergencies

The human body does not like to be cold. Frostbite and hypothermia can be dangerous situations.  With the right information, they can be avoided or, at the very least, treated in short order.

Chapter 9 – Allergic Reactions

Like many medical situations, allergic reactions can range from the benign (seasonal allergies) to the severe (deadly food allergies).  Treatment can be tricky as each person can have a different reaction to epinephrine but Scott does his best to help provide solutions that will make the patient comfortable and stabilize them.

Chapter 10 – Bites and Stings

Bites and stings fall into the same category as allergic reactions.  Some are benign – mosquito bites for instance – and some can border on deadly – picture shark bites or some snake venoms.  Learning how to not only identify the guilty predator but also provide the right treatment is critical to success in these situations.

Chapter 11 – Common Medical Emergencies

Cardiac arrest, seizures, and diabetic attacks can all be life-threatening.  Scott spends some time in this chapter of Prepper’s Survival Medicine Handbook talking about each and how to deal with them if you do not have immediate access to professional medical services.

Chapter 12 – Chemical, Biological, Radiological, and Nuclear First Aid

While the general population is not immune to such situations, this chapter was definitely written with military personnel in mind.  The good news is that the average reader will probably never have to experience this kind of trauma.  The better news is that this chapter gives you a fighting chance of surviving it if you do.

Chapter 13 – Specific Climate Survival

The big three – fire, water and shelter – are discussed heavily here.  After all, they are three of the most important skills to survival.  Food and medicinal plants are also discussed at length.  Specific climates such as desserts, cold/icy environments, mountain ranges and forest areas are presented as well.  Each terrain style is broken down into detail about what to look for and how to make do in your surroundings.  While interest, this chapter could be a book unto itself.  I would caution the reader that each topic is just touched on and not gone into detail due to the need for some kind of brevity.

Chapter 14 – Rescue Operations

So you’ve made your buddy comfortable after that fall or traumatic event.  How do you go about extricating yourself and him from the situation?  Do you know how to perform one- or two-man carries? Build a stretcher? Or even drag your fallen buddy appropriately?

Chapter 15 – Psychological First Aid

Post Traumatic Stress Disorder (PTSD) is a serious issue and one that can raise it’s ugly head after a situation goes sideways.  Learn how to identify it and possibly treat it so that everyone can get out of the situation safely.

Chapter 16 – Resuscitation

Blood flow and oxygen are critical to survival.  Scott goes into great detail in this chapter of Prepper’s Survival Medicine Handbook to talk about resuscitating someone who has stopped one or both of these critical functions.

Editor’s Note: While the information provided in this chapter is high quality, it in no way replaces a Red Cross CPR certification.

What I Liked About Prepper’s Survival Medicine Handbook

Scott took a very straightforward approach with this book.  His chapters read clearly and both the identification and treatment sections are quite clear.  It’s evident that his years as a firefighter and his time researching military medical response have aggregated into all the information in this book.

What I Didn’t Like

Prepper’s Survival Medicine Handbook was definitely written from more of a military/group perspective than a homesteader or suburbanite.  That’s not a knock on the book; it’s more of a heads up for the readers of this site.

Overall Thoughts on Prepper’s Survival Medicine Handbook

Those of you who were ever a Boy Scout remember the booklets that each merit badge had associated with it.  Prepper’s Survival Medicine Handbook reminds me of those booklets on steroids!  It’s chock full of both identification and treatment information.  It’s definitely geared more towards immediate treatment so that you can get the patient to more professional treatment.

I’d recommend this book as a good back-up to any formal first aid training you’ve received in the past.

Prepper's Survival Medicine Handbook


Disclaimer: Scott Finazzo supplied a copy of Prepper’s Survival Medicine Handbook via Ulysses Press for me to review. I can assure my readers that I gave it a fair and honest review.


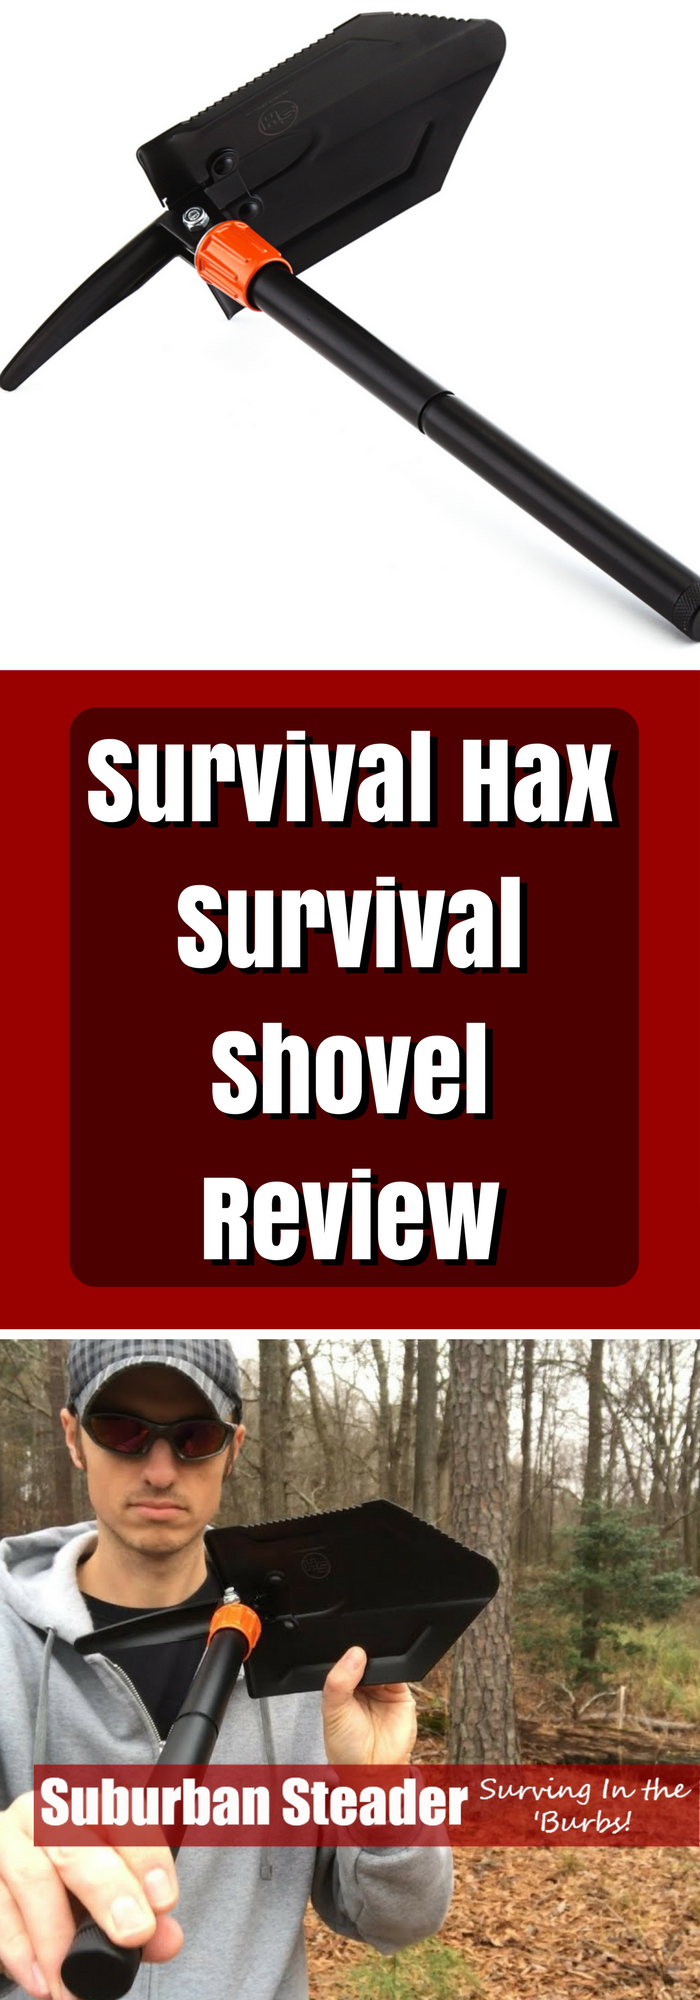
Survival Hax Survival Shovel Review

I was recently approached by Survival Hax to review a new shovel they had come out with.  The Survival Hax Survival Shovel is filling a void in the marketplace for a budget-friendly, collapsible shovel.  It’s small and lightweight which makes it conceptually ideal for hiking and backpacking.  Likewise, it’s adjustable which promotes ease of use.  Come check out what I thought of the shovel and where it fits into my daily loadout.

Product Description

Survival Hax describes their Survival Shovel as “a durable yet lightweight portable folding shovel made for the outdoors. With a serrated edge on one side, our trowel can be turned into a saw to cut away brush or make kindling. This multi-purpose shovel also doubles as a pickaxe and has a fire starter flint.”

It measures 24 inches long when unfolded and collapses to 8.6 inches wide by 8.2 inches high.  The whole unit weighs about 2lbs.

The shovel head is steel manganese with the handle being steel as well.  The orange adjustment bolt is made out of an aluminum alloy.

The overall technical specs are as follows:

Technical Specs:

  • Full shovel length: 24in
  • Pickaxe length: 16.9in
  • Folded shovel length: 8.6in
  • Handle length: 16.1in
  • Head length: 8.2in
  • Head width: 5.9in
  • Pickaxe length: 5.3in
  • Fire Starter length: 2.3in
  • Carry bag: 9.8in x 7in
  • Weight: 2lbs

The Pros

The Survival Hax Survival shovel does have some things going for it.  First is its compact nature when folded up.  I was able to throw this shovel in my backpack and have it take up very little room.  It’s nice to be able to stow a shovel into my pack and not have to lash an oddly shaped item to the outside of it.

The second thing I liked about the Survival Hax Survival Shovel was the versatility.  The shovel and pickaxe can be oriented in many different orientations thanks to the adjustability of the orange adjustment bolt.  The adjustability allows you to attack the ground from many different angles than a traditional shovel.  The “serrated” and “blade” edge of the shovel also present the possibility of this being a cutting tool.

The Cons

There are quite a few things working against the Survival Hax Shovel.  Let’s start at the blade end and work up the handle.

The shovel blade and pickaxe themselves have a few issues.  The shovel itself performed well as a shovel.  The pickaxe performed equally as well.  Keep in mind that Long Island is just a big freaking sandbar so our soil isn’t terribly difficult to dig in.  The edge of the shovel is serrated and supposed to be sharp on the other side.  Well, neither of these blades were all that sharp or useful.  That being said, they were there and, with a file and some elbow grease, they would be useful.

The orange adjustment bolt is the first real issue I ran into.  Survival Hax uses a fine thread on this bolt (actually, in all threaded areas of the shovel) and it takes forever to tighten and loosen the bolt.  The fine thread is also is quite susceptible to sand getting in them and causing issues with tightening or loosening.

Further up, the handle extension threads on and has the same fine pitch problem I mentioned above.  I found that trying to tighten the orange adjustment invariably meant the handle extension loosening up.  The fine thread just doesn’t seem to lock up the way I’d want it to.

At the very end of the handle is the ferrocerium rod.  I had very little luck getting quality sparks out of this rod (as you’ll see in the YouTube video review below).  It’s nice to have, in a pinch, but I wouldn’t count on it.  I did like that the tube was hollow and could be used to store more gear.

Overall Impression

I really want to say that the Survival Hax Survival Shovel is something everyone should have in their Bug Out Bag but I can’t wholly endorse it.  It seems weak in construction to me (in fact, some have gotten it to fail during testing) and a lot of the shortcomings I mentioned above just don’t meet my tough criteria for being a “bulletproof” piece of equipment.

That being said, I do want to applaud Survival Hax.  They’ve put together a budget-friendly piece of equipment that, with a few changes, could be a quality piece of equipment.  If they changed the threading and improved the quality of the ferrocerium, I’d be more apt to recommend it.  I’d also want to see the serrated edges either taken away or sharper.

Overall, the Survival Hax Shovel is a middle of the road shovel that has some nice perks (the pickaxe is a great addition in my opinion).

Personally, I’ll be putting the Survival Hax Survival Shovel in my truck to be used in snow removal situations.  I absolutely trust it for that and can see it being a perfect tool for those kinds of jobs.

[youtube_sc url=”FQ_Kmfl6Azg” width=”400″]

Buying A Survival Hax Survival Shovel

If you’re interested in buying the Survival Hax Survival Shovel, you can buy them on Amazon.

Survival Hax Survival Shovel


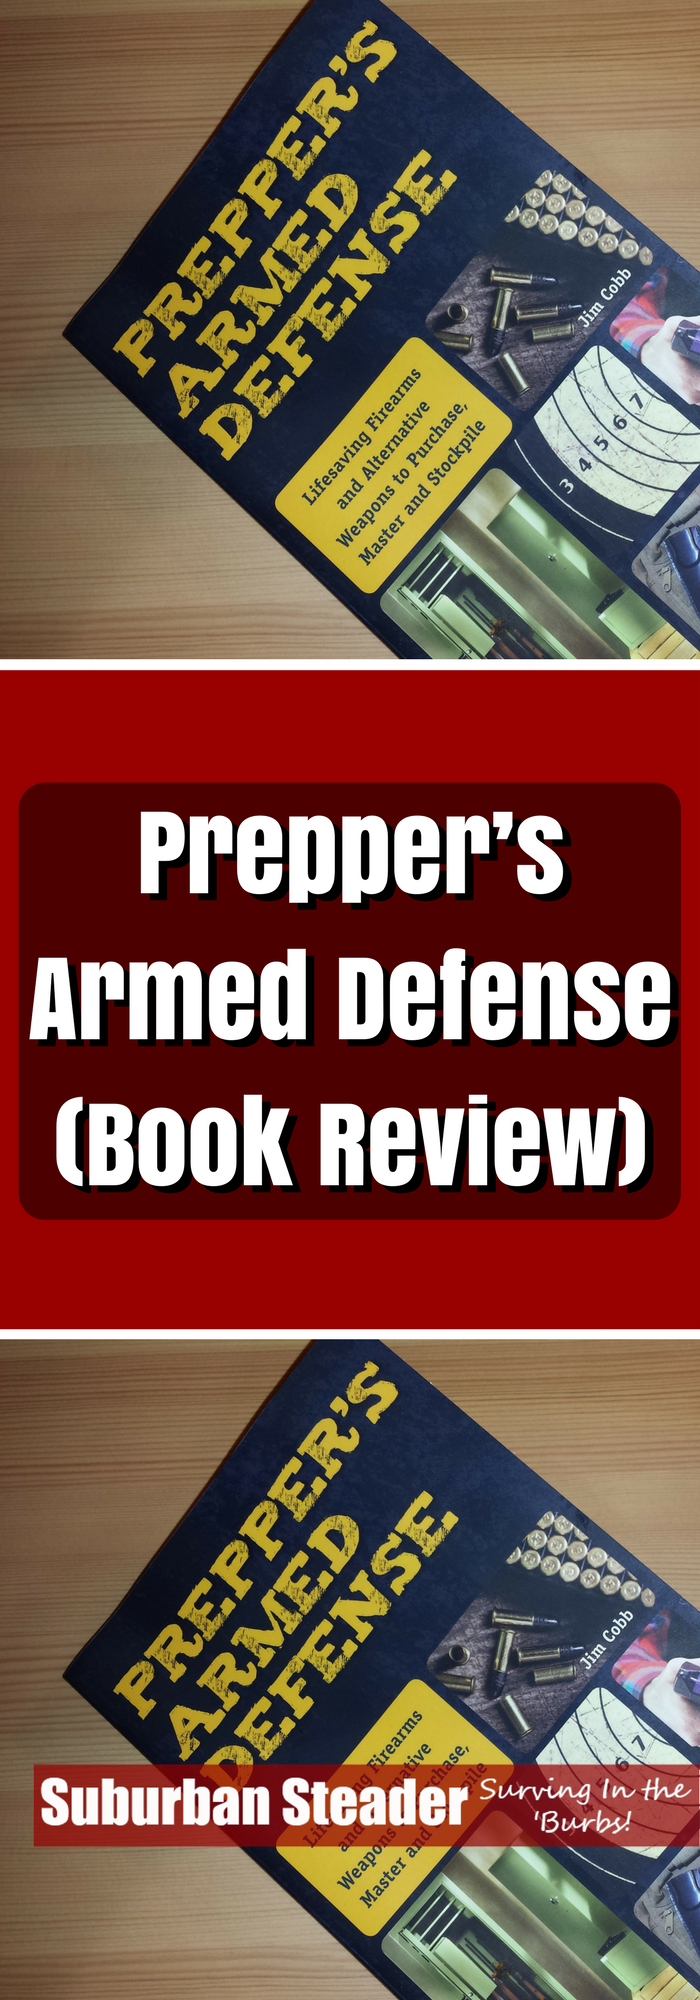
Prepper’s Armed Defense (Book Review)

Armed defense is always an interesting topic when it comes to prepping, survivalism and suburban homesteading.  At the end of the day, I strongly believe in a person’s right to stand their ground and protect themselves.  Jim Cobb shares that belief.  He has used his latest offering, Prepper’s Armed Defense, as a means of explaining how individuals can arm themselves in the pursuit of self-defense.

Book Set-Up

Jim Cobb has written numerous books to date and he has hit on a style that just plain works.  He uses this style in Prepper’s Armed Defense.  It’s a concise, intelligent approach that walks you through each topic and allows the reader to grow their knowledge base chapter by chapter.  That being said, the inquisitive reader can skip to any chapter and consume that knowledge without needing the information provided in previous chapters.

The chapters are as follows:

Chapter 1 – The Realities Of Self-Defense

The unfortunate truth is that self-defense is nothing like it is shown in the movies.  If the good guy thwarts the bad guy in a lethal manner (or even just maims him), he doesn’t get to ride off into the sunset with the girl.  More than likely, he’s going to have a long talk with the local authorities and possibly even spend a night in jail before everything is squared away.  Jim understands the reality of this situation and spends this chapter talking about these kinds of topics.  He talks about such things as situational awareness, training, post-confrontation action plans, self-defense legal concepts (read up on the Castle Doctrine) and the difference between criminal and civil law.  If you take one thing away from this chapter it’s that self-defense is not without possible legal ramifications and you should be prepared to handle that part of the act as well.

Chapter 2 – Non-Lethal Self-Defense Options

As Jim says, “the whole point of self-defense is to make sure you’re still alive and kicking come the next morning.”  That means that if running gets you out of a situation, then it is just as good of a self-defense option as fighting (possibly a better one from a legal perspective).This chapter of Prepper’s Armed Defense centers on all kinds of non-lethal approaches to protecting and defending yourself such as pepper spray, stun guns, tasers, flashlights, and restraints.  On a personal level, I found this chapter to be one of the most beneficial ones in the book as I believe the topic is highly underrated when it comes to self-defense in the prepper/survivalist/homesteading world.

Chapter 3 – Firearms

Ahhh, guns! Every keyboard commandos favorite topic.  Listen, I’m a firm supporter and practitioner of the Second Amendment and completely believe in having firearms for self-defense.  At the same time, I hope to never, ever have to use my firearms in a defensive manner.  That being said, you can’t write a self-defense book without addressing the 800lbs gorilla in the room.  Jim does a great job of writing about firearm selection, ammunition selection, safety (both in the home and handling) and maintenance required.  Truth be told, this chapter of Prepper’s Armed Defense is a great primer for folks who are looking to buy their first firearm.  Even this (somewhat) experienced firearm owner learned a thing or two.

Chapter 4 – Projectile Weapons

Keeping your distance from an attacker may be the difference between life and death in a self-defense situation.  Projectile weapons help you keep that distance while also maintaining a certain degree of safety.  Obviously, a firearm is the most lethal projectile weapon.  But what if you can own a firearm or don’t want to?  Well, there are other projectile weapons like bows and arrows, crossbows, slings and slingshots that can fill the void.  Jim does a great job of describing all these weapons and spends a lot of time explaining how to properly fit and use them.

Chapter 5 – Knives

If you’ve been around this site at all, you know I like sharp things.  Knives are something of a hobby for me (not as much as my buddy Mike at The Backyard Pioneer, but I digress…).  That being said, I loved this chapter of Prepper’s Armed Defense. Jim dug right in and laid down all the basics about knives – folders vs fixed blade, blade material, handle material, blade geometry and general knife terminology.

Much like the firearms chapter, this chapter could be a stand-alone primer for the new knife owner.  Once the basics were laid down, Jim spends time talking about knife fighting and how personal of an experience it will be.  It’s not presented in a manner that is intent on scaring you off, but more as a means of laying down the reality of the situation.  In his words, “Using a knife to intentionally harm another human being takes a certain mindset and commitment.”  Be prepared if you’re going to use a knife for self-defense.

Chapter 6 – Melee Weapons

What’s a melee weapon you ask? Well, I didn’t really know either.  According to Prepper’s Armed Defense, a “melee weapon is used in close proximity to your attacker.”  They can basically be broken down into two categories – blunt weapons and bladed weapons.  Blunt weapons include items such as brass knuckles, batons, bats, canes and walking sticks.  Bladed weapons include items such as machetes, spears, tomahawks and karambits.  Training is key for these items as understanding moving with them in hand is critical to success.

Chapter 7 – Martial Arts Weapons

It’s easy to foresee a situation where a trained martial artist would want to use something they’ve trained with such as a bo staff, nunchaku, tonfa or kubaton.  In reality, unless you’ve spent a lot of time training with them, these weapons are not very realistic or practical for self-defense.  Jim spends some time in this chapter walking you through some common martial arts weapons and the rest talking about important training with them is to your success.

Chapter 8 – Homemade Weapons

The MacGyver chapter of Prepper’s Armed Defense! Jim walks you through a bunch of homemade weapons such as homemade pepper spray, Molotov cocktails, hairspray flamethrowers, modified baseball bats (Lucille anyone?) and slungshots (not a typo).  You’ve probably got everything you need in your house to make most of these and, while they’re not ideal, these items can be a great last line of defense.

Chapter 9 – Force Multipliers

Simply stated, “force multipliers are devices or tactics that allow you and your group to be far more effective against intruders than they might otherwise be.”  Think about how surveillance cameras, drone cameras, alarms and booby traps could be in upping your ability to defend yourself.  This chapter of Prepper’s Armed Defense had me thinking about The Walking Dead and all the preventative measures the different groups have set up around their locations.  Jim does a good job describing the pros and cons of each force multiplier and he spends times talking about how you can roll them into your self-defense plan.

Final Thoughts Section

Jim summarizes the books and gives a few parting shots of wisdom which hinge on the fact that taking a life is no small matter.  One must be prepared for the after effects of such a catastrophic event.

Resources Section

Prepper’s Armed Defense is gear and information heavy.  Jim outlines a bunch of recommended resources – both knowledge-based and hardware – in this section.

Why I Liked Prepper’s Armed Defense

I’ve reviewed a lot of books by Jim Cobb at this point.  In fact, I jump at the opportunity to read his books above most other folks in this genre.  The reason for that is that Jim is very formulaic in the way writes a book.  He provides information in a straightforward, no-BS kind of way.  Jim’s approach doesn’t confuse and doesn’t mince words.  He gets to the point and explains things in plain English.

What I Didn’t Like

Prepper’s Armed Defense didn’t spend a lot of time outside of Chapter 2 talking about ways to avoid the fight.  Why is this important?  Taking a life is a catastrophic event for both parties.  The person performing the act will forever be haunted by it to some extent or another and I think that exaggerating the fact that one should avoid it as much as possible could have been more strongly presented to the reader.

Overall Thoughts on Prepper’s Armed Defense

I think Prepper’s Armed Defense by Jim Cobb is a good addition to your library if you are at all concerned with situations that would warrant self-defense.  While it is gear heavy, it has to be to meet the requirements of the book.  There is also a lot of thought on topics such as the end-effect of self-defense and how to avoid situations where self-defense may be required.  As usual, Jim Cobb doesn’t disappoint.


Disclaimer: Jim Cobb supplied a copy of Prepper’s Armed Defense for me to review. I can assure my readers that I gave it a fair and honest review.

Prepper’s Armed Defense (Book Review)


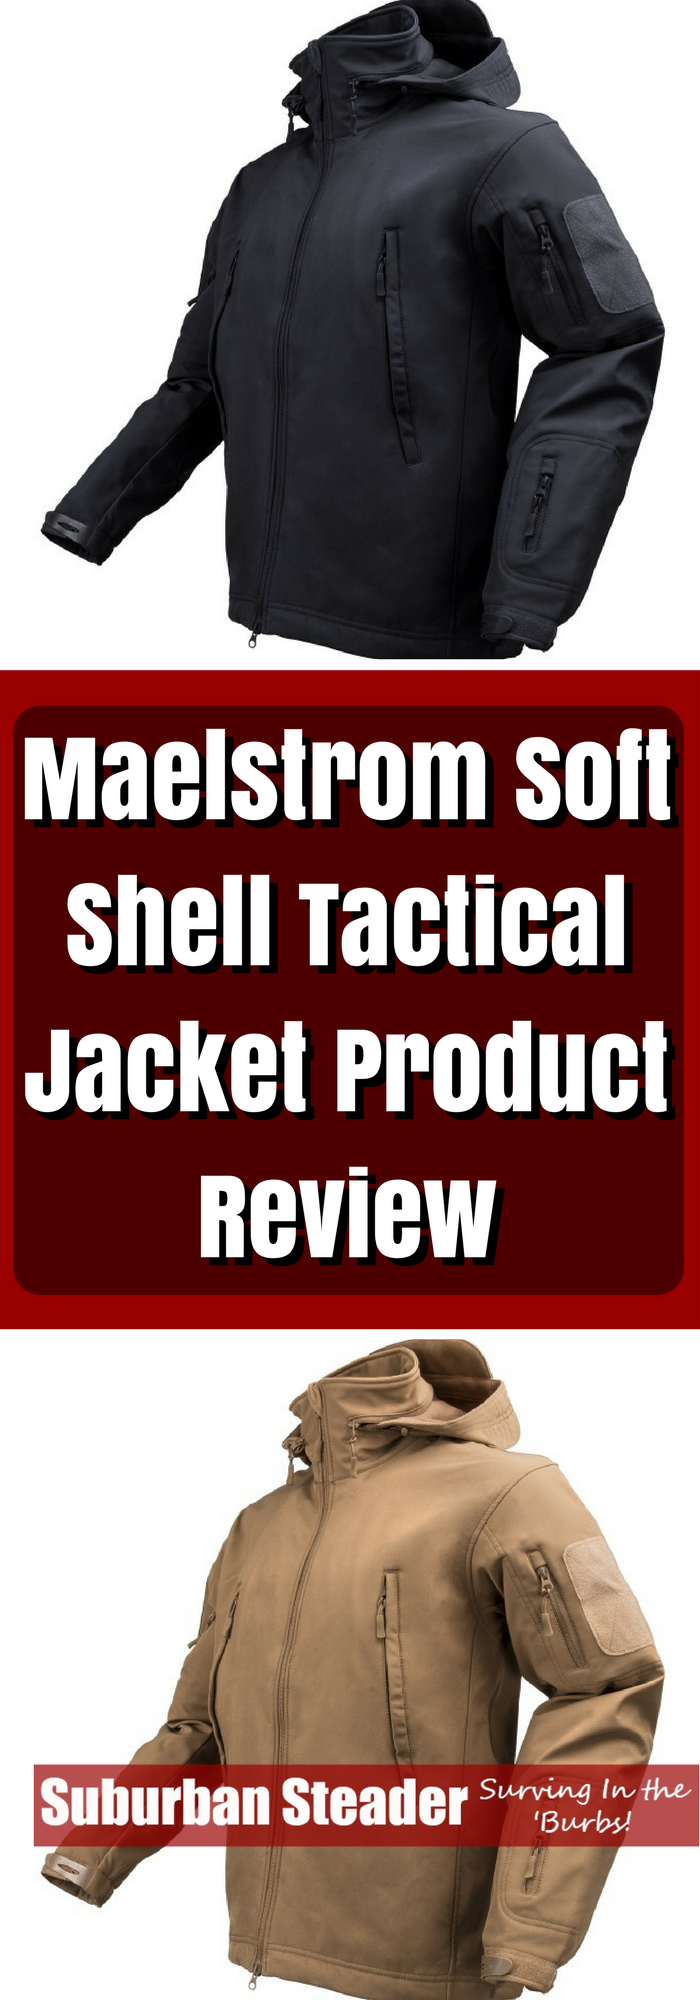
Maelstrom Soft Shell Tactical Jacket Product Review

A jacket is a critical piece of gear for any suburban homesteader.  Rain, wind and cold are all elements that we battle both on the homestead and in our day-to-day suburban adventures.  In today’s post, we see if the Maelstrom Soft Shell Tactical Jacket meets the demands of today’s suburban homesteader.

Product Description

The three layer integrated shell fabric technology on the Maelstrom Soft Shell Tactical Jacket is multi-purpose.  It can prevent water penetration, deflect the wind and wick away moisture all while retaining body heat.  Comfort and warmth are provided by the soft fleece lining which resides underneath the shell.  Zippered pockets are plentiful throughout the jacket and drawstrings are utilized in both the waist and hood areas.  This jacket is designed for specific end-users: tactical personnel, airsoft players, and outdoor enthusiasts will all benefit from its comfort, fit and functionality.

Maelstrom provides the following technical specs on this jacket:

  • Mandarin collar for professional look
  • Heavy duty YKK zippers throughout
  • Underarm zippers for breathability
  • 3 layer DWR polyester softshell
  • Reinforced elbow and adjustable wrist cuff
  • Adjustable waistband
  • Detachable, stowaway drawstring hood
  • Back pocket for storage
  • Product weight: 32.8oz (size large)
  • Available colors: Black, Coyote Brown and Olive Drab

The Pros

The first thing I noticed about this jacket was the weight.  Not that it’s a heavy jacket, but there is some definite mass to Maelstrom Soft Shell Tactical Jacket.  It felt more “beefy” than your typical jacket.  I think part of it was the outer shell.  While it’s billed as a soft shell, there’s some definite durability to the shell.  In fact, I found that the jacket is a bit rigid at first and loosened up a bit once it was worn in.

The second thing I liked about the Maelstrom Soft Shell Tactical Jacket was the rear pocket.  This feature may sound a bit ridiculous to most, but I have always hated having my hand pockets laden down with items.  The rear pocket is huge and has zipper access on both sides.  I find it the perfect place to stow a winter hat when I’m not wearing it.

Finally, I like the fit.  I picked an XL jacket and was a bit dubious at first.  For reference, I’m 6’2”, 250lbs with an athletic build.  Not exactly the smallest guy in the world, but not the biggest.  The XL version of the Maelstrom Soft Shell Tactical Jacket is definitely as small as I could go.  If I had bought this in a store, I probably would have gone back and forth between the XL and XXL.  In the end, I really like the snug fit as it makes the jacket a perfect fit for both work and leisure while not looking too bulky.

The Cons

Ironically, some of my biggest complaints about this jacket are related to the reasons I like this jacket.  I will admit that, while I like the weight of the jacket, I had a fear during my first few weeks of wearing it that it was going to remain stiff.  It didn’t and that’s a big plus in my opinion.  Be prepared, however, to break in your Maelstrom Soft Shell Tactical Jacket.  It’s probably the first jacket I’ve ever had to break in.

I’m not a big fan of the location of the hand pockets.  The hand pockets on the Maelstrom Soft Shell Tactical Jacket are a bit high.  They don’t sit on your hips/”love handles” like most jackets do.  Instead, they sit higher – more around the bottom of the rib cage.  I’m not sure if there is a tactical reason for this placement (as I’ve mentioned in past posts, I have no military or LEO experience), but it does take some getting used to.

Likewise, the cut is a bit short for tall guys.  My biggest request going forward for this jacket would be to offer a Tall version to the sizes.  Like I said, the XL version fits me almost perfectly, but the waist could extend just a few more inches.

Overall Impression

The bottom line on the Maelstrom Soft Shell Tactical Jacket is that it is a durable, weatherproof jacket that is at home in the field (whatever that means for you) or on the way to the office.  It is quite warm (I’ve worn it in below freezing temps without issue) and definitely holds up to the rain (I wore it to work during a three-day spell where I think Noah was getting ready to set sail and I was dry as a bone each day).  As mentioned, it looks good with a pair of jeans or dress pants.

I would suggest three changes to the Maelstrom Soft Shell Tactical Jacket:

  1. Line the rear pocket with loop material (soft side of Velcro).  I could conceive of putting a concealed carry holster back there in certain situations and a loop patch would be the perfect attachment method.
  2. Give us a tall version!
  3. Scale back on the collar.  The dang thing comes up to my ears when stood up straight!  It’s nice on rainy, windy days but it’s a bit awkward to fold down on nicer days.

I think the Maelstrom Soft Shell Tactical jacket would be a perfect jacket law enforcement, first responders, military personnel and the average joe. It will keep you dry and warm while also blending in and not screaming “tactical” to everyone around you.

Buying A Maelstrom Soft Shell Tactical Jacket

The Maelstrom Soft Shell Tactical Jacket can be purchased in multiple locations.  A few are:

Full Disclaimer: Maelstrom provided me with the Maelstrom Soft Shell Tactical Jacket free of charge. I was not paid for my review nor was I obligated to post only a good review of this jacket. The Amazon links above are affiliate links and the ALTAI link is not an affiliate link.


Maelstrom Soft Shell Jacket Product Review


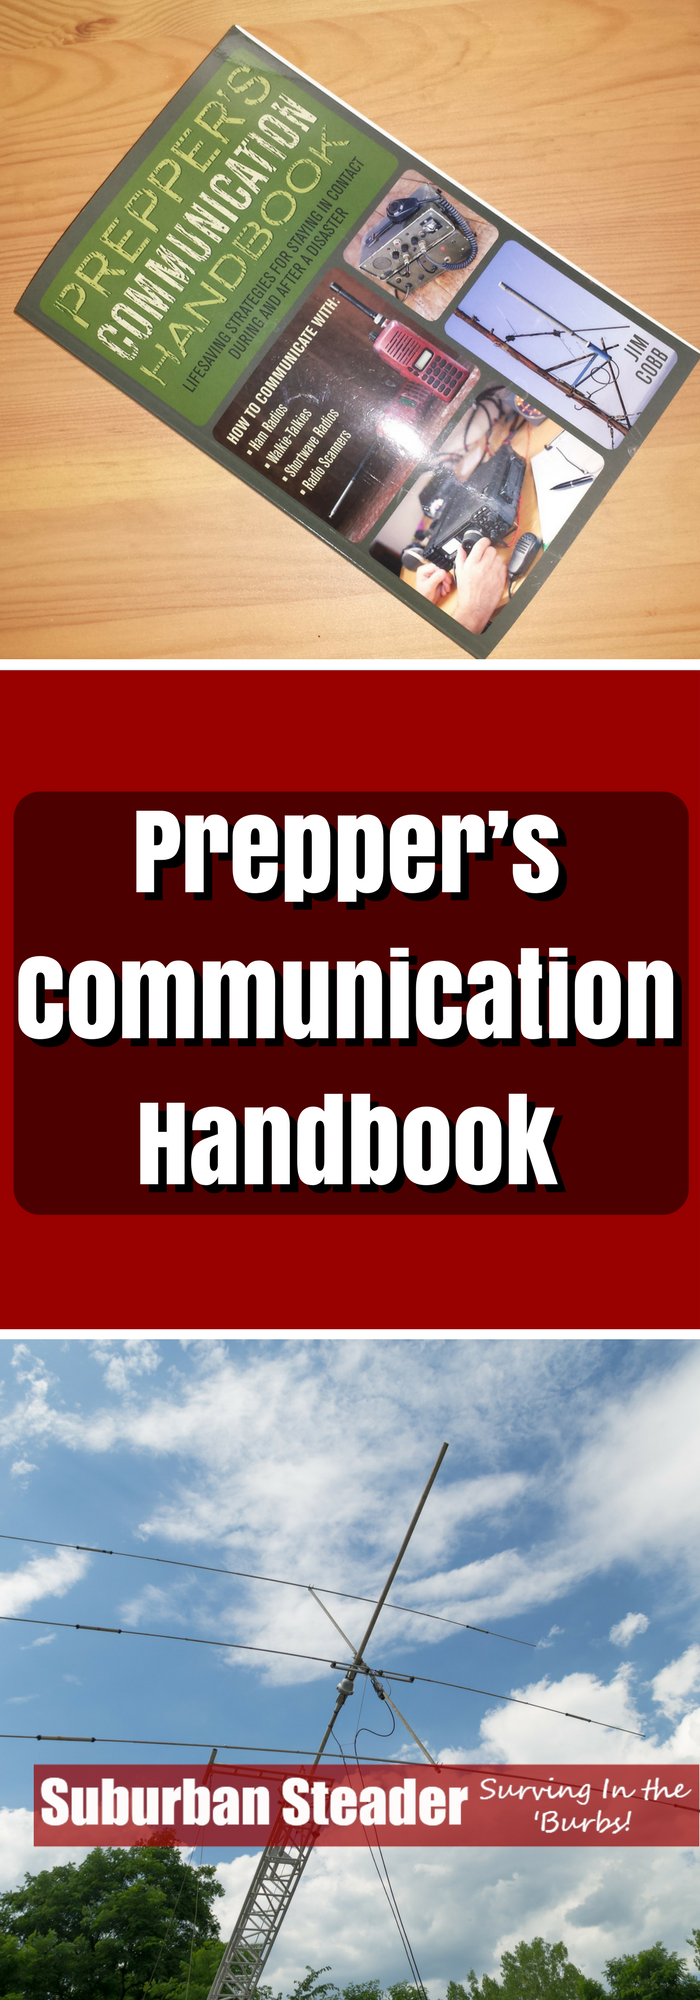
Prepper’s Communication Handbook (Book Review)

Communication is important – both in normal, everyday life and in a SHTF scenario.  Suburban homesteaders have the benefit of being nearby people and, often, don’t have to worry about being stranded without normal communication equipment functioning.  That doesn’t mean they can’t benefit from Jim Cobb’s latest offering, Prepper’s Communication Handbook.  This book will not only walk you through communication equipment and strategies you may need but also talks about communications methods that will increase your quality of life – both in and outside of disastrous situations.

Book Set-Up

In what has become typical Jim Cobb style, Prepper’s Communication Handbook is laid out in a concise, intelligent manner.  Each chapter is precise in its information and to the point.  There’s no fluff or extraneous information – “Just the facts, ma’am!”

The chapters are as follows:

Chapter 1 – One-Way Radio: Receivers

Mark Hortsman of Manager Tools (completely non-prepping related, I know…but I do have a real job that I have to work at and improve in) always says “Communication is what the listener does.”  In this sense, it makes sense that Jim starts his book with ways to listen to communication.  Receivers are an important part of a communication plan and this chapter covers AM/FM, satellite, shortwave and National Oceanic and Atmospheric (NOAA) or weather radios.  Radio scanners are also addressed.  Overall, Jim spends a lot of time on how to collect information as opposed to sending, or broadcasting, information.

Chapter 2 – Two-Way Radio

Listening to and gathering information is great, but sometimes you need to interact with people or send out critical information.  This point is where two radios come into play.  Jim talks about the power required for different radios and goes in depth on items such as telephones, Citizen Band (CB) radios, Family Radio Service (FRS) and General Mobile Radio Service (GMRS) radios and Multi-Use Radio Service (MURS) radios.

Chapter 3 – Amateur Radio

FRS, GMRS and MURS radios are great for local communication, but HAM radio is really where it’s at if you want to communicate over long distance.  This chapter of Prepper’s Communication Handbook is dedicated to the HAM radio: licensing information, test taking, local clubs, emergency communication versus normal operation and required equipment.  This topic is so broad that Jim cannot possibly provide everything there is to know about HAM radio in this chapter but he does a great job of setting the stage for further investigation by the reader.

Chapter 4 – Online Communication

We live in a digital world and I would hazard that a majority of our current communication is done online.  Jim would be remiss if he didn’t devote a significant portion of this book to such things as instant messaging, email, message boards, blogs and the myriad of social media networks out there.

Chapter 5 – Putting Together A Plan

This chapter is where the rubber meets the road, so to speak, for me in this book.  All the background information is great, but how do we pull it all together into an actionable plan?  While there’s no template to follow, Jim does one better – he provides a structure one should follow and can use to author their own plan.  This chapter alone is worth the price of the book.

Chapter 6 – Emergency Business Communications Planning

Think emergency communication only pertains to you and your family?  What about your place of business?  Corporate emergency communication plans are just as important today as are personal plans.  Jim uses this chapter to discuss how and why a plan should be implemented.

Chapter 7 – Codes And Ciphers

It’s easy to foresee a situation where you would want to safeguard your communications from prying eyes (or ears, as it were).  This chapter of Prepper’s Communication Handbook explains the differences between codes and ciphers.  It also talks about way to safeguard your communications and situations in which you might want to do just that.

Chapter 8 – Essentials For Effective Communication

The next three chapters of Prepper’s Communication Handbook could just as easily be found in a management training handbook as in a prepper communication handbook.  Jim doesn’t talk about gear and codes and strategy here.  Instead, in this chapter, he talks about how to increase the effectiveness of your communication by doing things like active listening, not interrupting, giving feedback and tailoring your language for your audience.  Sometimes how you communicate is just as important as what you communicate.

Chapter 9 – Body Language

Body language can tell you a lot about a person.  Are they telling the truth? Lying? Are they defensive?  This chapter is useful in understanding certain “tells” in body language and may also be used to help you learn how not to have these tells if you’re put in certain situations.

Chapter 10 – Conflict Resolution

Strategies for conflict resolution such as concession, consensus, mediation, arbitration, compromise, collaboration, and competition are discussed.  Jim also suggests some tips for conflict resolution in a leadership role.

Final Thoughts Section

Jim summarizes the books and gives a few parting shots of wisdom.

Resources Section

As with most books on this topic, Prepper’s Communication Handbook is gear and information heavy.  Jim outlines a bunch of recommended resources – both knowledge-based and hardware – in this section.

Why I Liked Prepper’s Communication Handbook

As you might have noticed by now, Jim has a basic style when he writes a book.  There’s solid information provided in a no-BS kind of way.  In addition, the topic of communication is very broad and can be quite confusing.  Jim does a good job of providing introductions that allow the reader to continue a self-study off of.

What I Didn’t Like

What I didn’t like about this book was the same thing I liked – it’s high level.  If you’re looking for communication plan templates and the like, this isn’t the book for you.  This book is more of a “teach a man to fish” kind of book.

Overall Thoughts on Prepper’s Communication Handbook

I think Prepper’s Communication Handbook by Jim Cobb is a solid addition to your long-term survival library.  The book is not just a gear guide but talks about communication methods and theory – both of which are important in stressful situations that preppers may face.


Disclaimer: Jim Cobb supplied a copy of Prepper’s Communication Handbook for me to review. I can assure my readers that I gave it a fair and honest review.

Prepper's Communication Handbook


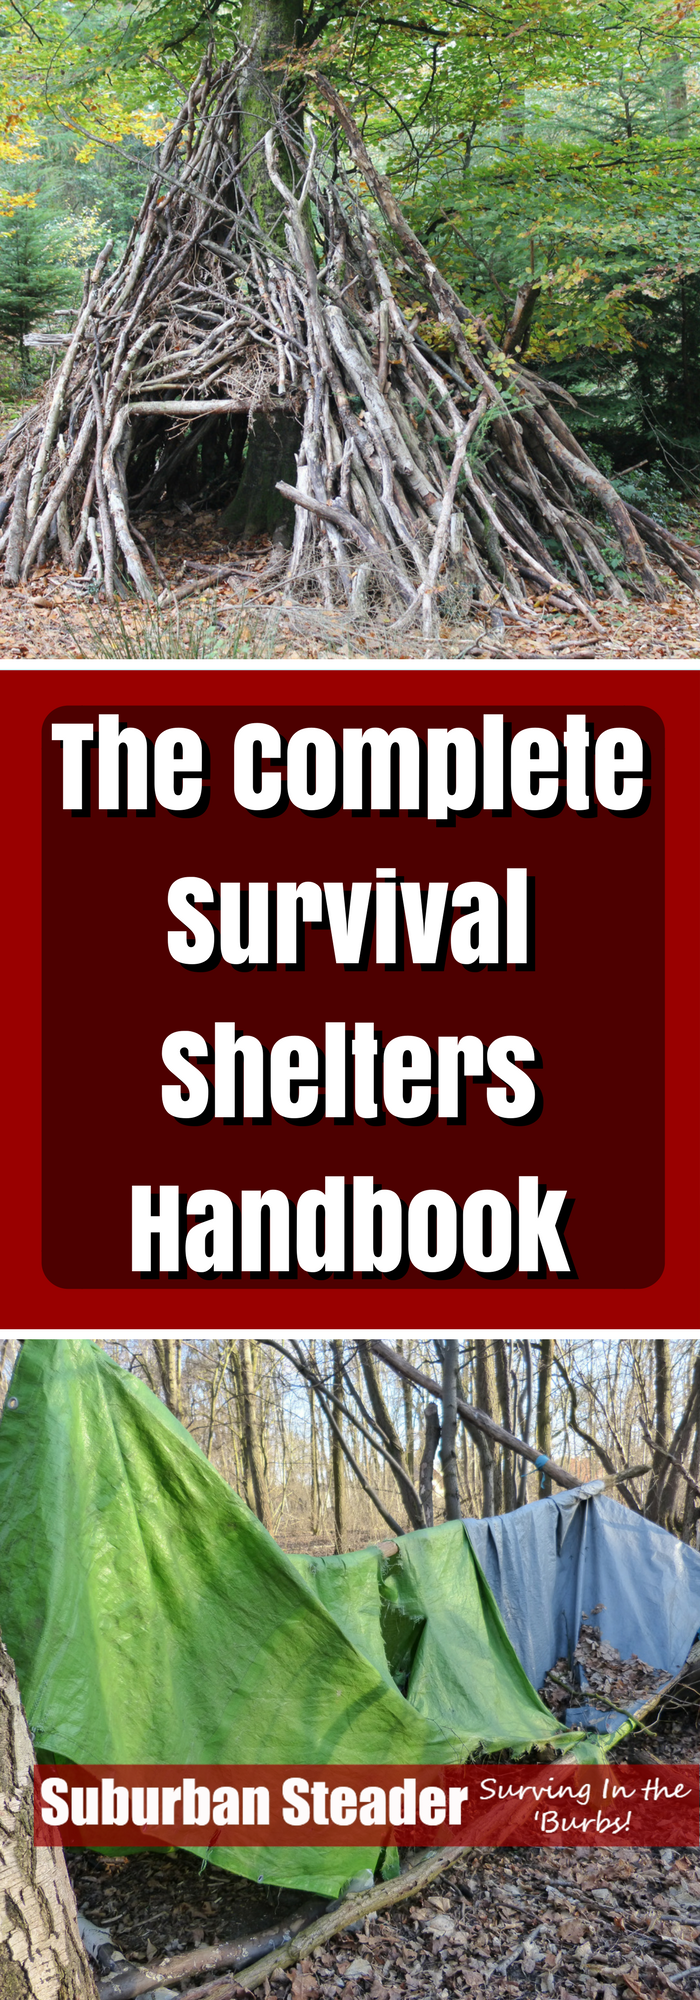
The Complete Survival Shelters Handbook (Book Review)

Bushcraft survival is something that a lot of folks in the prepping community have an interest in.  Most of us spend some time outdoors away from our homesteads.  Knowing how to survive if SHTF in those situations is quite important.  In his book The Complete Survival Shelters Handbook, Anthonio Akkermans walks you through the different ways to construct shelters and how each can be used appropriately given your situation.

Book Set-Up

The Complete Survival Shelters Handbook is written in a chronological manner.  That means that it starts with talking about the fundamentals of shelters and then progresses through shelters from natural materials, shelters from modern material and then store-bought shelters.  Finally, the book sums up the shelter process with a chapter on mental preparedness.  The chapters are:

Chapter 1 – Shelter Fundamentals

Shelter fundamentals is an important base of knowledge to know before you go headlong into building shelters.  This chapter is full of information on shelter knowledge – starting with clothing (your first line shelter), move onto to sleeping equipment and finishing up with information on where to build a shelter and what materials to use.  There are two “bonus” sections on how to make cord and a hammer from elements found in the backwoods.

Chapter 2 – Making Debris Shelters With Your Bare Hands

This chapter gets into the fundamentals of what it takes to use natural (backwoods) material to build shelters.  As you might imagine, different areas of the country and different seasons dictate the use of different shelters.  For that reason, the author has provided how-to knowledge on the following types of shelters:

  • Natural Shelter
  • Rock Shelter
  • Debris Hut
  • Lean-To
  • Stacked Debris Wall
  • Round Debris Wall Shelter
  • Bent Sapling Shelter
  • Subterranean Shelter
  • Snow Shelter

Additional information is provided on improvements and furnishing such as fireplaces, shelving, and bedding.

Chapter 3 – DIY And Modern Material Shelters

Anthonio moves into more modern shelters which involved man-made materials.  The topics covered in this chapter include shelter bags, emergency foil blankets, bansha/tarp shelters, Scandinavian Lavvu and a ger or yurt type shelter.  Essentially, this chapter starts with “cowboy camping” situations and finishes with more permanent structures that are built to last more than a night or two.  I was most interested in this chapter due to the breadth of knowledge represented here.  My interest was probably also due to the fact that living in a permanent structure for a long duration interests me greatly.

Chapter 4 – Modern Store-Bought Shelters

All you campers will like this chapter.  In it, Anthonio talks about your basic camping gear including standard hiking tents, hammocks, bivvy bags and bell tents.  The pros and cons of each option are discussed.  In addition, there is a good amount of time spent talking about the best way to use each and how to set each up properly.  I’m an avid camper and try to spend a good amount of time sleeping outdoors.  I agreed with a lot of what was written here but did disagree with a few minor points.  In all honesty, though, my disagreements were so minuscule that they are not worth discussing.  They were more personal preference than technical disagreements.

Chapter 5 – Mental Preparedness

Anthonio wraps up The Complete Survival Shelters Handbook with a smart talk about mental preparedness when it comes to shelter.  He talks about how you should drill (or practice) any shelters you may use as trying to build them under stressful situations is nearly impossible.  In addition, he talks about ways to handle the stress involved with surviving in a shelter and how to gain confidence as you go.  Adopting the right mental attitude is key to surviving in a shelter.

Why I Liked The Complete Survival Shelters Handbook

Anthonio Akkermans takes a very large topic and boils it down to a simple presentation.  The way he systematically approaches shelter building and living is intelligent and easily digestible.  One chapter builds on the next.

The other great part about this book are the pictures.  The Complete Survival Shelters Handbook is picture heavy which makes understanding the topics presented much easier.  As they say, a picture is worth a thousand words.

What I Didn’t Like

There were two things about this book I didn’t like.  

First, as odd as it may sound given the section above, is the pictures.  While they are plentiful, the pictures are all black and white.  Most are also quite washed out meaning they don’t have good contrast.  This fact makes them hard to read and sometimes lacking in information.  I understand that color pictures cost more during printing, but it would definitely help to better convey the quality information provided in this book.

The second thing I didn’t like about The Complete Survival Shelters Handbook was the writing.  The knowledge presented in this book was top-notch but it often read like a textbook.  That fact alone made getting through this book difficult at times.  A writing approach that was a bit lighter and more story-telling might help make this an easier read.

Overall Thoughts On The Complete Survival Shelters Handbook

I think The Complete Survival Shelters Handbook by Anthonio Akkermans is an overall interesting read.  The knowledge base is top notch and the information presented may help save your life one day.  It’s presentation, while dry at times, is successive in its presentation meaning one part builds on the previous.  While I do not necessarily think this book is a “must have” for a prepping library, I would definitely put it in the “nice to have” category.  It lends itself more to the bushcraft crowd and, for them, I would lean more towards the “must have” category.  

Overall, I enjoyed reading this book and think you would too if you have any interest in being in the woods for any reason.


The Complete Survival Shelters Handbook


Prepper’s Natural Medicine (Book Review)

Natural medicine is something you will invariably hear about as you get involved in the prepping community.  We, as a general society, have become very dependent on conventional medicine – doctors, hospitals, pharmacists, etc.  If a SHTF scenario ever happens, we’ll need to be able to take care of ourselves both from a conventional medicine standpoint and a traditional medicine, or natural medicine standpoint.  Cat Ellis’ latest offering, Prepper’s Natural Medicine, walks you through the unnecessarily intimidating world of natural medicine.

Book Set-Up

Cat has created Prepper’s Natural Medicine in a very concise, direct manner.  Each chapter listed below is presented in an intelligent chronological manner which builds on the information already presented.  The chapters in the book are:

Chapter 1 – Introduction

Cat uses this chapter to introduce herself and her background.  She also spends a significant amount of time talking about why we should use natural medicine, the benefits of using natural medicine in a SHTF scenario and, most importantly, her version of natural medicine.

Chapter 2 – Stocking The Home Apothecary

This is where Cat starts to get into the nuts and bolts of natural medicine.  She takes the time to describe all the different items you will need to start in the natural medicine movement including formula ingredients such as herbs, alcohol, vinegar, glycerin, raw honey, beeswax, propolis, mushrooms, oils and fats, bentonite clay, kaolin clay, activated charcoal, salts and essential oils.  Don’t worry – you don’t need to have all of these things to get started! Cat just does a great job of outlining everything you may need!  In addition to these ingredients, she also discusses containers and other equipment you may need to start working with natural medicine.

Chapter 3 – Basic Skills

Very simply put, this is the ‘how to’ section of the book.  Cat goes through all the different ways you can create natural medicine and walks through the general directions for the creation of each.  The methods discussed include:

  • Tisanes – Infusions and Decoctions, as well as Blending Herbs for Tisanes
  • Tinctures
  • Aceta
  • Herbal Wines
  • Glycerin and Glycerites
  • Oxymels
  • Syrups
  • Elixirs
  • Infused Honey
  • Electuaries
  • Powders
  • Pastilles
  • Poultice
  • Infused Oils (both cold and warm infusions)
  • Salves
  • Lotions and Creams

She also discusses topics such as fresh vs dried herbs as well as the effect of alcohol percentage in tinctures.

Chapter 4 – Materia Medica

“Materia Medica” is a Latin medical term for the body of collected knowledge about the therapeutic properties of any substance used for healing.  This section is the meat and potatoes part of the book.  There over sixty-five pages of information on fifty individual herbs and plants which are used in natural medicine.  Common material such as cayenne, comfrey, garlic, ginger, lemon balm, sage, thyme and valerian are discussed as well as lesser known items such as Chinese skullcap, hyssop, ma huang and sida.

Cat discusses the Parts Used, Actions, Preparations, Dose, Uses and Contraindications for each item.  The information discussed here is incredibly in-depth and useful.

Chapter 5 – Herbal First Aid Kit

As you might expect from the title, this chapter walks you through building a first aid kit which consists of natural solutions.  Cat talks about how each person’s first aid kit will differ, but she does spend some time walking through different items she recommends everyone have including ingredients required and the directions on how to construct them.  She includes natural medicine solutions for some common situations including infection, inflammation, burn care, constipation, earaches, nausea/vomiting, sore throats, sprains, stress and wound wash (among others).

Chapter 6 – Everyday Natural Medicine

In addition, to the remedies mentioned in Chapter 5, Cat spends a significant amount of time in this chapter talking about preventative, as opposed to reactionary, natural medicine solutions.  You would use the solutions in this chapter if you have a chronic situation or know that you require a longer term solution.

Appendices & Indexes

There a multiple different tables and lists that summarize different natural medicine solutions as well as herbs that are used in different situations.  In addition, there are lots of links to external information sources.  Definitely a treasure trove of information.

Why I Liked Prepper’s Natural Medicine

Plain and simple, Cat Ellis takes a very daunting, ambiguous topic and brings it down to a simple presentation that just makes sense.  I’ve not only been able to understand her writing but have started to implement some of her suggestions and can attest to the fact that her directions are complete.

In my opinion, that’s the best part of this book – the level of knowledge that is presented in a clear, concise manner.

What I Didn’t Like

I don’t want to be that guy, but there was not much to not like about this book.  It reads as an information book and is definitely more of an educational tool than a theoretical or opinion-lead work.

Overall Thoughts On Prepper’s Natural Medicine

I think Prepper’s Natural Medicine by Cat Ellis is a solid addition to your long-term survival library.  The natural medicine information provided is straight-forward and no-nonsense.  In addition, the presentation is put together in a chronologically intelligent way.  You can build on the information as it is presented to you.  The book, in its non-digital form, will be a great possession to have in your survival kit.

Prepper's Natural Medicine