1

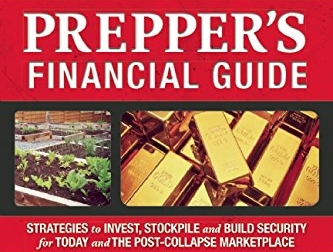
Prepper’s Financial Guide (Book Review)

Financial freedom is something I often preach about here on Suburban Steader. All suburban homesteaders can benefit from being free of financial burden.  How do you get there?  There are lots of ways to go about it.  You can get quite overwhelmed with all the different ways to get to financial independence.  Jim Cobb’s latest offering, Prepper’s Financial Guide, walks you through different topics which will lead towards financial independence.

Book Set-Up

Jim has laid out Prepper’s Financial Guide in a very concise manner as is typical with his books. Each chapter is precise and addresses both the why and how of each topic. The chapters are as follows:

Chapter 1 – What Is An Economic Collapse?

Jim spends some time talking about the definition of an economic collapse as well as describing what can cause one.  He goes into depth talking about some economic collapses in history including Germany (1921-1924), the US (1929-1940) and Argentina (1998-2002).

Chapter 2 – Debt Reduction

The first step in finding financial freedom is debt reduction. You’re halfway home if you don’t owe anyone anything.  Jim discusses topics such as authoring a budget, reducing your realistic debts (debt snowball, anyone?), managing credit cards and cutting your expenses in both soft and hard approaches.

Chapter 3 – Currency

Do you know the difference between commodity and fiat currencies? Want to understand more about exchange rates? This chapter of Prepper’s Financial Guide will set you straight.

Chapter 4 – Precious Metals And Minerals

Most preppers know that gold and silver are the mainstays in ‘prepping currency.’  Jim dives into these precious metals and others.  He also talks about minerals (diamonds, rubies, etc.) in this chapter.

Chapter 5 – Post-Collapse Barter And Trade Goods

Stocking up on vices, consumables and medical supplies is recommended in this chapter because barter items will be the ‘normal’ currency in a SHTF scenario.

Chapter 6 – Bartering Skills Instead Of Stuff

Don’t have any material possessions to trade? No worries. Jim talks about trading time and sweat of your brow in this chapter.

Chapter 7 – Safeguarding Valuables

Safes, hiding spots, and caches – as you might expect – are the main topics in this chapter.

Chapter 8 – Investing In Self-Sufficiency

This chapter of Prepper’s Financial Guide is one of the longer ones.  Jim spends a lot of time explaining how the best way to survive a financial downturn is to reduce your dependence on purchasing power.  Grow a garden, raise your own livestock, learn about medicinal plants and herbs, grow your handyman skill set – these are all skills you can be doing now to reduce your financial dependence later.

Chapter 9 – Putting It All Together: The Home Of The Self-Sufficient Investor

Setting up your property to be self-sufficient and maximize your investments is a key part of being a financially free prepper.  Jim’s exploration of this topic is broad and general due to the fact that each situation will be unique.

Chapter 10 – Final Thoughts

Jim summarizes the books and gives a few parting shots of wisdom.

Prepper's Financial Guide by Jim Cobb

Why I Liked Prepper’s Financial Guide

You’ll notice that Jim doesn’t have any Earth-shattering information in his book when you compare it to most financial books. Everything he presents is rock solid advice that most anyone will provide AND he paints it in a prepper’s hue. In my opinion, there are a few things in this book that make it a quality addition to your long-term survival library:

  • Bluntness – Jim has a history of not sugar-coating anything. An economic collapse situation is going to be tough. Getting your mind wrapped around that idea and accepting it is going to be half the battle.
  • Checklists – Much like in Prepper’s Long-Term Survival Guide, Jim disperses valuable checklists in the chapters and provides a large, long barter item checklist at the end.
  • Creativeness – Jim’s approaches are not always in line with mainstream thinking.  He’s not afraid to think outside of the box and present unorthodox ideas.

What I Didn’t Like

In my opinion, an economic collapse will bring out the worst in people.  Folks will be capable of doing most anything when they are hungry, thirsty and cold.  I would have expected a bit more in the chapter about safeguarding your valuables.  I think Jim’s view is a little too utopian – although this book wasn’t intended as a prediction of social environments.  I have to say that I was a bit surprised that the “Oldest Profession In The World” didn’t come up in Chapter 6.  I wouldn’t expect Jim to promote it, but I would expect that – if you’re talking about bartering “skills” – the topic would come up.

Overall Thoughts on Prepper’s Financial Guide

I think Prepper’s Financial Guide by Jim Cobb is a solid addition to your long-term survival library.  Most of the financial information and advice provided is no different than the majority of financial books and websites out there, however, the book is written with the prepper in mind.  That last fact makes it a good read.

Prepper's Financial Guide by Jim Cobb

Disclaimer: Jim Cobb supplied a copy of Prepper’s Financial Guide for me to review. I can assure my readers that I gave it a fair and honest review.


The Survival Savvy Family (Book Review)

Julie Sczerbinki’s latest offering – The Survival Savvy Family: How To Be Your Best During The Absolute Worst – is different than most survival and preparedness books.

Most are written from a gloom-and-doom, the-world-is-about-to-end point of view. Those books and the skills described in them have their place. I, however, enjoy survival based books which present clear, concise information without fear mongering.

The Survival Savvy Family nails this approach with its instructive, easy to read style.

Set-Up of The Survival Savvy Family

Julie – who describes herself as a Coach purse carrying, Go-Bag packing wife and mom – has obviously gone through great pains to lay out the book in a way that allows you to walk through the stages of getting your family prepared for all possible scenarios.

Each chapter has actionable items and clearly explains the reasoning behind her suggestions. The chapters are as follows:

Introduction

This section is a quick few pages that outline Julie’s thoughts on preparedness. She begins with asking a few questions:

If my family had to evacuate, where would we go?

How would we have managed if our tap water was contaminated?

What would I have fed the kids if we were stuck on the Atlanta interstate for ten hours like thousands were during a winter storm?

What exactly goes in an emergency kit?

A few personal anecdotes roll into a strong reasoning to become prepared as a family. The stories here are the genesis for the chapters to follow.

Chapter 1 – Family Emergency Plan

What you should prepare for and how to create your plan are the main topics in this chapter. Julie hits on some topics that most people don’t think of such as:

  • Divorced Family Plans
  • Plans For Family Members With Special Needs
  • Pet Plans

The end of the chapter has a template you can use to start formulating your own Family Emergency Plan.

Chapter 2 – The Emergency Kit

Emergency Kits, Go-Bag, Bug-Out-Bags, GOD Bags – there are all kinds of names for the same thing.

This chapter in The Survival Savvy Family talks about how to build one for each member of your family.

Have you thought about what your child’s bag should include and shouldn’t include? What about extra gear that you may be able to grab if you have time? Are you pets accounted for? Julie addresses all of these concerns.

The chapter concludes with a nifty checklist that you can use to begin building your own Emergency Kit.

Chapter 3 – Be Ready In Your Pantry

You are fairly well-versed on building a pantry if you’ve spent any time in prepping or suburban homesteading circles.

Julie’s approach is nothing new but she does a good job of calming the new-comer’s fears as well as describing a systematic approach to building a quality pantry.

There’s even a checklist of non-food essentials that you should make sure are in your pantry.

Chapter 4 – Medical Readiness

One of my biggest fears as a parent is having a medical emergency involving one of my children and not being to act on it. This chapter in The Survival Savvy Family has helped alleviate some of those fears by showing me ways to prevent it.

The chapter starts with ways to increase your level of health. She’s taking the ‘an ounce of prevention is worth a pound of cure’ approach. She then goes into ways to build your medical skill set – including how to teach your kids to handle medical emergencies.

In addition to the skill sets, Julie provides a great checklist for building your Home First Aid Kit and a great template for adding medical history to your Family Emergency Plan.

Chapter 5 – Financial Readiness

You know that financial preparedness is near and dear to my heart if you’ve spent any time on this blog. Taking care of your finances is the first big step in taking care of your family.

Like me, Julie is a big fan of setting up an emergency fund and then paying off debt. She even recommends the debt snowball approach made famous by Dave Ramsey.

Other topics such as insurance, wills and creating a Grab-And-Go Binder are discussed in this chapter.

Chapter 6 – Away From Home

Being safe at home is all well and good, but what happens when you’re on the road? The Survival Savvy Family goes into great depths in the chapter with sections on:

  • Everyday Carry
  • Get Home Bags
  • Car Preparedness
  • Work Preparedness
  • School Preparedness
  • Safety On Vacation

As usual, there are great checklists at the end of this chapter for building a Get Home Bag and setting up ‘survival’ kits for different locations.

Chapter 7 – Power Outages

What is the one situation that each of us is almost guaranteed to encounter in our lifetime – regardless of geographic location, age, economic status or social standing? If you said a loss of power, you’d be correct.

In this chapter of The Survival Savvy Family, Julie does a good job of how to get prepared for a loss of power. All areas are covered including lighting, cooking, temperature management and choosing a backup power source.

As always, there’s a great checklist for making a Power Outage Kit at the end of the chapter.

Chapter 8 – Be Ready To Stay Or Go

I’m embarrassed to admit that I got a song from the Clash (Should I Stay Or Should I Go?) stuck in my head when I started reading this chapter! That being said, Julie does a great job of explaining when you should bug-out or bug-in.

Including in this chapter are the following lists and templates:

  • Making A Busy Box For The Kids
  • Emergency Tool Kit List
  • Last Minute Checklist For Bugging Out

Chapter 9 – Natural Disaster Savvy

Surviving and handling tornadoes, hurricanes, earthquakes, wildfires, floods, severe thunderstorm, and snowstorms are all covered in this chapter of The Survival Savvy Family.

Chapter 10 – House Fires

House fires are more common than you might realize and most people aren’t ready for them.

Julie goes into some excruciating detail about how to prevent house fires. She also describes how to fight them if they pop up and how to escape from them if they get out of control.

The last part of the chapter is all about creating a house fire evacuation plan.

Chapter 11 – Home Invasions

Is your home security beefed up? Are you sure?

Julie spends a good amount of time talking about door locks, windows, garage doors and sliding glass doors in this chapter. The pros and cons of each are discussed and ideas on burglar-proofing them are also presented.

The topic of vacation comes up as well in this chapter of The Survival Savvy Family. Julie spends some time talking about prepping your home for when you’re on vacation.

The topic of weapons in the home is also broached.

Chapter 12 – Personal Safety

Personal safety is always a tough topic to discuss because most people want to believe that they are aware of their surroundings.

When it comes down to it, most aren’t.

Situational awareness is a topic that is talked about a lot in this chapter as well as ways to defend yourself – both with a weapon and without.

Chapter 13 – Ready Kids Are Safe Kids

The final chapter of The Survival Savvy Family is all about your most precious asset – your children.

Abduction prevention, online safety, firearm safety and bullying are all topics Julie is not afraid to broach.

While it’s not a dyed-in-the-wool survival topic, this chapter may be the most important chapter for many of us.

Why I Liked The Survival Savvy Family

First things first – there’s nothing Earth-shattering in this book. Julie doesn’t provide the magic pill for being prepared.

What she does in this book is provide rock-solid suggestions in a progressive, mature manner. There are a few things about this book that make it a quality addition to your long-term survival library:

    • Book Size: Believe it or not, the physical size of the book is appealing. It is 7.5″ tall and 5.5″ wide which makes it a great pocket reference. Literally, it fit in the cargo pocket of my pants and shorts.
    • Progression: While she never stated it, I feel like Julie presented the chapters in a natural progression which allows the reader to us this book as a guide to preparedness. Complete all the chapters in order and your family will be in great shape!
    • Checklists & Templates: This book is awesome for creating documents and kits based on the information Julie provides. The checklists and templates allow you to get started and then modify as necessary. They are going to be key to re-starting my family’s preparedness planning.

What I Didn’t Like

I mentioned that The Survival Savvy Family is not Earth-shattering but it is chock-full of knowledge. I think there are certain areas that need a little more breadth to them. For instance, the Home Invasion and Personal Safety chapters are both kind of weak on what to do if something happens. They spend much more time discussing how to prevent those actions. The book is already over 200 pages (remember, it is a physically smaller book than normal), so perhaps Julie was limited in her ability to add more depth while still covering the topics she wanted to cover.

Overall Thoughts on The Survival Savvy Family

Overall, I think The Survival Savvy Family: How To Be Your Best During The Absolute Worst by Julie Sczerbinski is a must have for your long-term survival library. The straightforward approach and progressive chapters build quite the family plan for preparedness. Following her suggestions and plans will result in a family that is ready to weather any storm. I can’t recommend the checklists and templates enough. They will get you over the hump and moving towards preparedness much faster than the information alone.

This book is a great reference manual for home and family preparedness!

Survival Savvy Family

Disclaimer: Julie Sczerbinski supplied a copy of The Survival Savvy Family: How To Be Your Best During The Absolute Worst for me to review. I can assure my readers that I gave it a fair and honest review.


Valley Food Storage Product Review

I hate long-term storage foods. If you know me, you know I like to cook and eat food that is made from scratch. Long-term storage food never tastes that way. So, to say I was skeptical when Valley Food Storage approached me and asked if I would try their White Bean & Lime Chili product would be an understatement. I had every expectation that I would greatly dislike their product and expected to write a negative review even though the reviews I read online were all positive.

Fortunately – for me and for Valley Food Storage – I was way wrong. Their product was great!

Valley Food Storage – Initial Impressions

Given my background, most ‘stored’ food I’ve eaten in the past has been backpacker-ish meaning you don’t need much heat or water to get going. That is not the case with Valley Food Storage White Bean & Lime Chili. The directions call for 2-1/4 cups of water and specify boiling it on a stove top for 15-18 minutes. You’re not doing that with a backpacking stove. This package was definitely a prepper food!

The second impression I had was the smell when you opened it. Normally, when you open other backpacking and prepper food, you don’t smell anything as tasty. After looking at the ingredient list, I realized there was a reason why this product smelled so good. Valley Food Storage uses ingredients that you can pronounce and know what they are! There weren’t a lot of processed additives or ingredients. Image that – natural food, squared away for 25 years of storage. Awesome!

Cooking Process

Cooking the Valley Food Storage White Bean & Lime Chili couldn’t have been easier. I brought the 2-1/4 cups of water to a boil on my stove, added the ingredients of the package, whisked it up and let it site in a gentle boil for about 17 or 18 minutes. At that point, I removed the chili from the heat and let it sit for about 5 minutes. I followed the process exactly as outlined on the bag and it couldn’t have been easier.

This slideshow requires JavaScript.

Taste and Wrap Up

Wow! Most long-term storage food I’ve tasted has been fairly bland. This chili was not. I really enjoyed this meal. It was fresh and tasty. The beans were a bit strong (for lack of a better word) and you could tell they were rehydrated. That being said, a little meat would have offset them perfectly and made this dish awesome.

What I did not taste was a strong salt content. That’s great. My experience has always been that meals like this are heavy in salt. This one from Valley Food Storage wasn’t. That was a pleasant surprise.

So, would I recommend the Valley Food Storage White Bean & Lime Chili? Absolutely! Moreover, I would recommend Valley Food Storage overall because of their ingredients and the wholesome taste of their products.

Valley Food Storage


Kershaw OSO Sweet Knife (Product Review)

You know that I think every suburban homesteader should build their EDC in tiers and one of the items in the second tier is a good pocketknife.  I’ve been on the search for a low-cost EDC blade that held up to my demands and may have found it with the Kershaw OSO Sweet pocketknife.  I’ve been carrying this little guy around in my pocket for the last few months and decided it’s time for a review.

Kershaw OSO Sweet General Description

The Kershaw OSO Sweet isn’t going to win any awards for creativity or innovation.  It is, in the simplest sense, a locking pocketknife.  With that in mind, here’s the specs on the knife:

  • Closed length: 4.1 in. (10.5 cm)
  • Overall length: 7.25 in. (18.4 cm)
  • Blade length: 3.1 in. (7.9 cm)
  • Weight: 3.2 oz. (90.7 g)
  • Blade Material: 8Cr13MoV, satin finish steel
  • Handle Material: Glass-filled nylon
  • SpeedSafe® assisted opening
  • Liner lock (steel)
  • Reversible (tip-up/tip-down) pocketclip

The Pros

The Kershaw OSO Sweet met my first requirement for a pocketknife – cost.  I was able to buy one of these knives from Amazon for less than $20 (editor’s note: at time of publishing, it is selling for $21.77 on Amazon).  As you might imagine, the weight of this knife is also a big plus.  Coming in at a whopping 3.2oz (Editor’s Note: it came in at 2.98oz on my scale), this inexpensive pocketknife is light and you never really know it’s there.  In fact, I’ve reached down more than once just to make sure it’s still in my pocket.  The pocketclip is pretty sturdy, however, and I’ve never had a problem with it coming loose.

Kershaw OSO Sweet (Product Review)So the knife meets weight and cost requirements – but how does it handle?  The simple answer there is very well.  Let’s first talk about opening the knife.   The SpeedSafe® assisted opening functionality on this knife is simply awesome.  I can pull the Kershaw OSO Sweet from my pocket and have it ready for use with just a flick of my index finger.  The curvature of the body fits well in my hand – there is a hollowed-out portion of the body that my index finger sits in and the SpeedSafe® assisted opening tang acts as a kind of guard to prevent your hand from slipping forward during use.  The glass-filled nylon body has a fish scale pattern on it that provides sufficient grip.  It’s not as grippy as the pattern on the Spyderco Endura 4 FFG, but I find it more than sufficient for daily work.

The blade was quite sharp out of the box and Kershaw provides a lifetime sharpening policy for their knives if you are so inclined to use it (I prefer to sharpen my own knives).  Being that I’ve used this knife for EDC purposes, I’ve performed mostly normal, everyday tasks with it – opening letters, cutting cardboard, whittling wood and other similar tasks.  The blade has held up and hasn’t needed sharpening after about two months of daily use.  The 8Cr13MoV steel is apparently a Chinese version of AUS8.  I don’t have much experience with it, but the guys over at BladeForum.com give it a passing grade. I don’t have any experience sharpening it as it hasn’t needed it yet.

The knife itself is fairly innocent looking meaning that it “plays well” in an office setting like I am in.  In fact, the only time you will get a few odd looks is if you are quick on opening it – but it’s so fun to open!

[youtube_sc url=”9VMwI0_0iiI” title=”Kershaw%20OSO%20Sweet%20Pocket%20Knife%20Product%20Review” width=”559″ fs=”1″]

The Cons

I have to be perfectly honest here – for the price, it’s very hard to find major flaws with the Kershaw OSO Sweet.  It’s almost disposable at this price and makes dealing with imperfections or faults trivial.

That being said, my biggest complaint about this inexpensive pocketknife has to do with the part I probably love the most about it – the opening functionality.  The SpeedSafe® assisted opening function is awesome but also has the potential to lead to serious injury.  The blade comes flying out and, while you get used to it rather quickly, I have snagged my shirt and the heel of my hand on the tip of the blade.  It’s only a minor problem as you figure it out pretty quick, but it can be a safety issue.

The lack of gimping on the blade is a bit disappointing.  There is a hollow created for your thumb and the recess in the middle from where the blade spins gives your thumb decent traction, but I would have liked to see some solid gimping in place.

Kershaw OSO Sweet (Product Review)My other complaint – and this one is even more minor – has to do with the clip.  First, the clip is solid.  I’ve never had a problem with it not holding the knife in place.  That being said, I found two small flaws in it.  First, it can only sit on one side of the knife.  This design constraint is a non-issue for right-handed folks, but lefties may run into issues with how they want the knife to release from their pocket.  Second, I would prefer the clip to sit higher on the knife, giving less visibility to it in your pocket.  It’s a minor, minor detail but worth noting.

The last issue is that Kershaw makes the Kershaw OSO Sweet in China.  I prefer to buy American  made products when possible.  But, given its cost and surprisingly quality for that cost, I have no problem owning a foreign-made product, especially when it’s produced by an American-owned company.

Overall Impression

Kershaw OSO Sweet (Product Review)Bottom line, the Kershaw OSO Sweet has the best bang for the buck out of any pocketknife I have ever carried.  It’s light, sharp, locks well and doesn’t grant you “Tacticool” status when you use it in an office setting.  Outside the office – I have taken it hiking and also used for yard work – it has performed quite well.  Creating shavings for fire starting, making sparks off a ferro rod (the spine is rather stiff and at a nice right angle), cutting rope and zip ties, and working with plants have all been easily achieved with this inexpensive pocketknife.

I would recommend the Kershaw OSO Sweet for anyone looking for a good quality, low-cost EDC pocketknife.  To further that recommendation, I have to mention that I, in addition to carrying it as my EDC blade, I also have one included in my fire kit which I carry with me in my EDC bag.  This kit gets moved around from EDC bag, hiking/camping backpacks, and is on me just about all other times.  It’s that good!

Do you have any experience with the Kershaw OSO Sweet? Want more information? Drop me a line in the comments and let me know!

Kershaw OSO Sweet (Product Review)

Kershaw OSO Sweet (Product Review)


ALTAI MF Tactical Boots Product Review

Boots are a key component to any suburban homesteaders closet. Whether you’re working in the yard, shoveling the driveway, hiking, hunting, fishing or just hanging around, keeping your feet warm and dry is essential to being comfortable. In today’s post, we see if the ALTAI FM Tactical Boots meet the demands of today’s suburban homesteader.

Product Description

The ALTAI FM Tactical Boots are light, durable boots designed for folks who spend a majority of the day on their feet. They are breathable and waterproof at the same time thanks to the leather toe and SuperFabric® uppers. ALTAI provides the following description of these boots:

  • Light at only 650 grams – 23 ounces (size 9)
  • Waterproof / Breathable Bootie
  • NO Break-in Period
  • Highly functional Upper with SuperFabric® Material
    • Abrasion Resistant
    • Quick Drying
    • Stain Resistant
    • Air Permeable
  • Vibram® Outsole – Hiking Tread
  • Slip Resistant
  • Crimped Laces
  • Speed Lacing – Metal Eyelets
  • Padded Nylon Tongue
  • Waterproof Leather Toe

The Pros

Right out of the box, I noticed the weight of these boots – or, more accurately, the lack thereof. I’ve grown up in the trades and have always had a few pair of boots in my closet. The ALTAI MF Tactical Boots are, by far, the lightest ones I have ever owned.

The second thing I liked about the ALTAI MF Tactical Boots was the fact that they truly have no break-in period. I took these boots on a five-mile hike the first time I wore them. While I knew I was possibly setting myself up for major blisters, I wanted to see if their claims of no break-in time were real. Not only did I not have blisters at the end of the day, I didn’t have that typical “swamp feet” feeling you can have at the end of a hike. The breathability of these boots is also the real deal.

Finally, I really like the Vibram® outsoles. I have yet to slip on something while wearing the ALTAI MF Tactical Boots and I credit this to the Vibram® outsoles. Not only are they grippy, but they are light, cushioning and have the ability to be very quiet in the woods.

The Cons

My biggest complaint about the ALTAI MF Tactical Boots was that, in order to wear these boots comfortably, you have to wear socks that come up past the top of the boots. This complaint may sound a little strange, however, I am used to wearing socks that stop just higher than my ankle. I have worn these socks with many different boots without experiencing discomfort. I could not wear the ALTAI MF Tactical Boots with similar socks. Once I bought socks that went this high, this complaint went away.

My other complaint about the ALTAI MF Tactical Boots is the look. Yes, I know, they are tactical boots. However, if they were available in a color besides black, I believe these boots would look less out-of-place and ‘blend in’ more for those of us who are not in fields where tactical looks are an everyday occurrence. I was asked multiple times on one hike if I was a member of the military based solely on the boots I was wearing. Would I not wear the ALTAI MF Tactical Boots simply because of this fact? No. However, ALTAI may consider color options to open up their sales to non-tactical operators. For instance, a desert tan version which looks similar to a traditional work boot would not look out-of-place in most suburban settings and may open up sales in new markets.

Overall Impression

The bottom line on the ALTAI MF Tactical Boots is that they are light, durable, supportive boots that can be worn for long durations without discomfort. They stand up well to the abuse around a normal suburban homestead as well as more traditional outdoor activates such as hiking.

I recommend the ALTAI MF Tactical Boots without reservation to law enforcement, first responders, military personnel and the average joe. These boots will keep your feet dry and your ankles supported while also providing a cushioned walking experience.

Where To Buy ALTAI MF Tactical Boots

ALTAI MF Tactical Boots

Full Disclaimer: ALTAI provided me with a pair of ALTAI MF Tactical Boots free of charge. I was not paid for my review nor was I obligated to post only a good review of these boots. The Amazon links above are affiliate links and the ALTAI link is not an affiliate link.

ALTAI MF Tactical Boots


Prepper’s Long-Term Survival Guide (Book Review)

A suburban homestead is the kind of place that goes hand-in-hand with prepping. Why else do you want your land to produce and become self-sufficient if not to be prepared to take care of yourself? But are you thinking about what would happen if we got into a long-term survival situation?

Enter Jim Cobb’s latest book Prepper’s Long-Term Survival Guide.

Book Set-Up

Jim has laid out the book in a very concise manner. Each chapter is very on-topic and begins with an interesting narrative that is a fictional journal entry related to that chapter’s central them. The chapters are as follows:

Chapter 1 – Long Term Events

Jim takes time to describe the different scenarios that may trigger a long-term survival situation. They include:

  • Pandemics
  • Famine
  • Economic Collapse
  • Freak Occurrences
  • New Madrid Earthquake
  • Yellowstone Caldera
  • EMP

He spends a little bit of time describing each and talking about the possibility of it occurring.

Chapter 2 – Water

Storage, purification and filtering of water are essential to long-term survival. Jim addresses all three topics in detail within this chapter.

Chapter 3 – Food

Jim talk about finding, generating and preserving food in this chapter.

Chapter 4 – Medicine

Everything from setting up a “Crash Bag” to dealing with medications and what happens when they run out in a long-term survival situation are talked about in this chapter.

Chapter 5 – Hygiene

Staying clean can keep you healthy. Jim talks about bathing, laundry, waste disposal and all the other “unsexy” parts of prepping in this chapter.

Chapter 6 – Stay Warm and Keeping Cool

Clothing is addressed here as well as keeping your shelter warm or cool, depending on the season.

Chapter 7 – Security

Gotta protect yourself and your gear, right? Jim talks about how to do that here.

Chapter 8 – Tools

Which do you need? Which are going to be useless for long-term survival? Jim will tell you.

Chapter 9 – Surviving Boredom

Keeping morale up in long-term survival is key to getting by. Jim has a few thoughts on how to keep the mood light and have fun.

Chapter 10 – Barter and Trade

In a long-term survival situation, money may end up being useless. Learning how to barter and trade will be a critical skill for survival.

Chapter 11 – Community Survival Planning

Lone wolves won’t last in a long-term survival situation. Community planning is crucial for extended success in a dire situation.

Chapter 12 – Final Thoughts

Jim summarizes the books and gives a few parting shots of wisdom.

Prepper’s Long-Term Survival Guide (Book Review)

Why I Liked Prepper’s Long-Term Survival Guide

If you’ve been around prepping for a while, you’ll notice that Jim doesn’t have any Earth-shattering information in his book. Everything he presents is rock solid advice that most anyone will provide. In my opinion, there are a few things in this book that make it a quality addition to your long-term survival library:

      • Reference Material – Jim isn’t afraid to point you towards an expert. In fact, he provides a four page reference directory at the back of the book. This list alone is worth getting the book.
      • Checklists – While there are not a ton of checklists, the ones that are there are VERY pertinent to a long-term survival situation. The Medicine and Tool chapters are especially heavy on this information.
      • Bluntness – Jim doesn’t sugar-coat anything. A long-term survival situation is going to be tough. Getting your mind wrapped around that idea and accepting it is going to be half the battle.

What I Didn’t Like

As I mentioned, this book is very straight forward. Jim doesn’t sugar-coat how hard life will be when/if life gets turned upside down. Jim seems to have a general sense that most people will band together and that, while life will be tough, the community will make it work. Perhaps I’m too cynical or perhaps he’s too utopian, but I think some time spent talking about what happens when the ugliness in people shows up would be beneficial to a book on long-term survival.

Overall Thoughts on Prepper’s Long-Term Survival Guide

Overall, I think Prepper’s Long-Term Survival Guide by Jim Cobb is a solid addition to your long-term survival library. Jim’s no-nonsense, straightforward approach to the book gives you the information you need in case the world as you know it goes south. Read it, use the checklists and keep it in an easily accessible area. You’ll want to grab this book from time to time because it’s great reference material.

Prepper’s Long-Term Survival Guide (Book Review)

Disclaimer: Jim Cobb supplied a copy of Prepper’s Long-Term Survival Guide for me to review. I can assure my readers that I gave it a fair and honest review.

Prepper's Long-Term Survival Guide (Book Review)


The Weekend Homesteader Review

Are you interested in suburban homesteading but aren’t quite sure where to start?  Anna Hess’ book The Weekend Homesteader may be just what you’re looking for!

The Weekend Homesteader Overview

The Weekend Homesteader is an interesting book because it is broken out into monthly chapters with each month having many little sub-projects.  Interestingly, the chapters start in April and conclude in (yup, you guessed it) March.  The idea is that, if you follow the book, you’ll have a project lined up for every weekend and they’ll be specific to that point in the year.  For instance, the projects for August (February in Australia) include:

  • Seeding Saving
  • Food Drying
  • Build A Chicken Coop or Tractor
  • Install A Rain Barrel System

Not all these projects can be completed in one weekend – creating and managing a budget in July is an on-going activity – while others can be completed in a few hours – mulching your garden is fairly simple if you have enough material.

The Weekend Homesteader – The Good

Anna obviously put a lot of thought into The Weekend Homesteader.  There is a large attention to detail in this book shown by the continuity of projects – there’s instruction on soil management one month and planting the next – to the simple but aesthetically pleasing way it is laid out.  To me, the pictures are what really make the book.

The Weekend Homesteader - Building A Chicken Coop

The Weekend Homesteader – Building A Chicken Coop

The Weekend Homesteader - Planting Trees

The Weekend Homesteader – Planting Trees

Anna also spent a good amount of time upfront defining the estimated cost, time, difficulty and ‘kid-friendliness’ of each project.  This information is quite useful to those of us with families who might require a bit more up-front planning when beginning projects.

The Weekend Homesteader – The Bad

Well, these aren’t really bad, but the heading goes with the theme (spoiler alert: we won’t have a section title The Ugly).

My first disappointment with The Weekend Homesteader is that the monthly tasks don’t really line up with my area of the country.  Anna and her husband live in southwest Virginia (according to her website).  Let’s just say that southwest Virigina and Long Island have very different weather patterns and some of the timing she suggests doesn’t line up with what’s feasible where I live.  I imagine many others will find the same problem.

Second, Anna and her husband are full time homesteaders.  They bought their 58-acre homestead in 2006 and have been working the land ever since.  The fact that a full time homesteader is giving advice to weekend homesteaders is a bit odd.  I don’t believe the information is necessarily bad, but the general impression of “look, we did it, you can too with only a few hours every weekend” seems a bit misleading to me.

The Weekend Homesteader Wrap-Up

Overall, I recommend The Weekend Homesteader to anyone, especially suburban homesteading newbies, who are looking to set a course of action for their first year.  The general timeline may need to be tweaked for your hardiness zone (you can read more about that topic in our previous article) but the overall message is solid.  There are good projects – some simple, some not simple – that will bring you from scratch up to a good level of self-sufficiency in a short amount of time.

Click Here To Buy The Weekend Homesteader

The Weekend Homesteader


Streamlight Stylus Pro Product Review

Light – it’s the often the difference between getting out of a dangerous situation and running into big problems. Be it fire or pure illumination, light is a key ‘must have’ in most precarious situations. From an EDC perspective, the need for light is almost a mandatory. In order to meet that requirement, I carry the Streamlight Stylus Pro flashlight.

Specifications

Before we get into the pros and cons of this flashlight, let’s lay out the specifics of the product (from Streamlight website):

Streamlight Stylus Pro

  • C4® LED technology (50,000 hour lifetime)
  • Unbreakable and scratch resistant polycarbonate lens
  • C4® LED (white): 1,033 candela peak beam intensity; 48 lumens measured system output; 6.25 hours runtime
  • Powered by two “AAA” alkaline batteries
  • Push button tail switch – momentary or constant on operation
  • O-ring sealed, shock proof and drop-tested construction
  • Water resistant per IPX4; in accordance with specification EN 60529:1992
  • Tear resistant nylon holster
  • Unbreakable pocket clip
  • L x D: 5.3″ x .6″ (134 x 15 mm)
  • 1.64 oz (46.9 g)

The Pros

There’s a lot to like about this little guy.

Size & Weight

The Stylus Pro is a just about the size of a thick pen and doesn’t weight much more. That makes it very easy to carry and allows it to be comfortably tucked into a shirt or pants pocket. The addition of the strong pocket clip makes it stay in place very nicely.

Streamlight Stylus Pro

Tail Switch

The push button tail switch makes momentary use very easy. This trait is great if you’re trying to signal people (Morse Code, etc) or if you are in a situation where constant light may give away your location.

AAA Batteries

One of the greatest things about this handy little flashlight is the fact that it runs on two (2) AAA batteries.  Other flashlights run on harder to find battery sizes like a CR123A.  You can find AAA batteries anywhere which makes this flashlight easy to run.

Lumens

This handy little flashlight pumps out about 48 lumens of light with a full battery load. While that is not, quantitatively, as high as some of the high performance lights on the market, it’s more than enough for most EDC situations. It’s important to remember that this type of light is being created only by two (2) AAA batteries. This performance item is not something that can be described well – it must be seen to be fully appreciated.

Streamlight Stylus Pro

The Cons

There is only one thing I don’t like about this flashlight and that is the ability to put it in constant mode. The tail switch, while great for using in a momentary setting, has a very high actuation force needed to switch it to a constant mode. Likewise, switching to off requires high pressure to turn it off.

Overall Impression

Despite the tough actuation pressure to turn it on or off, I highly recommend the Streamlight Stylus Pro. Its small size and solid construction make it a great EDC flashlight. I keep this flashlight in my EDC bag only because I always have that bag with me. When there are situations where I don’t have my EDC bag, I have no problem carrying this flashlight in a pocket.

I highly recommend the Streamlight Stylus Pro if you’re looking for a good quality, inexpensive flashlight. You can find one for around $20 on Amazon.com.

Are you a Streamlight Stylus Pro user? Do you want more information on this great little tool? Give me a shout in the comments below and I’ll be sure to respond!

Streamlight Stylus Pro Product Review


Leatherman Juice S2 Product Review

If you’re anything like me, you see the need to carry more than just a sharp blade on your person at all times.  There are times when you need to grip something, cute wire or turn a screw.  That’s where a multitool comes into play.  Lately, my multi-tool of choice has been the Leatherman Juice S2.

Leatherman Juice S2 General Description

The Leatherman Juice S2 is a fairly small multitool, measuring in at 3.25in in length when closed.  Also, it only weighs about 4.4oz.  The tool package in this multitool consists of needlenose pliers, regular pliers, wire cutter, hard-wire cutter, knife, scissors, three (3) flat-blade screwdrivers (extra-small, small and medium size), phillips head screwdriver, bottle opener, can opener and a lanyard ring.  According to the Leatherman website, it’s available in Flame Orange and Storm Gray and retails between $40 and $45 online.  The blade is made of 420HC steel which is strong enough for a multitool.  Remember, this blade isn’t your primary EDC blade, right?

The Pros

I’m going to be right up front about it – there’s lots to like about this little guy.  First, let talk about size.  At about 3.25in long (closed) and about 4.4oz, this little guy fits nicely into your pocket.  In fact, it fits perfectly into the watch pocket in your jeans (that little pocket in your right hip pocket that no one knows what to do with).  I’m not exaggerating when I say that the Juice S2 fits into this pocket better than any sheath you could buy.

The second feature I really like about this multitool is the fact that the knife can be used without opening the tool.  Many of the multitools I’ve owned in the past (and most of them were from Leatherman) required you to open the ‘plier handles’ part of the tool in order to access the blade.  Not with this little guy!

All the tools are sturdy and strong.  I’ve used all the screwdrivers as well as the scissors and pliers.  All of them worked well and I haver felt like the tool was going to break or slip.

Leatherman Juice S2

As you can see in the pictures, I picked up the orange version of the Juice S2.  Truth be told, I didn’t realize they made a gray version until after I bought it.  Had I known that, I would have probably picked that color (I don’t like to stand out this much).  That being said, I really like this color for a few reasons.  First, it’s easy to identify your tool when it’s on a table or with a group of other items. Honestly, how many bright orange tools do you have?  And, moreover, how many bright orange tools do other people have?  Secondly, there’s a lot less weird looks when you break out a bright orange tool that has a knife on it.  The fact that it’s not “tacticool” looking helps out a lot in day to day life – especially when you’re an office dweller like I am.

The Cons

Nothing is perfect and the Leatherman Juice S2 is no exception.  There are things about it that I don’t like, but not many.

First on the list is the fact that there is no spring load on the pliers.  Most multitools that I have owned have a spring load on the pliers that force the pliers into an open position when not in use.  This feature is particular useful when you’re working a nut and are turning then opening your pliers repeatedly.  With the Juice S2, you have move your fingers inside the pliers and open it when you’re ready to reposition your tool.  This movement isn’t a huge inconvenience, but it does take some getting used to.  I would prefer a spring in the handle that would separate the pliers if possible.

Second on the hit list is the grip.  I have two problems with it.  First is the finish. The aluminum seems to be anodized and is already showing signs of wear.  Not a big deal – it is a tool after all.  That being said, I’ve only carried this tool for a few months and expect a little more wear and tear durability than that.  The second problem with the anodized handles is the texture.  There are no grooves or texture machined into the handles.  The smooth nature of the finish makes the tool not always feel stable in your hands.  I’ve had a few occurrences where wet or oily hands have made the tool seems like it might slip out of my hands.  This feeling is the exact opposite of the handle on the Spyderco Endura 4 FFG which I recently reviewed.

Overall Impression

While it does have a few downsides, I highly recommend the Leatherman Juice S2.  Its small size and quality construction in conjunction with its accessible design far outweigh the minor drawbacks that it has.  I have used this multi-tool for a variety of different uses both around the office, at the office and in the garage with great success.

I highly recommend the Leatherman Juice S2 if you’re looking for a good quality, inexpensive pocketknife.  You can find one for between $40 and $45 on Amazon.com.

Are you a Leatherman Juice S2 user?  Do you want more information on this great little tool?  Give me a shout in the comments below and I’ll be sure to respond!

Leatherman Juice S2 Product Review


Spyderco Endura 4 FFG Product Review

I was lucky enough to win a Spyderco Endura 4 FFG pocketknife through a contest on TheBackyardPioneer.com. This knife has been in my EDC rotation since I received it in late April 2013 and it’s time for a review.

Spyderco Endura 4 FFG General Description

The Spyderco Endura 4 FFG – which stands for FRN Flat Ground – is a relatively inexpensive pocketknife.  It retails for between $55 and $65 with the cost driver being color.  In it’s collapsed state, the Spyderco Endura 4 FFG measures about 4.0-inches.  The 3.75-inch blade, which is made out of medium grade stainless steel (VG-10), gives you a total length of 8.75-inches – pretty big for a folder.  As expected, the signature Spyderco finger loop is present for easy one-handed opening.  The handle is made out of Fiber Reinforced Nylon (FRN) with steel liners and is held together by torx screws – a deviation from Spyderco’s typical pinned design.  A strong back locking mechanism is included in this knife.  All of these components add together to form a knife that weighs about 3.4 ounces.

The Pros

The first thing I noticed about this knife was its weight – or the lack thereof.  This baby is light!  I’ve carried a lot of knives in the past which are heavy enough to constantly remind you that you have a knife in your pocket.  The Endura 4 FFG is the exact opposite of those knives – in fact, I sometimes reach for my pocket to make sure I haven’t dropped this knife.

Spyderco Endura 4 FFGIn addition to its low-weight, this knife handles well.  The gimping on the back of the blade and the end of the handle provide a comfortable spot for your thumb while working with the knife.  The FR4 is machined in such a manner that the handle won’t slip in your hand.  I’ve used this knife with wet, slippery hands and never had the knife slip out of my hands.

The blade, as is common on all Spyderco knives, was razor sharp out of the box.  My use of this knife has consisted mostly of mundane, daily tasks – cutting cardboard, opening letters, light garden work and the like.  The blade has held up and hasn’t needed a sharpening.  That being said, I have no experience with how hard or easy it is to sharpen the VG-10 blade.

In addition, I really like the gray color that this knife came in.  It’s a pretty non-intimidating color and doesn’t draw as much attention that “Cool Guy Black” typically does.  That being said, a 3.75-inch blade in an office setting does draw a few odd looks now and again.

The Cons

My biggest complaint about this knife has to do with the locking mechanism.  The mechanism itself is quite strong.  When the blade is locked, there is no jiggling or movement which provides for safe use.  My problem is when you try to retract the knife.  The release is located about halfway down the handle and tends to cause the user to put his fingers in the area where the blade with retract into.  This could cause a situation where the top of your fingers gets sliced as the blade tries to retract.  You definitely need to be careful when retracting the blade.

Spyderco Endura 4 FFGMy other complaint – and this one is minor – has to do with the clip.  On my knife, the clip is painted black and is beginning to chip and show wear.  I would have preferred a stainless steel or anodized (clear or colored) aluminum clip that wouldn’t show wear and tear as much.

The last issue is that, being one of Spyderco’s lesser expensive pocketknives, this one is made in Japan.  I prefer to buy American  made products when possible.  But, given its cost (and cost to me), I have no problem owning a foreign-made product, especially when it’s produced by an American-owned company.

Overall Impression

Short and simple, the Spyderco Endura 4 FFG is the best EDC pocketknife I have ever carried.  It’s light, sharp, locks well and isn’t “scary” to folks when you pull it out.  Granted, I work an office job so I’m not using this knife for tough work day-to-day.  I have, however, taken this knife with me hiking and fishing.  It has held up well there as well – providing good shavings for fire starting, cutting both fishing line and rope, and letting me work with moleskin to handle some blisters.

I highly recommend the Spyderco Endura 4 FFG if you’re looking for a good quality, inexpensive pocketknife.  As mentioned earlier, you can find them for between $55 and $65; you can find it on Amazon.com.

Do you have any experience with the Spyderco Endura 4 FFG? Want more information? Drop me a line in the comments and let me know!

A reliable EDC knife is very important. Check out why the Spyderco Endura 4 FFG is one that I completely recommend.