How To Build A Worm Bin
How would you describe the typical suburban homesteader family? More than likely you’re looking at two parents, a few kids, maybe a dog or a cat, two full-time jobs, soccer practice, ballet recitals…the works! With that kind of schedule, how are you going to fit in managing livestock on your suburban homestead? I’ve got the answer for you – worms! And to raise worms, you’re gonna need a worm bed!
In today’s post, we’re going to explain why you’d want to raise worms and how to build a worm bin. This information is very similar to what you’d find in Anna Hess’ great book entitled The Weekend Homesteader. If you don’t already have a copy, I highly recommend you pick one up. Every suburban homesteader should have one!
Why Worms?
Raising worms is all about the quality of the finished product, not necessarily the quantity. Anna Hess explains it best:
…your worm bin isn’t going to produce gobs of compost…an under-the-sink worm bin will churn out enough nutrients for a potted lemon tree
But, remember that, despite how much (or little) you get in terms of worm output, the quality is super high. Worm casting a very high in micronutrients and will help your food grow better than just about any other compost available.
Remember that commercial that used to say “A little dab’ll do ya”? Well, that’s worm castings and tea in a nutshell. Adding a small amount will show tremendous results to your garden. That fact alone makes growing worms a worthwhile endeavor for the suburban homesteader.
Gathering Your Supplies
There’s nothing particular outrageous required to make a worm bin. You’ll need the following:
- Drill (doesn’t matter if it’s cordless or not)
- 1/4″ Drill Bit
- Scissors
- Ruler or Tape Measure
- Marker
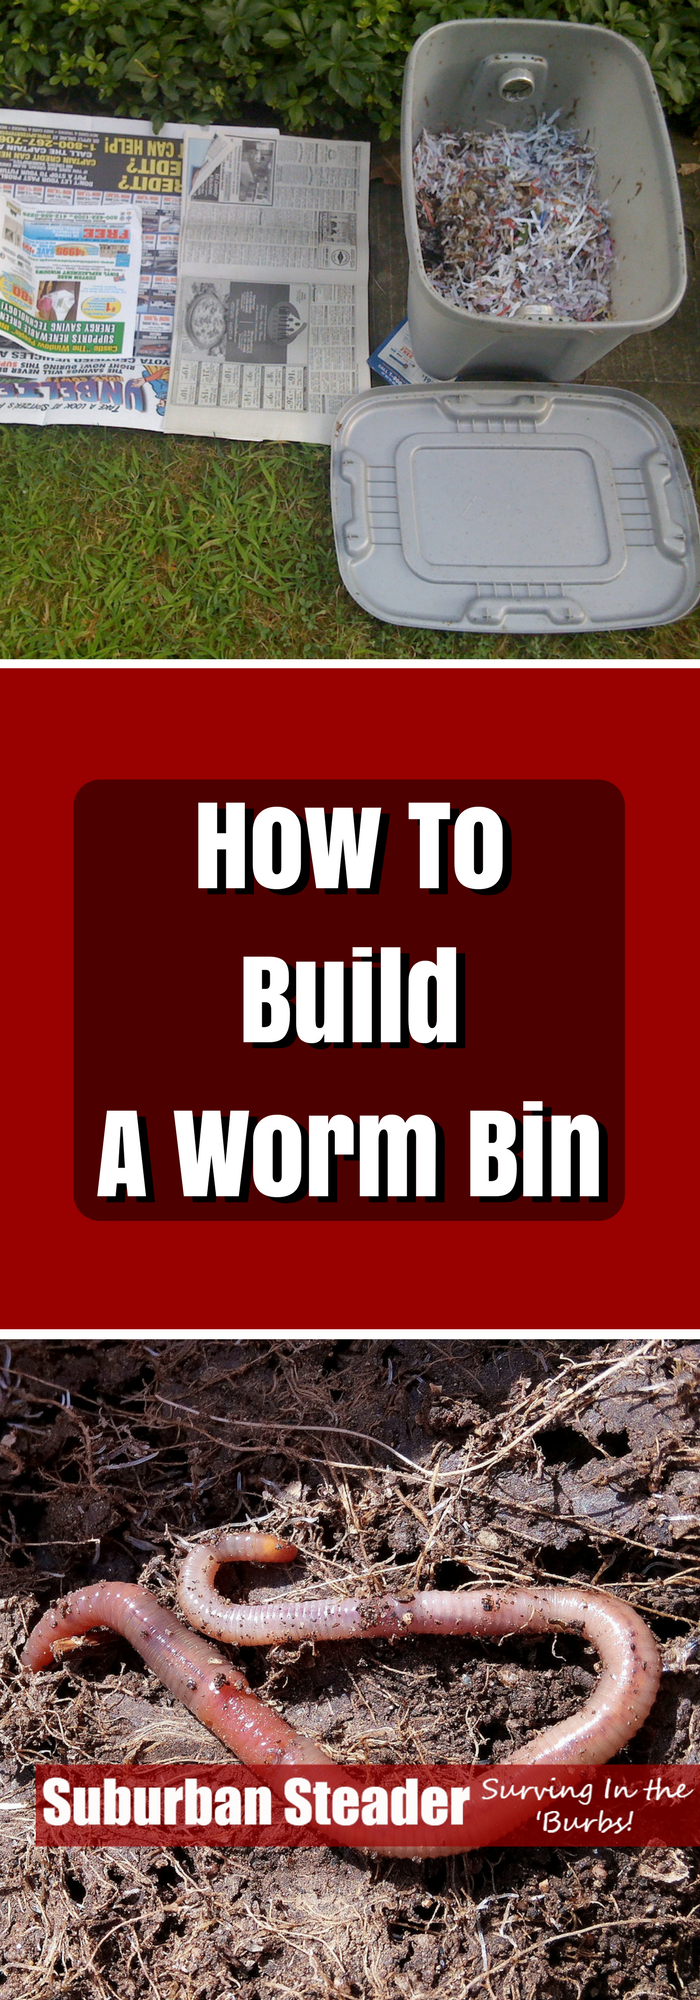
- (2) 8-10 Gallon Plastic Storage Bins
- Sheet of Cardboard
- Bedding
- Worms
- Soil
Plastic Storage Bins
The Plastic Storage bins should be somewhere in the 8-10 gallon range and can usually be found for around $5 a piece. Make sure both of the ones you are using are the same size.
Sheet of Cardboard
The sheet of cardboard needs to be big enough to cover the top of one of the bins.
Bedding
Worms love shredded newspaper for bedding. If you have a shredder that creates strips, you’re all set. The cross-shredders cut the paper into pieces that are too small. In the absence of shredded newspaper, you can use hand-shredded paper, torn-up cardboard or egg cartons, fallen leaves, straw, coconut coir and peat moss. Each of these have their downfalls, mostly that they’ll mat down in the bin too much when they get wet.
Worms
Let me say this very simple – we’re not raising earthworms. Compost worms are known as red wrigglers, redworms or Eisenia fetida. You might be able to find these guys living in horse manure, but you’re more than likely going to have to purchase them. You can find some on Amazon.com or at Vermicomposters.com. You’ll want about 2 lbs of worms for your bin, but could start with 1 lbs and let them grow to fill the space.
Soil
Nothing special here – a few scoops from your garden thrown into the bin to help the worms grind up their food.
Making The Worm Bin
This process is incredibly easy and even those of you who are mechanically challenged can do this project. Here we go:
- Soak your bedding in water for a few hours. It needs to be soaked, but not dripping.
- While the bedding is soaking, use the drill and drill bit to put about 10 holes in the cover and about 8-10 holes in each wall of one of the containers. The bottom of the container should have about 20 holes. You can use the ruler and marker, like I would, to put the holes in a nice, equally space pattern or simply do it by eye. Either way, you want a fairly even distribution of holes across each face.
- Place the bin with the holes inside the bin without any holes.
- Place the saturated bedding in the bin with the holes and add your soil. Mix well.
- Use the scissors to cut the cardboard so it sits flush with the top of the bedding. This addition will keep the worms dark and moist.
- Pour the worms in (including any bedding they came with) and replace the cardboard.
- Place the plastic lid on top and your done!
Caring For Your Worms
Much like any livestock, worms do take a little bit of work to care for. But, unlike most livestock, they’re not going to require daily attention.
Feeding
You’ll want to let the worms settle for a few days after you finish building the worm bin. At that point, you can add food scraps on a schedule that works for you – daily, weekly, whatever. Just make sure you are placing the scraps in different areas of the bin to promote the worms moving around. You can feed them just about anything you eat, although you’ll want to avoid citrus peels, bread, meat and oil. Citrus can be toxic in larger quantities. Likewise, bread, meat and oil will increase your chances of a pungent smell. Make sure you add a handful of fresh bedding eat time you feed them to cover up the scraps and keep the chance of smell and fruit flies down.
Overfeeding
Overfeeding is the biggest cause of worm bin failure. On a daily basis, a pound of worms can process roughly one-half pound of food scraps. That means your two-pound of worms can handle about seven pounds of food scraps per week. Anything above that should make its way to your compost pile. You do have a compost pile, right?
Bedding
The only care you need to give your worms besides feeding them is keeping their bedding moist, but not sopping wet. Likewise, you might find your bin is too dry. Either way, the way to tell something is wrong in your worm bin is to see how many worms are escaping to the lower bin. A few worms showing up there every week is normal. Anything more than that and you’ll need to investigate your worm bin’s conditions and see if you need to add moisture or dry bedding to reduce moisture.
As mentioned previously, stink and fruit flies can also be a problem. But, in the end, almost every worm bin problem can be treated by adding new layers of bedding (moist or dry, depending on your problem) and never having food scraps above the bedding. Reducing or stopping feeding for a few weeks during this process also helps.
Harvesting Tea and Castings
Harvesting worm bin tea is super easy. Simply remove the inner container and pour the worm bin tea from the outer container into a third container. Replace the inner container and you’re done. Now you can apply the worm bin tea to your favorite plants for a quick boost of fertilizer.
It’s time to harvest the castings when the contents of the inner container begin to look more like compost and less like bedding and food scraps. Get a third container, drill holes in it like described above, place some fresh bedding and food scraps in it and then place this new container on top of the original inner container. Place the cardboard and lid on top of this new, third container. The worms will work their way into the new bin over a week or two.
When applying the casting to your garden, remember the following:
- Your soil should be made of no more than 20% castings
- Casting are best used in your vegetable garden
- Castings should be used when fresh and damp
Conclusion
Building a worm bin is an easy task that will result in big returns on your suburban homestead. You’ll have a recycling center right in your house, as well as a compost creator and a fertilization machine. Your return on investment is terrific with this project so get after it!
Let us know in the comments how this worked out for you!
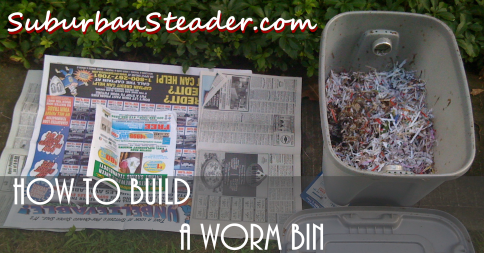
photo credit: AxsDeny via photopin cc