1

Survival Hax Survival Shovel Review

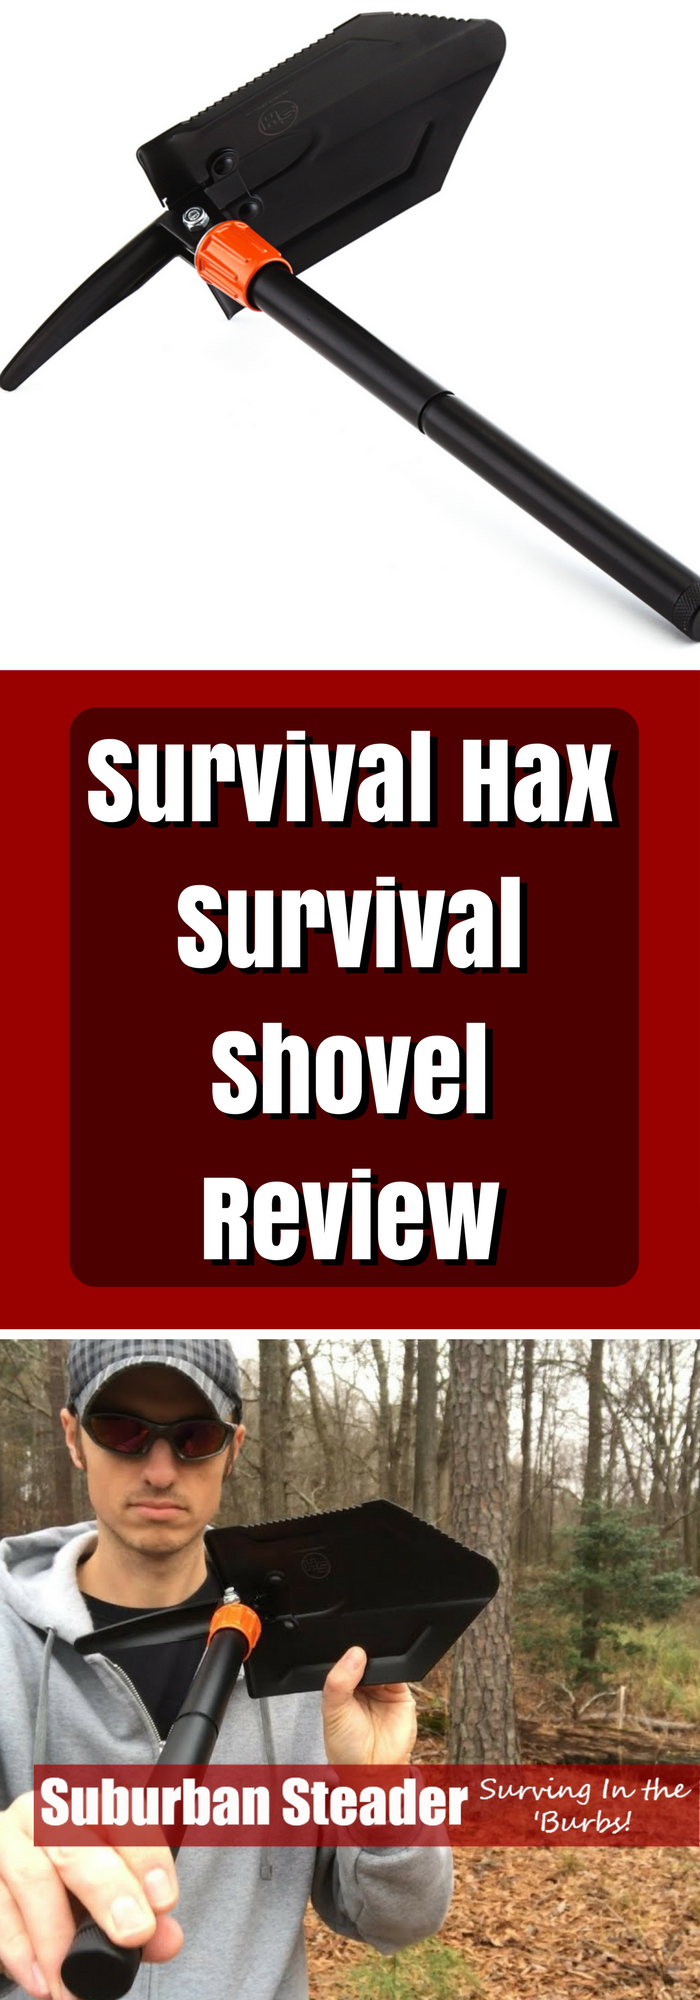
I was recently approached by Survival Hax to review a new shovel they had come out with.  The Survival Hax Survival Shovel is filling a void in the marketplace for a budget-friendly, collapsible shovel.  It’s small and lightweight which makes it conceptually ideal for hiking and backpacking.  Likewise, it’s adjustable which promotes ease of use.  Come check out what I thought of the shovel and where it fits into my daily loadout.

Product Description

Survival Hax describes their Survival Shovel as “a durable yet lightweight portable folding shovel made for the outdoors. With a serrated edge on one side, our trowel can be turned into a saw to cut away brush or make kindling. This multi-purpose shovel also doubles as a pickaxe and has a fire starter flint.”

It measures 24 inches long when unfolded and collapses to 8.6 inches wide by 8.2 inches high.  The whole unit weighs about 2lbs.

The shovel head is steel manganese with the handle being steel as well.  The orange adjustment bolt is made out of an aluminum alloy.

The overall technical specs are as follows:

Technical Specs:

  • Full shovel length: 24in
  • Pickaxe length: 16.9in
  • Folded shovel length: 8.6in
  • Handle length: 16.1in
  • Head length: 8.2in
  • Head width: 5.9in
  • Pickaxe length: 5.3in
  • Fire Starter length: 2.3in
  • Carry bag: 9.8in x 7in
  • Weight: 2lbs

The Pros

The Survival Hax Survival shovel does have some things going for it.  First is its compact nature when folded up.  I was able to throw this shovel in my backpack and have it take up very little room.  It’s nice to be able to stow a shovel into my pack and not have to lash an oddly shaped item to the outside of it.

The second thing I liked about the Survival Hax Survival Shovel was the versatility.  The shovel and pickaxe can be oriented in many different orientations thanks to the adjustability of the orange adjustment bolt.  The adjustability allows you to attack the ground from many different angles than a traditional shovel.  The “serrated” and “blade” edge of the shovel also present the possibility of this being a cutting tool.

The Cons

There are quite a few things working against the Survival Hax Shovel.  Let’s start at the blade end and work up the handle.

The shovel blade and pickaxe themselves have a few issues.  The shovel itself performed well as a shovel.  The pickaxe performed equally as well.  Keep in mind that Long Island is just a big freaking sandbar so our soil isn’t terribly difficult to dig in.  The edge of the shovel is serrated and supposed to be sharp on the other side.  Well, neither of these blades were all that sharp or useful.  That being said, they were there and, with a file and some elbow grease, they would be useful.

The orange adjustment bolt is the first real issue I ran into.  Survival Hax uses a fine thread on this bolt (actually, in all threaded areas of the shovel) and it takes forever to tighten and loosen the bolt.  The fine thread is also is quite susceptible to sand getting in them and causing issues with tightening or loosening.

Further up, the handle extension threads on and has the same fine pitch problem I mentioned above.  I found that trying to tighten the orange adjustment invariably meant the handle extension loosening up.  The fine thread just doesn’t seem to lock up the way I’d want it to.

At the very end of the handle is the ferrocerium rod.  I had very little luck getting quality sparks out of this rod (as you’ll see in the YouTube video review below).  It’s nice to have, in a pinch, but I wouldn’t count on it.  I did like that the tube was hollow and could be used to store more gear.

Overall Impression

I really want to say that the Survival Hax Survival Shovel is something everyone should have in their Bug Out Bag but I can’t wholly endorse it.  It seems weak in construction to me (in fact, some have gotten it to fail during testing) and a lot of the shortcomings I mentioned above just don’t meet my tough criteria for being a “bulletproof” piece of equipment.

That being said, I do want to applaud Survival Hax.  They’ve put together a budget-friendly piece of equipment that, with a few changes, could be a quality piece of equipment.  If they changed the threading and improved the quality of the ferrocerium, I’d be more apt to recommend it.  I’d also want to see the serrated edges either taken away or sharper.

Overall, the Survival Hax Shovel is a middle of the road shovel that has some nice perks (the pickaxe is a great addition in my opinion).

Personally, I’ll be putting the Survival Hax Survival Shovel in my truck to be used in snow removal situations.  I absolutely trust it for that and can see it being a perfect tool for those kinds of jobs.

[youtube_sc url=”FQ_Kmfl6Azg” width=”400″]

Buying A Survival Hax Survival Shovel

If you’re interested in buying the Survival Hax Survival Shovel, you can buy them on Amazon.

Survival Hax Survival Shovel


2016 Suburban Steader Recap

Suburban Steader had a hell of a 2016.  I want to spend a little time going through what changes the site went through, some of our successes, some of our failures and a bit about what the future holds.  Overall, 2016 was a good year for the site and, more importantly, for the Suburban Steader Homestead and family.

2016  Stats and Milestones

First things first, let’s take a look at some of the stats from 2016 and compare them to 2015.  This post is going live on December 29th so these numbers are fairly accurate for the whole year.

Visitors
2015: 59,953
2016: 77,812 (+29.8%)
Sessions
2015: 68,299
2016: 87,968 (+28.8%)
Page Views
2015: 144,360
2016: 165,792 (+14.8%)
Twitter Followers
2015: 641
2016: 853 (+33.1%)
Facebook Fans
2015: 4,071
2016: 4,434 (+8.9%)
Pinterest Followers
2015: 2,115
2016: 2,521 (+19.2%)
YouTube Subscribers
2015: 29
2016: 51 (+75.9%)
Instagram Followers
2015: 0
2016: 88

As you can see, Suburban Steader saw growth on all fronts.  I’m most happy with the social media growth that’s occurred.

Twitter, YouTube and Pinterest are all organic growth – I’ve done very little to grow Suburban Steaders followings in those places.

Facebook, while being the smallest percentage growth, has been where I’ve spent most of my time growing the audience (I did add 400 followers).  The reason for this is that Facebook, far and away, is the most productive social media driver to the website.

Instagram is a new social media account I took on this year and, while there’s a fairly small following, it’s an active following.  I don’t have any stats, but I definitely get more interaction with Instagram posts than any other.

The site, while the numbers are up fairly well, is nowhere near where I want it to be and that has most everything to do with my lack of consistency posting.  In fact, it’s embarrassing to admit that I published twenty-six (26) posts in 2015 and only fourteen (14) in 2016.

Most importantly, however, is that 2016 was the first year that Suburban Steader was self-supporting.  The site didn’t make a lot of money, but it did make enough to cover all the costs associated with running a blog.  And, for that, I’m quite thankful.

What To Expect In 2017

People spend a lot of time reflecting on the year gone by and making grand plans for the year to come this time of year.  I suppose I’m not different.  I had mixed emotions on 2016 – Suburban Steader saw better numbers across the board, but site upkeep and product creation was down.

Much like everyone e;se, I view 2017 as a new slate and have some plans to grow the site and extend the brand a bit

Blog Goals

Personalize The Blog

I feel like the blog is losing its voice, so to speak, and want to fix that.  I think bringing more of my personality back to it will help elevate the quality of the writing and bring a more centered voice to the site.  The other thing I’m going to concentrate on with regard to this topic is to use “I” more and “we” less.  This site is not a conglomerate of people.  It’s one guy busting his butt to make it all work and I think it’s time I own that fact!

Post Weekly

I’ve been thinking a lot about how to accomplish this goal and believe I’ve hit on a plan.  2017 will be the year of the Suburban Steader Homestead Review.  I’ll write a weekly piece about the goings on at the Suburban Steader Homestead.  Not only will this approach cause me to publish weekly, but it will also chronicle a year in the life of a suburban homesteader.  Articles in addition to this update will be published as appropriate.  The goal will be one article and one update per week, but I’m not going to promise a standalone article per week right now.

Social Media Goals

FacebookFacebook

Facebook has been on a slow, steady climb.  I’ve had about 10% growth in 2016 and, while that’s not bad, I’d like to see more.  I’d be ecstatic if I broke into 10,000 followers next year (yes, that’s over 125% growth) but I realize the chances of that are slim.  I do think that keeping my nose to the grindstone and pumping out content on a regular basis will help grow the site organically, however.

TwitterTwitter

I’ve never been a big Twitter user and any growth I’ve experienced has been completely haphazard and organic.  I will continue this approach as I’m not seeing a lot of engagement on this outlet.  Essentially, that means that I’ll keep sharing on this platform on a daily basis but there probably won’t be a lot of interaction past that.

Google+Google+

Google+ has shown to be almost a waste of time.  If not for the fact that I can simultaneously post to Google+ and Twitter, I’d probably not post there at all.  Unless something changes on this platform, I won’t be spending a lot of my time there.  Much like Twitter, that means that I’ll keep sharing on this platform on a daily basis but there probably won’t be a lot of interaction past that.

YouTubeYouTube

YouTube is one of my two main goals in 2017 when it comes to social media.  I will not commit to a regularly scheduled video but I will say that I intend on posting more videos in 2017 than I’ve ever posted before.  I believe the engagement is worth it and I also like the fact that it’s a creative process – scripting, filming, editing and producing.  Definite skill sets that I want to gain and also a way for my viewers and followers to gain knowledge.

PinterestPinterest

I have a love-hate infatuation with Pinterest.  When I need something, it’s a great resource, but it’s not a place I like to spend a lot of time.  I find the mobile interface clunky and personally prefer Instagram and YouTube to it.  I’ll continue to post there when a blog post goes up and I’ll also post when the mood strikes.  The traffic bump may be enough to make me entertain more time on the platform.

InstagramInstagram

Instagram – my social media drug of choice lately.  I love the pictures you can find and the speed of interaction is just terrific.  I can honestly say that if I had to pick just one social media platform to use going forward, it would be Instagram.  And, to that end, I need to be more of contributor and not just a lurker.  Instagram participation will increase in 2017 – the end goal will be for me to be posting at least once a day.  I don’t think it’s going to be a big driver to the blog but A) I could be wrong and B) it doesn’t matter.  The community interaction is what I’m after.

Wrap Up

First, I want to thank each and every one of you.  Without my readers and social media followers, Suburban Steader would just be a diary of sorts.  It’s all of you that make this site, and its social media accounts, what they are.

I want you to know that I fully intend to re-up my commitment for this project in 2017 but I need your help.  Keep reaching out to me and letting me know what you want.

More product reviews? What kind? More how-to’s? For what skills? More general theory articles? What topics?

This site is only as good as its readers and I know I have some of the best readers out there.  Help me grow it into the wealth of knowledge I know it can be!

Wishing you all a Happy New Year! Many blessings and good fortune in 2017!

Suburban Steader


6 Skills Every Suburban Homesteader Needs

Suburban homesteader.  What comes to mind when you hear that term?  Personally, I think of person who lives in the typical American suburbs, they’re probably married with a few kids.  Maybe a dog.  Their land isn’t huge, but it’s being transformed into something that’s functional and they’re very proud of that fact.  The household quite possibly runs on two incomes and free-time is scarce commodity given all the social obligations they have.  Does this description sound like you?  Even if there are a few differences with your situation, you can relate to it, right?  Then you’re a suburban homesteader.

We’ve identified you as a suburban homesteader.  Awesome!  But what now?  What do you need to do to make this life work?  Well, as luck would have it, I’ve laid out six skills you need to improve your abilities and become the suburban homesteader you always wanted to be:

1. Monthly Financial Tracking

I’ve spoken before about how important financial independence is to the suburban homesteader.  Those guidelines still hold true.  I want to see you free from the shackles of debt.  Even more so, I want you to track your finances and know what your incomes and expenses are.  Treating your suburban homestead like a business by looking at the financials of your home every month will easily let you see the areas that are going to become problems before they do.  Are you spending too much money on dining out? Has your income dipped in the last few months? Are you spending more on a certain area of life than you were before? Why?

All these answers are answered in the monthly financial review.  Suburban homesteaders typically are folks who rely on two incomes and have a vast array of family activities in addition to the homestead which makes it easier to fall into debt.  Keeping track of your finances on a monthly basis will help you keep your debt from rising and allow you to track the costs of all these activities.

2. Gardening

Most people think of gardens or farms when they hear the word homesteading.  You more than likely will not have room for a farm in suburban homesteading so you need to concentrate on gardening.  The simple act of starting a garden can do so many things for you.  First and foremost, you will provide food for your family at reduced cost to what you would pay at the supermarket.  Second, the food you will be providing will be fresher and healthier than what you are buying.  Even if you buy GMO-free organic vegetables and fruits, they will not taste as fresh and vibrant as something you pull out of the ground or harvest moments before eating.  Third, and probably most important, you’ll be developing a functional skill that will make you more self-sufficient.  And, to top it all off, gardening is a great family activity that everyone can take part in.

Get your garden going today!

3. Composting

The ability to produce your own compost is paramount to a healthy garden.  Your soil’s health is an investment in your garden and, in turn, an investment in your family’s health.  And, truth be told, composting is not that hard.  Take your table scraps, yard waste and whatever other organic matter you can find and throw it in a pile.  Keep turning it every so often as you continue to add to it.  Before long, you’ll have thick, dark compost that your vegetables will love you for.  We have been feeding our compost pile here on the Suburban Steader Homestead for about a year and we probably have 2-3 cubic yards of compost at this point.  It can be done and is easy to do.  Don’t worry about perfecting the balance of greens and browns.  Just go at it and you’ll learn what works best!

4. Handyman Capability

By definition, you live in the suburbs if you’re a suburban homesteader.  And that means ‘fix-it’ folks are very prevalent.  Plumbers, electricians, contractors, gardeners, mechanics and appliance repairmen are all willing to take your hard-earned money.  Most of these folks are quite skilled at what they do and will probably do the job quicker than you.  But, will they do it better than you?  The answer is probably not.  You can can find out how to fix just about anything on YouTube if you’re willing to spend a little time learning.  You might need some new tools and extra material for when you mess up the first time, but you can develop yourself into a pretty proficient handyman if you want to.

I don’t want you to get me wrong here – being the son of a plumber, I can absolutely tell you there are times when you should call in the professionals.  But most of the fixes around your house can be completed with a little learning, trial, failure and elbow grease.  There’s so many benefits to improving your handyman skills: saving money, developing a talent and having the confidence to know that you can conquer almost any problem your home throws at you!

5. Project Management Skills

I can already hear the groans on this one.  First, I want you to stop thinking about the folks at work who are running around with Gantt charts and work breakdown structures (FYI, I am a project manager at work, so I am one of those people).  When I talk about project management skills around the suburban homestead, I’m talking more about thinking through a project and trying to corral it a bit before jumping in full force.  Let’s take for instance a fairly small project of building a garden box.  The project management skills you’d want to use here include the following:

  1. Material Cost Estimate: Think about all the materials you’re going to use including wood, fasteners, fill material (soil, compost, etc) and any new tools you need for the job.  Can you afford this project right now (go back to the first skill we talked about)?
  2. Project Duration Estimate: Is this a project you can finish on a Saturday?  Is it a two-day job?  With that information, you can then look at your calendar and figure out when a good time to start it would be.  Maybe your kids have a soccer tournament this weekend, but you’re free next weekend.  Plan accordingly.
  3. What’s My Return On Investment (ROI)?: Why are you building this garden box? Do you need the extra space? Is the money your going to spend on it, not to mention your time, going to be compensated by the final product?

None of these things are terribly difficult to think about but it’s important that the suburban homesteader (you!) is spending their time and money as wisely as possible.

Oh, and just so you know, I have used a Gantt chart for projects around the house ranging from remodelling to cooking Thanksgiving dinner – and they all went off flawlessly.  So, maybe it isn’t a bad skill to work on as well…

6. Determination and Self-Motivation

These are the least tangible but, arguably, most important skills a suburban homesteader needs to succeed.  The reality of life on a suburban homestead is that things are not going to always follow plan.  Money is going to get tight at times, the family pet is going to get sick, Johnny or Jane is going to break their arm, Mom or Dad is going to get sick, the boiler is going to bust, etc.  Life is going to happen.  Having a determination and self-motivation to keep going despite these setbacks is the most important skill a suburban homesteader can develop for success. So, to invoke a few over-played clichés, keep your head up and keep your eyes on the prize.  Know what your goal is and shoot higher.  You’re bound to flounder a bit, but by aiming higher you’ll increase your odds or achieving all that you wanted to achieve.

Become The Suburban Homesteader You Always Wanted To Be

So there you have it – 6 skills every suburban homesteader needs to succeed at this game.  Financial tracking, gardening, composting, handyman skills, project management, determination and self-motivation.  You’ll be a better suburban homesteader and a better person if you spend the time to develop and hone these skills .

6 Skills Every Suburban Homesteader Needs


5 Homesteading Blogs You Should Be Reading

Typically I try to point my readers to a specific article on other sites that is relevant to homesteading or I just wanted to share.  But, today I wanted to share with you the list of 5 homesteading blogs I think you should be reading.  All five were picked because they publish articles on a regular basis and contain great homesteading information.

* In alphabetical order:

  1. The Backyard Pioneer: It’s no secret that Mike over at The Backyard Pioneer is our brother-from-another-mother.  He’s a great guy who, more importantly, writes a terrific blog.  His articles range the gamut from gardening to cooking to equipment review.  The Backyard Pioneer takes a rustic, cost-conscious approach to his projects and we highly recommend his no-nonsense approach to gear and technique.  Oh, and don’t forget about his recipes – I can vogue for the high quality of the food he makes! (His Chicken and Dumplings are awesome!)
  2. Home Ready Home: The owner/author of Home Ready Home is Julie and she describes herself as someone who “used to dream of being a guest on Oprah, but now, [wishes she] could go on location with Survivorman.”  That says it all in a nutshell. The articles on Home Ready Home are top-notch and Julie definitely takes a “family-first” approach to her tutorials and instruction.  The content is gardening and cooking heavy – concentrating on how to eat what you grow and grow what you eat. (Check out her 5 Items You Should Be Growing In Your Garden)
  3. Homestead Dreamer: Homestead Dreamer is a new addition to my reading repertoire and, so far, it has not disappointed at all. The blog is very interested because it is basically chronicles a young Alaskan couple as they work towards self-sufficiency. As you can imagine it’s very homestead driven with flavors of self-sufficiency. Highly recommended! (The article on Unraveling the Mystery: Drying and Dehydrating Food is a nice intro)
  4. Survival At Home: While probably the least homesteading-centric blog, Patrick has a great site over at Survival. He regularly publishes good articles on survival, prepping and homesteading which cause you to pause, think and re-evaluate your approach. It’s been my experience that he is helpful and always willing to talk to folks and send them in the right direction. (like his article on 45 Ways to Save Money on Your Monthly Bills)
  5. Tenth Acre Farm: This list wouldn’t be complete without a site that concentrates on permaculture. Amy and Vince have a (shocker) tenth acre lot in Cincinnati, Ohio where they grow most of their own food and implement permaculture principles on a scale relevant to their land. I highly recommend getting up to speed on their project/homestead and becoming a regular reader. It’s amazing to see how permaculture and a desire to change your life can manifest itself in a very cool project. (Their article on Front Yard Rainwater Catchment was awe inspiring).

More?

Tell us in the comments what other homesteading sites you follow and why. Or why you already read and like the sites I mentioned.

5 Homestead Blogs You Should Be Reading

5 Homestead Blogs You Should Be Reading


How To Build A Worm Bin

How would you describe the typical suburban homesteader family?  More than likely you’re looking at two parents, a few kids, maybe a dog or a cat, two full-time jobs, soccer practice, ballet recitals…the works!  With that kind of schedule, how are you going to fit in managing livestock on your suburban homestead?  I’ve got the answer for you – worms!  And to raise worms, you’re gonna need a worm bed!

In today’s post, we’re going to explain why you’d want to raise worms and how to build a worm bin.  This information is very similar to what you’d find in Anna Hess’ great book entitled The Weekend Homesteader.  If you don’t already have a copy, I highly recommend you pick one up.  Every suburban homesteader should have one!

Why Worms?

Raising worms is all about the quality of the finished product, not necessarily the quantity.  Anna Hess explains it best:

…your worm bin isn’t going to produce gobs of compost…an under-the-sink worm bin will churn out enough nutrients for a potted lemon tree

But, remember that, despite how much (or little) you get in terms of worm output, the quality is super high.  Worm casting a very high in micronutrients and will help your food grow better than just about any other compost available.

Remember that commercial that used to say “A little dab’ll do ya”?  Well, that’s worm castings and tea in a nutshell.  Adding a small amount will show tremendous results to your garden.  That fact alone makes growing worms a worthwhile endeavor for the suburban homesteader.

Gathering Your Supplies

There’s nothing particular outrageous required to make a worm bin.  You’ll need the following:

Plastic Storage Bins

The Plastic Storage bins should be somewhere in the 8-10 gallon range and can usually be found for around $5 a piece.  Make sure both of the ones you are using are the same size.

Sheet of Cardboard

The sheet of cardboard needs to be big enough to cover the top of one of the bins.

Bedding

Worms love shredded newspaper for bedding.  If you have a shredder that creates strips, you’re all set.  The cross-shredders cut the paper into pieces that are too small.  In the absence of shredded newspaper, you can use hand-shredded paper, torn-up cardboard or egg cartons, fallen leaves, straw, coconut coir and peat moss.  Each of these have their downfalls, mostly that they’ll mat down in the bin too much when they get wet.

Worms

Let me say this very simple – we’re not raising earthworms.  Compost worms are known as red wrigglers, redworms or Eisenia fetida.  You might be able to find these guys living in horse manure, but you’re more than likely going to have to purchase them.  You can find some on Amazon.com or at Vermicomposters.com.  You’ll want about 2 lbs of worms for your bin, but could start with 1 lbs and let them grow to fill the space.

Soil

Nothing special here – a few scoops from your garden thrown into the bin to help the worms grind up their food.

Making The Worm Bin

This process is incredibly easy and even those of you who are mechanically challenged can do this project.  Here we go:

  1. Soak your bedding in water for a few hours.  It needs to be soaked, but not dripping.
  2. While the bedding is soaking, use the drill and drill bit to put about 10 holes in the cover and about 8-10 holes in each wall of one of the containers.  The bottom of the container should have about 20 holes.  You can use the ruler and marker, like I would, to put the holes in a nice, equally space pattern or simply do it by eye.  Either way, you want a fairly even distribution of holes across each face.
  3. Place the bin with the holes inside the bin without any holes.
  4. Place the saturated bedding in the bin with the holes and add your soil.  Mix well.
  5. Use the scissors to cut the cardboard so it sits flush with the top of the bedding.  This addition will keep the worms dark and moist.
  6. Pour the worms in (including any bedding they came with) and replace the cardboard.
  7. Place the plastic lid on top and your done!

Caring For Your Worms

Much like any livestock, worms do take a little bit of work to care for.  But, unlike most livestock, they’re not going to require daily attention.

Feeding

You’ll want to let the worms settle for a few days after you finish building the worm bin.  At that point, you can add food scraps on a schedule that works for you – daily, weekly, whatever.  Just make sure you are placing the scraps in different areas of the bin to promote the worms moving around.  You can feed them just about anything you eat, although you’ll want to avoid citrus peels, bread, meat and oil.  Citrus can be toxic in larger quantities.  Likewise, bread, meat and oil will increase your chances of a pungent smell.  Make sure you add a handful of fresh bedding eat time you feed them to cover up the scraps and keep the chance of smell and fruit flies down.

Overfeeding

Overfeeding is the biggest cause of worm bin failure.  On a daily basis, a pound of worms can process roughly one-half pound of food scraps.  That means your two-pound of worms can handle about seven pounds of food scraps per week.  Anything above that should make its way to your compost pile.  You do have a compost pile, right?

Bedding

The only care you need to give your worms besides feeding them is keeping their bedding moist, but not sopping wet.  Likewise, you might find your bin is too dry.  Either way, the way to tell something is wrong in your worm bin is to see how many worms are escaping to the lower bin.  A few worms showing up there every week is normal.  Anything more than that and you’ll need to investigate your worm bin’s conditions and see if you need to add moisture or dry bedding to reduce moisture.

As mentioned previously, stink and fruit flies can also be a problem.  But, in the end, almost every worm bin problem can be treated by adding new layers of bedding (moist or dry, depending on your problem) and never having food scraps above the bedding.  Reducing or stopping feeding for a few weeks during this process also helps.

Harvesting Tea and Castings

Harvesting worm bin tea is super easy.  Simply remove the inner container and pour the worm bin tea from the outer container into a third container.  Replace the inner container and you’re done.  Now you can apply the worm bin tea to your favorite plants for a quick boost of fertilizer.

It’s time to harvest the castings when the contents of the inner container begin to look more like compost and less like bedding and food scraps.  Get a third container, drill holes in it like described above, place some fresh bedding and food scraps in it and then place this new container on top of the original inner container.  Place the cardboard and lid on top of this new, third container.  The worms will work their way into the new bin over a week or two.

When applying the casting to your garden, remember the following:

  • Your soil should be made of no more than 20% castings
  • Casting are best used in your vegetable garden
  • Castings should be used when fresh and damp

Conclusion

Building a worm bin is an easy task that will result in big returns on your suburban homestead.  You’ll have a recycling center right in your house, as well as a compost creator and a fertilization machine.  Your return on investment is terrific with this project so get after it!

Let us know in the comments how this worked out for you!


How To Build A Worm Bin

photo credit: AxsDeny via photopin cc

How To Build A Worm Bin


Compost On Your Suburban Homestead

What comes to mind when you hear the word compost? Do you think of some stinky pile where food scraps get thrown and flies live? If that’s what comes to mind then you need to know something – you’re doing it wrong! Compost is a decidedly simple yet effective process that anyone on a small suburban lot can partake in.  You’ll see incredible benefits in your garden once you take the plunge into making good compost.

Compost Science

The ‘art’ of making compost is actually quite easy – it’s less art and science and more…well, just doing. You need to make sure you have the right ingredients and keep them moist (not wet). You also need to make sure you’re turning it often to keep the heat up inside the pile. And, while it’s a very forgiving process, it’s also good to have an understanding of what goes into compost.

Temperature

Temperature can be a fickle creature in the world of compost. On one hand, an elevated temperature can help you. Keeping the compost at a minimum of 104°F for five days (hitting 131°F for five hours during that time) will make sure that all the weed seeds and pathogens in your compost are killed. Likewise, if you get too hot it’s not good either. For example, if you hit 160°F, all the microorganisms – basically bacteria and fungi – that make the compost action happen will die.

Heat is caused in the compost pile when the microorganisms begin to decompose the plant material you’ve included. You are most likely not going to have to cool down your compost pile (it’s pretty hard to get it that hot). But, if you do see smoke on your compost pile, all you have to do is add water to cool it down. Adding a mixture of high carbon ingredients (dead leaves are great) after the water is a good idea.

Browns and Greens

If you remember the post about Mulch and Your Suburban Homestead, you’ll remember how we talked about the C:N ratio. This ratio is commonly thought of as the ratio of browns to greens. The table below gives you a few examples of browns and greens:

Browns Greens
Autumn Leaves Grass Clippings
Wood Chips Fruit/Veggie Scraps
Sawdust Coffee Grounds
Shredded Paper Manure


The easy way to remember which is which is to remember that greens are typically moist and colorful (with the exception of coffee grounds and manure – both of which are moist).  Everything else is browns.

You want to start your pile at a rough C:N ratio of 30:1 meaning your browns are 30x more prevalent than your greens.  This scenario will whittle down to roughly 10:1 or 15:1 as the decomposition occurs.

An ammonia type smell coming from your compost pile means you have too many greens.  Likewise, if you don’t see a lot of decomposition action going on, you’re probably too high on the browns.

If you’re the analytical type, check out this compost calculator to see how well you are doing.

Compost On Your Suburban HomesteadParticle Size and Shape

Believe it or not, size and shape greatly influence your compost.  As a rule of thumb, the smaller the better.  The microorganism can more easily digest small pieces.  A good example of this phenomenon is an apple.  We put a whole apple in our compost pile and then chopped one into small pieces and placed it in there as well.  After a certain amount of time, the small pieces were barely recognizable and the whole apple was more or less intact.

Remember that shape is equally important.  If you have material that is so small that it can mat together when wet – whole sheets of paper, full lettuce leaves, or very finely ground up food – the air and water will not be able to get in and help the microorganisms work their magic.

Aeration

As I eluded to above, air is critical to the decomposition process in a compost pile.  Much like humans, microorganisms take in oxygen and expel carbon dioxide.  If these little guys can get oxygen, they’ll eventually be smothered and replaced with anaerobic microorganisms (anaerobic = no oxygen).  These guys stink (literally) and don’t decompose your compost nearly as well as their aerobic counterparts.

So how do you aerate your compost pile?  Easy – keep it open to the air and turn it often.

Moisture

Again, the microorganisms are like you and I in that they also need moisture to live.  But, much like temperature, moisture can be a fickle situation.  Too little moisture and your microorganisms will perish.  Too much and they’ll drowned; being replaced by their anaerobic counterparts.

You can tell if your compost pile is sufficiently moist by grabbing a handful of the compost.  If it feels like a wrung-out sponge when you squeeze it, it’s good.  For the most part, you won’t have to worry about this problem as your greens and rainfall will give the pile enough moisture.

Turning

Turning is one of those things that people have differing opinions on.  Some folks say that nature does this kind of process without turning a forest floor.  And they’re completely correct.  But those people are usually more patient and willing to wait a year or more for a compost pile to be ready.

Those of us who are a bit more impatient will turn the pile on occasion.  Turning the pile provides a few benefits to the compost pile.  First, the temperature at the middle of the pile is always going to be greatest so turning it allows for a more thorough compost.  Second, turning the compost pile helps aerate it and break up clumps that may shed water.

We here at the Suburban Steader Homestead turn our pile because we believe it provides a better quality compost in a shorter time.

Compost On Your Suburban HomesteadCompost Bins

Good news – science class is over!  Now we’re getting into the hands-on part of this post.

The question also becomes: What should I make my compost in?

My answer is usually a simple Nothing.

To be perfectly frank, the compost pile on the Suburban Steader Homestead is just a pile on the ground.  We add our table scraps, scrapped paper, straw, etc to it and turn it on occasion.  We’ll water it during especially dry spells but those are far and few between considering where we live.

But, you may not want to have a compost pile just laying on your property somewhere so let’s talk about what you can do:

Pallet Compost Bin

This concept is very simple.  Make a four-sided area out of wooden pallets and put some hinges on it so you can open up one pallet.  Now make another one next to it in the same manner.  Once one bin is full, use a pitchfork to move it to the second bin.  This movement will aerate the compost pile for ‘finishing’ in the second bin.  You can now start a new pile in the first bin.  By the time you’ve filled the first bin again, the second bin material should be ready to use.

Compost Tumblers

You can either buy these at your local big box store or make one out of a plastic 55-gallon drum (with a cover) and a pipe.  Put the pipe through the barrel length-wise so the barrel can spin around it and support the pipe with a wooden frame.  Now all you have to do is cut and opening in the barrel – make sure you can close it again – that you can both add material and retrieve your compost from.  Now all you have to do is add material and give it a spin.  These aerate your compost quite well and generally produce quality compost at a faster rate.  The problem is that the amount you produce is significantly smaller than what you can with a pallet bin or pile situation.

Using Compost In Your Garden

Using compost in your garden is soooo simple.  Follow these three rules:

  1. Pull back mulch
  2. Apply compost
  3. Reapply mulch

That’s it.  Following these simple will help build up the health of your soil.  The sponge-like capability of the compost will retain moisture in the garden, the nutrients will attract earthworms which will work the compost deeper into your garden.  Pretty soon your soil will be darker and richer with a higher level of microorganisms.

Wrap Up

Compost is a wonderfully easy and inexpensive tool that every suburban homesteader should have in their toolbox.  While there’s a plethora of science behind, the premise is pretty simple.  Throw some browns and greens together, add moisture and oxygen, turn it occasionally and get out of the way.  Nature will do the rest of the work.

You’ll see incredible benefits in your garden and you’ll enjoy knowing that your soil is getting more and more fertile which means you can grow better and better produce.  Everyone wins!

Additional Resources

Please let us know any tips you have for making compost in the comments or on our Facebook Page.

Compost On Your Suburban Homestead

Compost On Your Suburban Homestead


June Preview – Project TWH

First, let me apologize. The end of May and June were a crazy time around the Suburban Steader Homestead. I don’t really feel like going into detail, but a lot of family issues came up. Long story short, everyone is happy and healthy(er) now, so we’re moving on. And, while it’s early June, we’re going to continue with the Project TWH and discuss the June Preview.

As an aside, my goal is to write about both the June and July topics this month in hopes of getting caught up. If it spills a little into August, so be it, but please know that I am committed to this discussion and believe it’s beneficial for both my readers and myself.

In what seems to be a theme lately, the June Preview of Project TWH is a mismatch of topics. Some of the topics are straight-up homesteading related. Others are more suburban homestead related and can be related to a general approach for bettering your life.

As usual, we’ll be referencing The Weekend Homesteader throughout this month. In fact, our four main articles for the month will be centered around the four topics Anna Hess outlines for June:

  • Compost
  • Worm Bins
  • Seasoning
  • Your Real Hourly Wage

Compost

  • Goal: Build a compost pile
  • Cost: $0-50
  • Time: 1-3hrs
  • Difficulty: Medium
  • Kid-Friendly: Yes

Compost – the lifeblood of a garden. Well, maybe that’s water, but you get the point. We’ll spend a good amount of time talking about the science behind compost and how to create it. Not sure what browns and green are? Should you turn or aerate your compost? Do you need to water it? Don’t worry about it because we will talk about all these topics and more. We’ll also get a little into how to store or contain your compost with bins and store-bought systems.

Worm Bins

  • Goal: Build an under-the-sink worm bin
  • Cost: $35-100
  • Time: 1-2hrs
  • Difficulty: Medium
  • Kid-Friendly: Yes

Yup, you hear that right. Worms! And we’re going to teach you how to build a worm bin to grow them! Well, the purpose of the worm bin isn’t really to grow worms, it’s to produce worm casting and worm tea for composting and fertilization needs. This post will be a kind of “How-To” in that we’ll walk you through building a worm bin and getting started with growing a worm colony. We’ll talk about what to do with the by-products of your bin and wrap up with a list of resources to get started on this most interesting adventure in suburban homesteading

Seasoning

  • Goal: Expand your culinary horizons by trying out new spices and herbs
  • Cost: $0-10
  • Time: 1-2hrs
  • Difficulty: Easy
  • Kid-Friendly: Yes

The first two posts for this month will concentrate on helping your garden grow and this post will give you some advice on what to do with its product. When you think about it, we garden and raise animals on our suburban homestead for one reason – to feed ourselves! Seasoning, however, makes this goal that much more interesting. Herbs and spices add whole new level of taste, texture and nutritional input to your diet. We’ll talk about the basic herbs and spices, how to use them in your cooking and where you might want to try experimenting with ‘off the beaten path’ herbs and spices.

Your Real Hourly Wage

  • Goal: Discover the true value of your time
  • Cost: $0
  • Time: 1-2hrs
  • Difficulty: Easy
  • Kid-Friendly: No

It’s probably not a stretch to assume that, as a suburban homesteader, you probably live in the (gasp!) suburbs. That being said, it’s probably safe to assume that you don’t own enough land to be completely self-sufficient. That means that one of you (at least) must have a full-time job. And I bet you can either tell me how much you get paid annually or per hour. But is that really what you make? In this post, we’ll spend some time talking about how to calculate your real hourly wage and what to do with those numbers. This article and it’s tasks will be an interesting introspective activity for you; I expect it will really get you thinking about what’s important to you and what isn’t.

Conclusion

So there you have it, the June Preview of Project TWH. As usual, it’s going to be an eclectic and busy month. There are some hands on activities as well as some non-gardening activities – this blog is about suburban homesteading after all and gardening is just one subset of that. I’m definitely interested in a few of the article this month – worm bins and real hourly wage especially. So sit back, enjoy a cup of coffee and join us on our suburban homesteading journey in June.

Like what we’re doing here? How about letting us know in the comments or on Facebook?

June Preview - Project TWH


Teamwork On The Suburban Homestead

When you hear the word homesteading, even suburban homesteading, I’m sure one of the your first thoughts is of complete self-sufficiency. You dream of being able to completely provide for your family in all aspects of life, right? Unfortunately, that’s just not realistic. You can’t do everything yourself, whether you’re on 40-acres or a little quarter acre suburban homestead.

You’ll need to rely on teamwork to get it all done.

Teamwork On Different Levels

Anna Hess tells a great story in her book The Weekend Homesteader about how a lack of teamwork nearly wrecked her farm. She tried to do it all herself and found out the hard way that she couldn’t. In the end, she found that teamwork not only helped her get farm up and running, but it also introduced her to her husband.

I’m not going to guarantee that teamwork around your suburban homestead is going to find you a spouse, but it will allow you to grow your network and skill set, as well as take some of the burden off your hands.

After Anna tells her little story about how teamwork, she goes on to describe the different kind of skills and traits that teamwork can help build within your community. Some of the more important ones to suburban homesteading are described below:

Strength and Stamina

I have no intention of starting a battle of the sexes here, but we can all admit that men and women have far different levels (and types) of strength. Personal experience has shown that men tend to be stronger in the upper body and women have more stamina for tasks like shovelling. Having a group of people with different levels of strength and stamina, regardless of gender, is always good to have when doing work around the suburban homestead.

Patience

I know this particular trait is something that I am short on. Having a wife who is patient and able to handle situations where either we’re having difficulty getting a task done or we have a repetitive task certainly helps.

Record-Keeping

We keep records of just about everything on our little suburban homestead – what plants were planted where, how much of each crop we harvested, where we bought certain supplies and how much they cost, etc. Having someone with meticulous attention to detail is a great addition to the teamwork aspect of suburban homesteading.

Building Skills

You’re invariably going to build something on your suburban homestead. There’s not way around it – whether it’s a new shed, raised bed, chicken tractor, or water collection system. Having someone on your team who can think in this manner is extremely helpful.

Teamwork On the Suburban Steader Homestead

As I’ve mentioned in the past, we have a little quarter acre lot on Long Island, NY. It’s nothing special and, from the outside, doesn’t look much different than your typical suburban plot. But, we do live a little differently and need to rely on teamwork to get it all done. Here’s how we do it:

Immediate Family

My wife and twin girls are the main support system on our homestead. I wouldn’t get half the work done without their teamwork. My wife is great at harvesting veggies and ‘master planning’ how we lay things out on our land so they are both functional and aesthetically pleasing. That’s not to mention her amazing skills in the kitchen!

My twin five-year-old daughters are an awesome help as well. They help me plant, harvest and compost. They love seeing the worms in the compost pile! As time goes on, they’ll acquire more skills and more responsibilities. For now, they’re learning more than they’re doing…and that’s part of the teamwork aspect as well.

My role is multifaceted. I’m kind of the manager of the homestead (don’t tell my wife I said that!). I manage when we’re going to plant and how to harvest. I’m also responsible for a lot of high-intensity physical labor aspects such as rotating the compost, building/fixing items around the homestead and most of the heavy duty yard work.

In addition to the immediate family, we harness the knowledge of extended family members when needed.  Two that come to mind are my father and brother.  My father is a plumber with a great mind for construction.  He has helped me do a ton of work on the house and in the yard.  My brother has a degree in plant and soil science and is my first call when I run into issue in both the garden and the yard.

It’s a wonderful blend between the four of us and our extended family.  The work is hard and, usually, we have fun doing it all.

Outside Resources

We have a lot of outside resources to help us with the homestead, some of whom don’t even know they’re part of our team. They include:

Security

I’ve hooked up with a great group of guys who I go to the range with on a fairly regular basis. While we always have a good time, we also spend a good amount of time working on our skills from a home defense perspective. The teamwork aspect of training – and making it fun – keeps me coming back for more.

Knowledge Base

I spend a good amount of time communicating with people online at places like The Survival Podcast Forums, When SHTF Forums, PermaEthos Forums and a private Facebook group for Preparedness & Homesteading bloggers. The people I meet in these places provide a great wealth of information for all aspects of suburban homesteading. Terrific teamwork mentality!

The Backyard PioneerLocal Support

I also have a good local support system in addition to all my ‘virtual friends.’ Most notable out of these folks is Mike over at The Backyard Pioneer. We regularly meet-up to discuss projects, bounce ideas off each other and discuss the challenges we are each facing. Sometimes just having an external sounding board and hearing that they’re facing similar challenges is enough to keep you going. In addition to our semi-regular meetings, Mike and I also lend a hand to each other whenever we can. And, being that we have families roughly the same age, we’re trying to get together more as a large group. I’m sure it’ll be good for our kids to hang out…and our wives can commiserate about their crazy husbands!

Wrap Up

Teamwork is a key part to the suburban homesteading lifestyle. As much as you’d like to think you can, you cannot do it all yourself. You need some help and the sooner you start working on building your team, the happier you’ll be. Remember that, as a suburban homesteader, you’re even more exposed to the community lifestyle. Why not try to build on that exposure and develop a group around you that can help you achieve your goals?

Please let us know any teamwork-related tips or question you have in the comments or on our Facebook Page.

Teamwork On The Suburban Homestead

photo credit: USDAgov via Compfight cc

Teamwork On The Suburban Homestead


Nutrition For The Suburban Homesteader

I know what you’re thinking. Nutrition? This is a blog about suburban homesteading! What does nutrition have to do with that?

The short answer is: a lot!

Think about it this way: you are the engine that gets work done around your suburban homestead and the food you eat is your fuel. Remember how the gas station has different grades of fuel for your vehicle? Well, that’s essentially what nutrition is for you – it is a quality scale of your fuel and it helps determine well you will perform.

What Does The Suburban Steader Know About Nutrition?

I have something to admit to you – I was a bit of a meathead in my past life. I spent a lot of time lifting weights and building my strength up in an attempt to get into powerlifting. I learned a lot about nutrition as a part of this endeavor. Admittedly, I was concentrating on how to build muscle mass but the knowledge base I acquired serves me well to talk about nutrition as it pertains to any goal.

What Should You Eat?

I could spend hours and hours writing on this topic given my experience. Heck, I could write an entire blog on this topic alone – but I’m going to concentrate on the basics for this post. And the first thing I’ll do is let you in on the secret of nutrition:

Keep It Simple!

Yep, that old KISS rule works perfectly when it comes to good nutrition.

Nutrition, from the athletic point of view, is very specific. Athletes who participate in sports which require large muscle mass – bodybuilders, wrestlers, powerlifters, football players, et – require a large protein intake. They concentrate on lean meats which provide the nutrients needed to build muscle. Conversely, endurance athletes such as marathoners, bicyclists, triathletes and the like concentrate more on diets that provide more extended energy levels. These diets typically involve larger amounts of slow burning carbohydrates.

I’m not an athlete, what do I eat?

OK, I know I’ve been dodging the question about how to eat well for good nutrition. The answer is this – eat natural.

Huh? What does that mean?

It means that the closer your food is to natural, the better the nutritional value. If you look at the ingredients on the box of whatever you are thinking about eating and it sounds more like a science experiment than dinner, I’d suggest putting it down and moving on. Fresh fruits and vegetables are great. Meat that hasn’t been pumped full of hormones, antibiotics and other crap is preferred.

Two things I want to point out:

  1. Yes, this approach is very similar to a Paleo diet. While I’m not a complete follower of the Paleo approach (I have no problem with dairy and non-GMO grains in moderation), I believe that the general concept is a solid way to approach good nutrition.
  2. Yes, this approach can be more expensive. Eating fresh (non-GMO) vegetables and fruit as well as grass-fed, free range meat is more expensive than the basics you find at the supermarket. I’ve heard this added cost referred to as a ‘six pack tax’ and, while your goal might not be to get into swimsuit model shape, I think it’s a good way to think about this added expense.

4 Quick Steps To Better Nutrition

Still not sure how to get started with improving your nutrition? Here’s four basic steps to get you started:

  1. Journal Your Food: I recommend you track everything you eat for at least a week. Keep track of what you eat/drink, how much of it you ate/drank and how it made you feel. Don’t try to game the system by eating healthier – the temptation will be there – because it won’t help you improve.
  2. Change One Item: While you keep logging your food, make one change and see how it affects you. For instance, if you have a beer or glass of wine every night, maybe you could cut that out and only have one on the weekend nights. Or, if you find that you’re eating only red meat and poultry, try throwing fish in one or two nights a week. Continue logging your intake and documenting how the foods make you feel. Pay special attention to how the new changes make you feel versus the old habits.
  3. Find A New Place To Shop: You don’t have to completely change your shopping habits. Simply tweak it a little. Is there a farmers market you’ve been meaning to hit up? Give it a shot! Maybe you can get some of your veggies or eggs there. Increasing the value of some of your purchased goods will help increase your nutrition.
  4. Repeat Step 2 As Necessary: Once your first change becomes habit, go back and make another change. As you work through this change, keep track of how you feel. If you feel better, it’s something you should work into habit. Keep using this approach and you’ll find that your entire nutrition routine is changed for the better in short order. The best part of this approach is that it’s much easier to stick to than changing everything all at once.

Additional Nutrition Resources

Here’s a few places you may want to explore for more information on nutrition:

  • RobbWolf.com: Robb Wolf is a former research biochemist and one of the world’s leading experts in Paleolithic nutrition. His website is considered the go-to site when researching Paleolithic eating and nutrition.
  • FitDay.com: FitDay.com provides a free online food tracking journal that I have successfully used to track and modify my daily nutrtional intake.
  • Harvard School of Public Health – Healthy Plate: The Harvard School of Public Health has published an alternative food plate (compared to the USDA) which they argue “is based exclusively on the best available science and was not subjected to political and commercial pressures from food industry lobbyists.”
  • Weston A. Price Foundation: Dr. Weston A. Price was a dentist who went on a search for the cause of dental decay and physical degeneration. During that search, he found a nutritious way of living that is very similar to a Paleo approach. While they differ in approaches, they are very much alike and a lot of information can be ‘co-mingled’ to create a very basic, but very nutritious lifestyle.

Wrap Up

This topic can leave you with your head spinning or it can inspire you to learn more. I hope it’s the latter.  I know you are not a nutrition expert by any means, but I hope that this post has helped you move along in your search for better nutrition.

Remember that, as a suburban homesteader, food is your fuel and nutrition is a way of describing the quality of that fuel. Also, remember that nutrition is an ongoing education – I’ve been involved in this world for the last fifteen years and am still learning every day!

Please let us know any nutrition tips or question you have in the comments or on our Facebook Page.

photo credit: BobPetUK via photopin cc

Nutrition For The Suburban Homesteader


Plant Your Summer Garden

If you’ve been following Project TWH, you’ve learned how to find room to homestead, performed a suburban homestead site survey, planned your summer garden and maybe even used the kill mulch technique to get your garden area ready. Now it’s time to really get your suburban homestead moving in the right direction – we’re going to plant your summer garden!

If you refer back to The Weekend Homesteader, you’ll see that planting your summer garden has four main components to it:

  • Knowing When To Plant
  • Succession Planting
  • Knowing How To Plant
  • Garden Maintenance

When To Plan Your Summer Garden

Determining when to plant your summer garden is probably one of the most frustrating parts of starting a suburban homestead garden. Plant too early and your crop is prone to late freezes that could kill it off early. Plant too late and your crop might bolt right to seed and have a horribly small yield.

What’s a gardener to do?

If you remember the 5 Tips To Start Your Garden that I provided a while back, you’ll remember that the first tip was to know your zone.

Your hardiness zone is a good indication of when last freeze and first freeze occur in your area and it also will have information about when to plant different species relative to these dates.

You can find more information on your hardiness zone by clicking here: USDA Hardiness Zone Map.

Hardiness Zone - Plant Your Summer Garden

Back in the article on Planning Your Summer Garden, I gave you five or six different vegetables that I considered ‘easy’ to grow. In general, the swiss chard can be started about a month before last frost and the rest can be planted after the frost-free date. Mint can be planted just about any time of the year.  You should consult with your seed providers and local nurseries for tips specific to your area.

Succession Planting

What’s worse than having a small harvest? How about a HUGE harvest that all happens at the same time? What are you ever going to do with ALL of these vegetables when they show up at the same time?

By staggering your planting, you will pretty much guarantee that not all your crops show up at the same time. How you use this method is up to you. Personally, I try to stagger plantings every week or so. That means that when the crop in one area is harvested, I’ll have some more coming up in another area a week later and a week after that in another area.

You can also use this approach to work with your schedule. Are you a teacher with the summer off? Plant so that there’s no harvest until mid-June. Or, if you plan to be on vacation mid-August, plan out your plantings so that nothing will be ready for harvest then.

How To Plant Your Summer Garden

You just dig a hole and throw the seeds or seedlings in. Right? Well, it’s not quite that simple, but it’s not terribly difficult either.

Here’s the really simple approach I recommend:

  1. Rake back the mulch
  2. Depress the soil as required
  3. Place seeds in ground
  4. Fill hole, tamp in place

It’s really not that hard. All you really need to remember is that the seeds you’re using need access to soil and water so making sure they are planted deep enough (but not too deep) is important.

If you’re using the Square Foot Gardening approach, I recommend building the garden stamp shown in the following video. Super easy to make and VERY useful:

[youtube_sc url=”yOZNRvlECic”]


If you’re using seedlings (or sets as others call them), I recommend planting them so that the first set of leaves is right above the soil. This approach gives the best chance for roots to grow and will also give your stems the most stability as they grow.  You might want to consider some fertilizer when you plant your seedling as well.  The application of fertilizer during planting will typically destress the situation for the young plants and give them the nutrients they need to begin growing in their new surroundings.

Summer Garden Maintenance

Again, this step isn’t rocket science. If you take the time to mulch, it will definitely help. You’ll spend much less time weeding and the water you apply to your summer garden will be retained much better.

Basically, you need to do three things to keep a garden in good order:

  1. Weed
  2. Water
  3. Harvest

You don’t have to worry about harvesting (with the exception of beans lettuce) for a while and the other two steps are relatively straight forward. It’s really hard to screw up a garden once it’s set, so take it easy and have fun.

Wrap Up

There you have it, how to plant your summer garden. It’s not terribly difficult and really is one of those things that you learn to do by doing it. So, please, go out and get your hands dirty this weekend! You’ll enjoy it!

Please let us know any tips you have for planting your summer garden in the comments or on our Facebook Page.

photo credit: Distant Hill Gardens via photopin cc

Plant Your Summer Garden